Workflows (Enterprise Only)
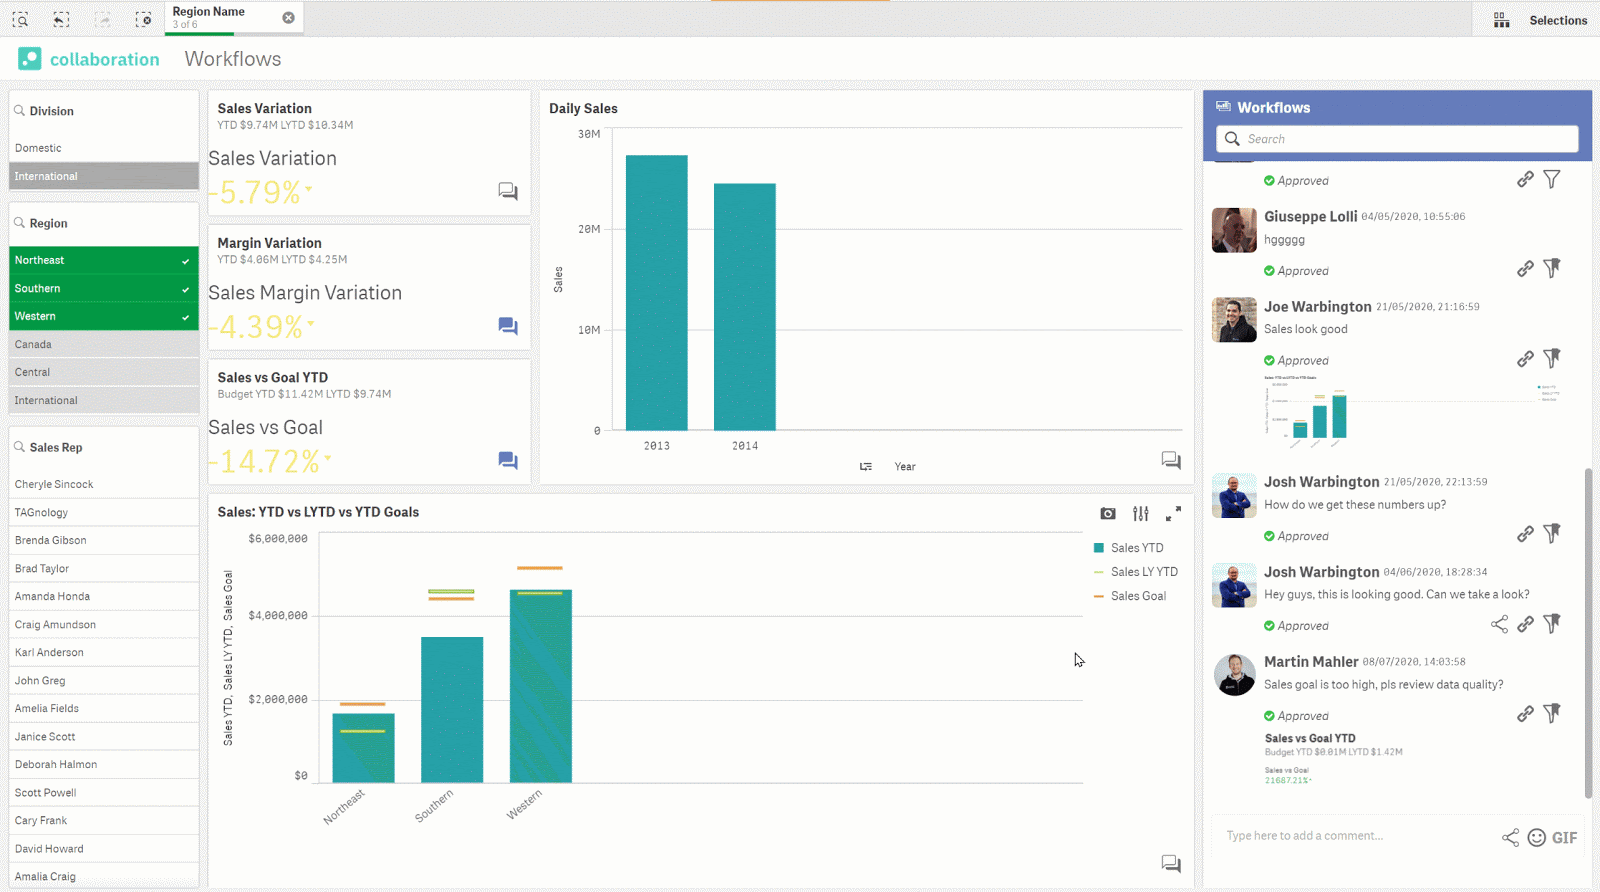
Workflows are available to Enterprise users who have installed Vizlib Server and Vizlib Collaboration V1.3.0 and above (Figure 1). Workflows are designed to move through a list of states to track the progress of a thread or comment. You can manage workflow settings and permissions using the Workflows page in the Vizlib Management Console (VMC). There are also user types which have roles set within the VMC (e.g. to hide or display comments for certain users depending on the workflow state).
Figure 1: Teamwork Workflows
This topic contains the following sections:
- Adding Workflows and States
- User Roles
- Users Page
- User Permissions
- Adding Workflows in Teamwork Streams
- Using Workflows in Teamwork
Adding Workflows and States
To configure Workflows, select Teamwork Settings >Workflows to open the homepage which holds your workflow configuration data.
Figure 2: Workflows Homepage
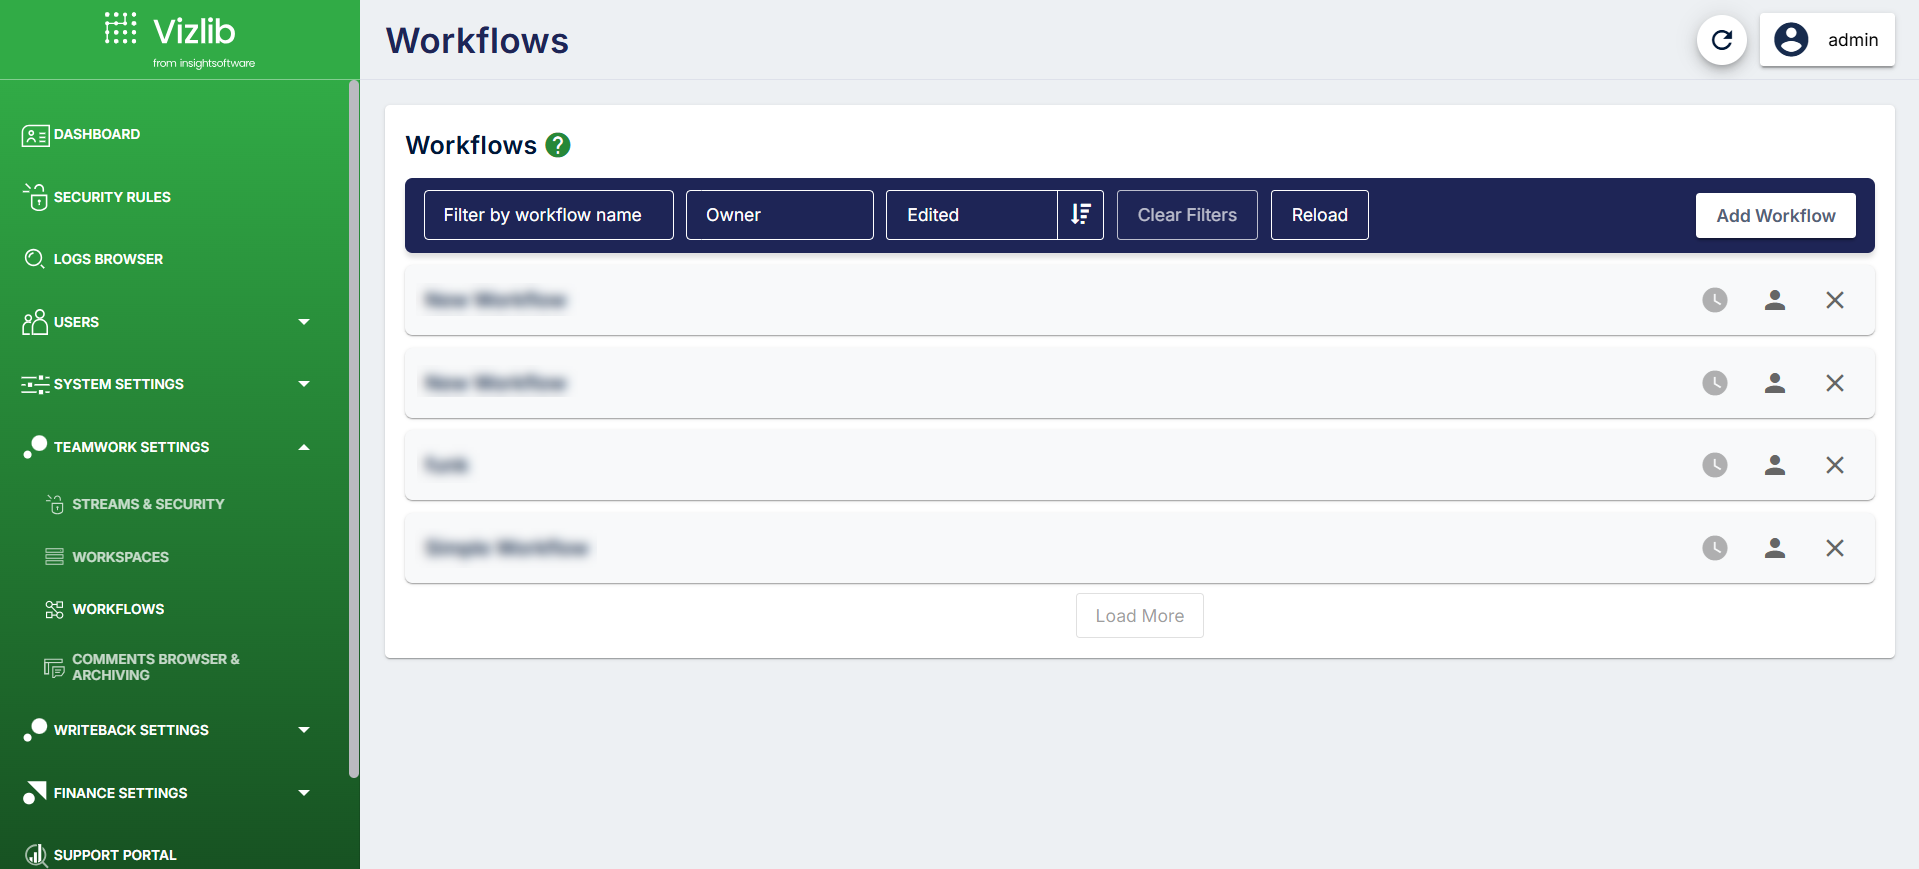
Configuration settings for each workflow can be edited from the workflow panel. You can find more information on each setting is in Table 1.
Table 1: Workflow Configuration Settings
| Setting | Description |
|---|---|
|
State |
The label name used by the workflow state in Teamwork. |
|
Color |
The color used by the workflow state icon. Change the color by clicking on the square to open the palette. |
|
Icon |
The icon used to identify the workflow state. Change the icon by clicking on it and choosing from the icon list. |
|
Default |
The initial workflow state for any new comments added to a stream. |
|
Visibility |
The level of visibility for comments assigned to the workflow state. The Limited setting restricts visibility to the author and users with the Approver role. |
- To edit a workflow, click Add State to open the settings screen.
- Select the Color, Icon, Default and Visibility settings you need.
- Click Edit Workflow to save your settings.
-
You can remove a workflow state by clicking the
 button on the far right.
 Figure 3: Workflow Functionality
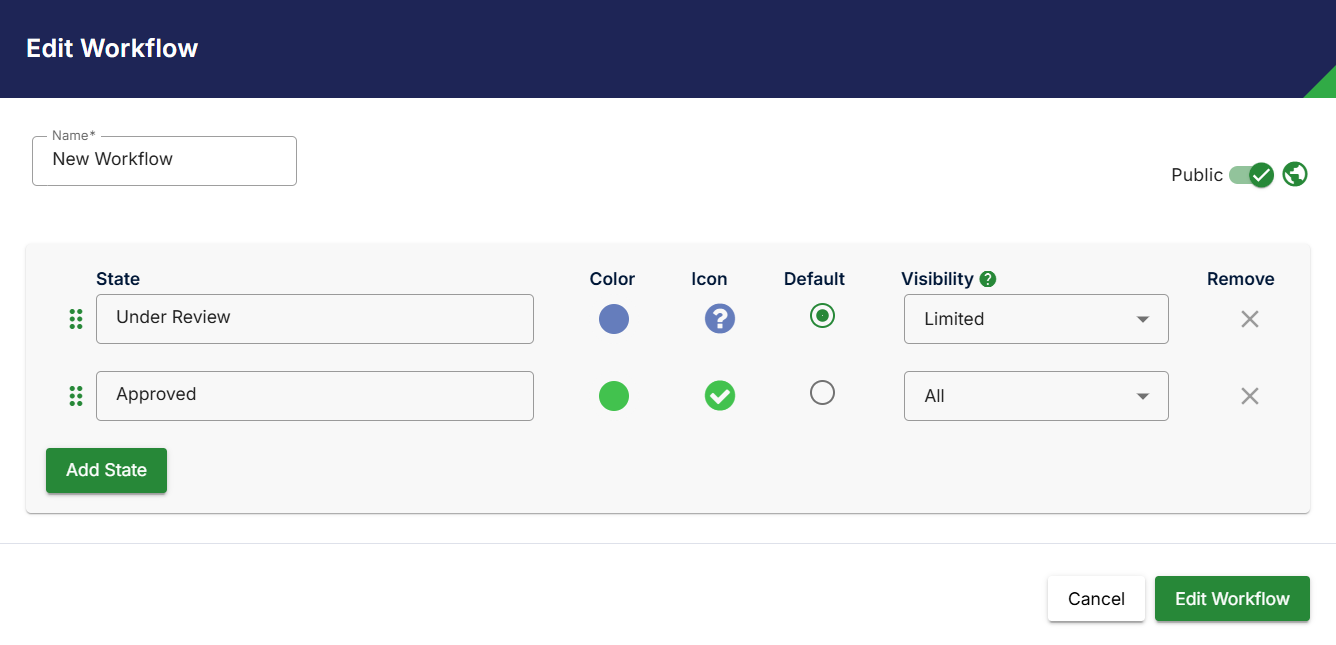
- To add a new workflow, click Add Workflow to open the settings screen.
- Enter the workflow settings for each state, selecting the Color, Icon, Default and Visibility.
- Click Add Workflow to save your changes.
- You can remove a workflow by clicking the icon on the far right.
User Roles
Clicking the User Roles button in the VMC side Panel will open a window containing user information for your Qlik Sense environment.
Figure 4: User Roles
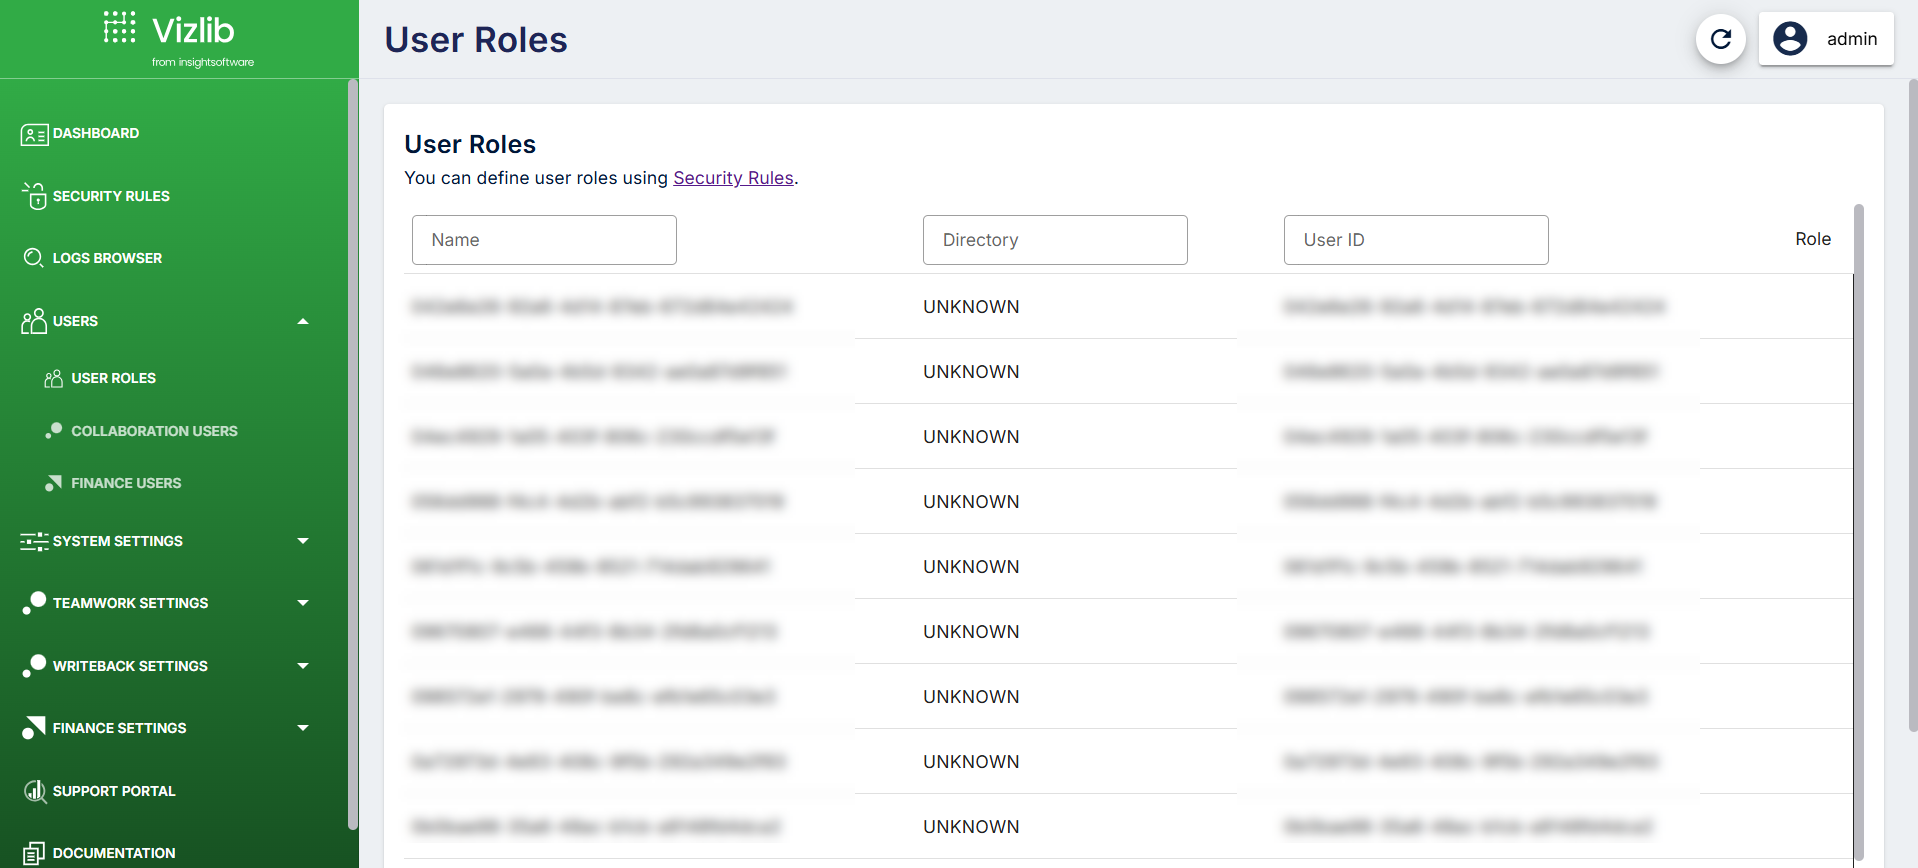
The window displays four fields for each user:
- Name - the user name.
- Directory - the user directory.
- User ID - the user ID.
- User - User type (User or Approver). You can filter on user type by using the drop-down.
Note: Only Approver users can change the workflow state for a comment.
Users Page
You can make changes to user accounts in the Users > Collaboration Users page.
- If you enable Override User Names from Qlik Sense, you can define the user name displayed in Vizlib Teamwork.
- Deactivate a selected user account (if activated) by clicking Deactivate Selected.
- Activate a selected user account (if deactivated) or Activate Selected buttons.
- Clicking on Add User will open a window to add new user information. The Id and Directory fields are required to add a user account. You can find more information about the fields for adding a user in Table 2.
- Once you’ve added the user data, click Add User to save your changes.
Figure 5: Add User
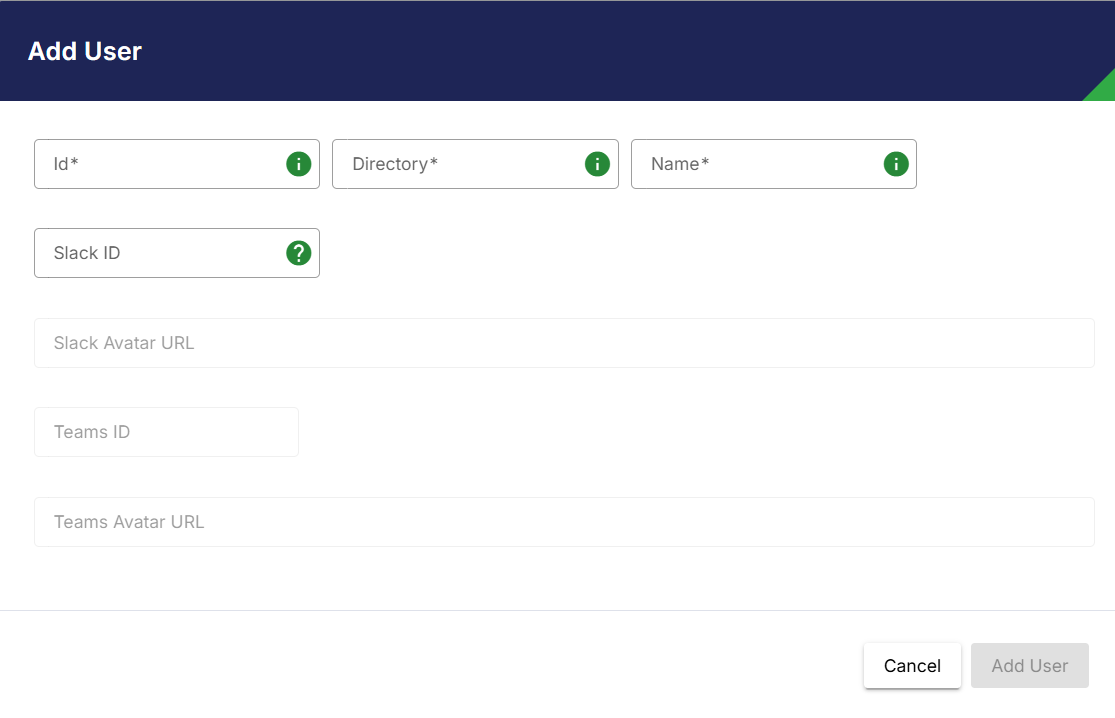
Table 2: Add User Fields
| Field | Description |
|---|---|
|
Id |
Qlik Sense user ID (required). |
|
Directory |
Qlik Sense directory assigned to the ID (required). |
|
Name |
User display name if over-ride is selected. |
|
Slack ID |
the Slack ID allocated to the user. |
|
Slack Avatar URL |
the link to the user’s Slack image file. |
|
Teams ID |
the Microsoft Teams ID allocated to the user. |
|
Teams Avatar URL |
the link to the user’s Teams image file. |
User Permissions
Note: User Permissions for Workflows are managed by setting Security Rules. You can read more about security rules in our article here.
Click on Security Rules in the VMC to display the list of existing security rules.
- Click Add Rule to open the Create Security Rule dialog.
- Add a Description, and make sure the rule is Active.
- Select a Resource Type (Workflow).
- Select a Resource ID (Simple Workflow).
- Select an Access Level (Approver).
- Select an Attribute Type (userID).
- Select an Operator (Equal).
- Select a Value (type in the userID or select from the list).
- Click on Create Security Rule to finish.
There are additional functions in the dialog, which may be needed once the rule is created.
- Clicking Add Condition opens a line for adding a new condition (e.g. a new user).
- Clicking Actions
 displays options about creating or moving a group of conditions.
 - Clicking Remove
 deletes the condition.
Once the rule is created it will be displayed in the list.
If you re-open the User Roles screen (Figure 5) you’ll see the user permission has been updated.
Adding Workflows in Teamwork Streams
You’ll need to configure a workflow for a Teamwork stream once it’s created.
Note: Click on ![]() to display more information about the various configuration fields.
to display more information about the various configuration fields.
- Open the Teamwork section, then select the Streams and Security page.
- Click on Add Stream to add a new stream, or click a stream name to edit a stream.
- Enter the stream configuration, using the drop-downs to select a Workflow.
- Click on Add Stream to finish.
Important: Do not configure workflows for multiple streams in the same workspace.
Using Workflows in Teamwork
When a stream is configured with a workflow, comments will become visible, with the icon and state labels displayed under the comment.
Figure 6: Workflow Comments
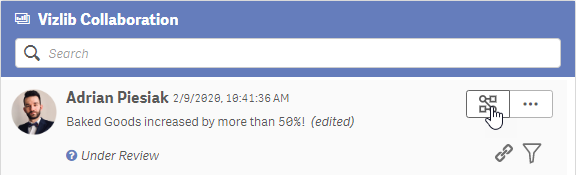
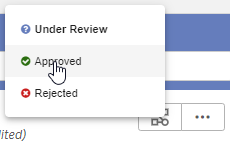
Approver users can change the workflow state of other users’ comments by hovering over the comment and selecting a state when the list appears.
Figure 7: Comment List
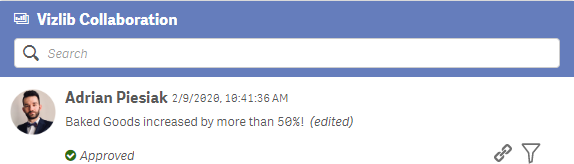
When workflow states have Visibility set to All, their comments are visible to all users in the stream.
Figure 8: Visible to All
Note: When a user edits a comment it will revert back to the Default workflow state (e.g. the default for Figure 1 would be Under Review).
Vizlib Teamwork workflows make it possible to break down and track suggestions, helping you to manage changes that come with continuous data analysis, as well as helping you control when to make new information available to your user base.