Exporting a Pivot Table from Qlik Sense
This topic contains the following sections:
Vizlib Pivot Table Exports from Qlik Sense
Role Permissions to Set the Export Type
You must have a Designer role to set the export type in Qlik Sense and Qlik SaaS. Users cannot change how their data are exported when clicking on the Export to Excel icon.
Limitations
When exporting Table data to XLS/CSV etc., the totals won't be included in the exported file. This is a Qlik limitation. Please see our article on Vizlib Table data good practice and troubleshooting for more information.
Understanding format processing performance - server or browser
Beside each export type on this page, we've included whether the export is rendered or processed on your Qlik server or in your web browser.
This is important to understand because if you select Formatted Export which is processed by your browser, then:
-
The efficiency of the export relies on your computer and browser processing speed.
-
All formatting elements (spacing, colors, font details, etc.) must be processed, which can also slow down the export performance.
-
Formatting issues may occur if the browser's export functionality doesn't support your chosen formatting.
Therefore if you’re in a rush, please use an option that exports using your Qlik Server.
Note: The Qlik Sense API / engine drives the export type, not Vizlib.
Export from Qlik Sense - Download Options
|
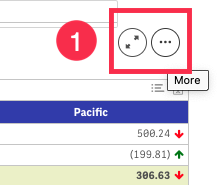
1. Right-click or move your mouse over your pivot table to view the option to view the table full screen and the context menu (...). |
Figure 1: Context menu |
|
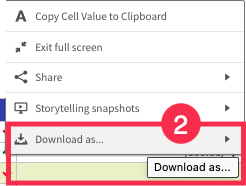
2. Click the context menu (...) to view the option to Download as…. |
Figure 2: Select 'Download as...' |
|
3. Pivot Table download types from the context menu include:
|
Figure 3: Export options |
|
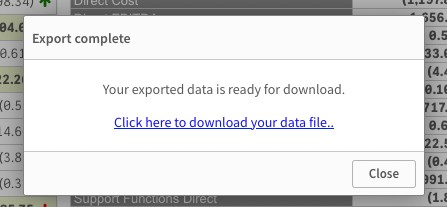
4. The message 'Your exported data is ready for download' displays. Click the link to download your file. |
Figure 4: Download your data file |
Formatted Exports - Values or Text export
The default - formatted export - treats all cell data as ‘values’ (text strings). For example, a hyperlink in your data will export as a link.
-
Values export - looks at the underlying data, including expressions.
-
Text export - displays the data.
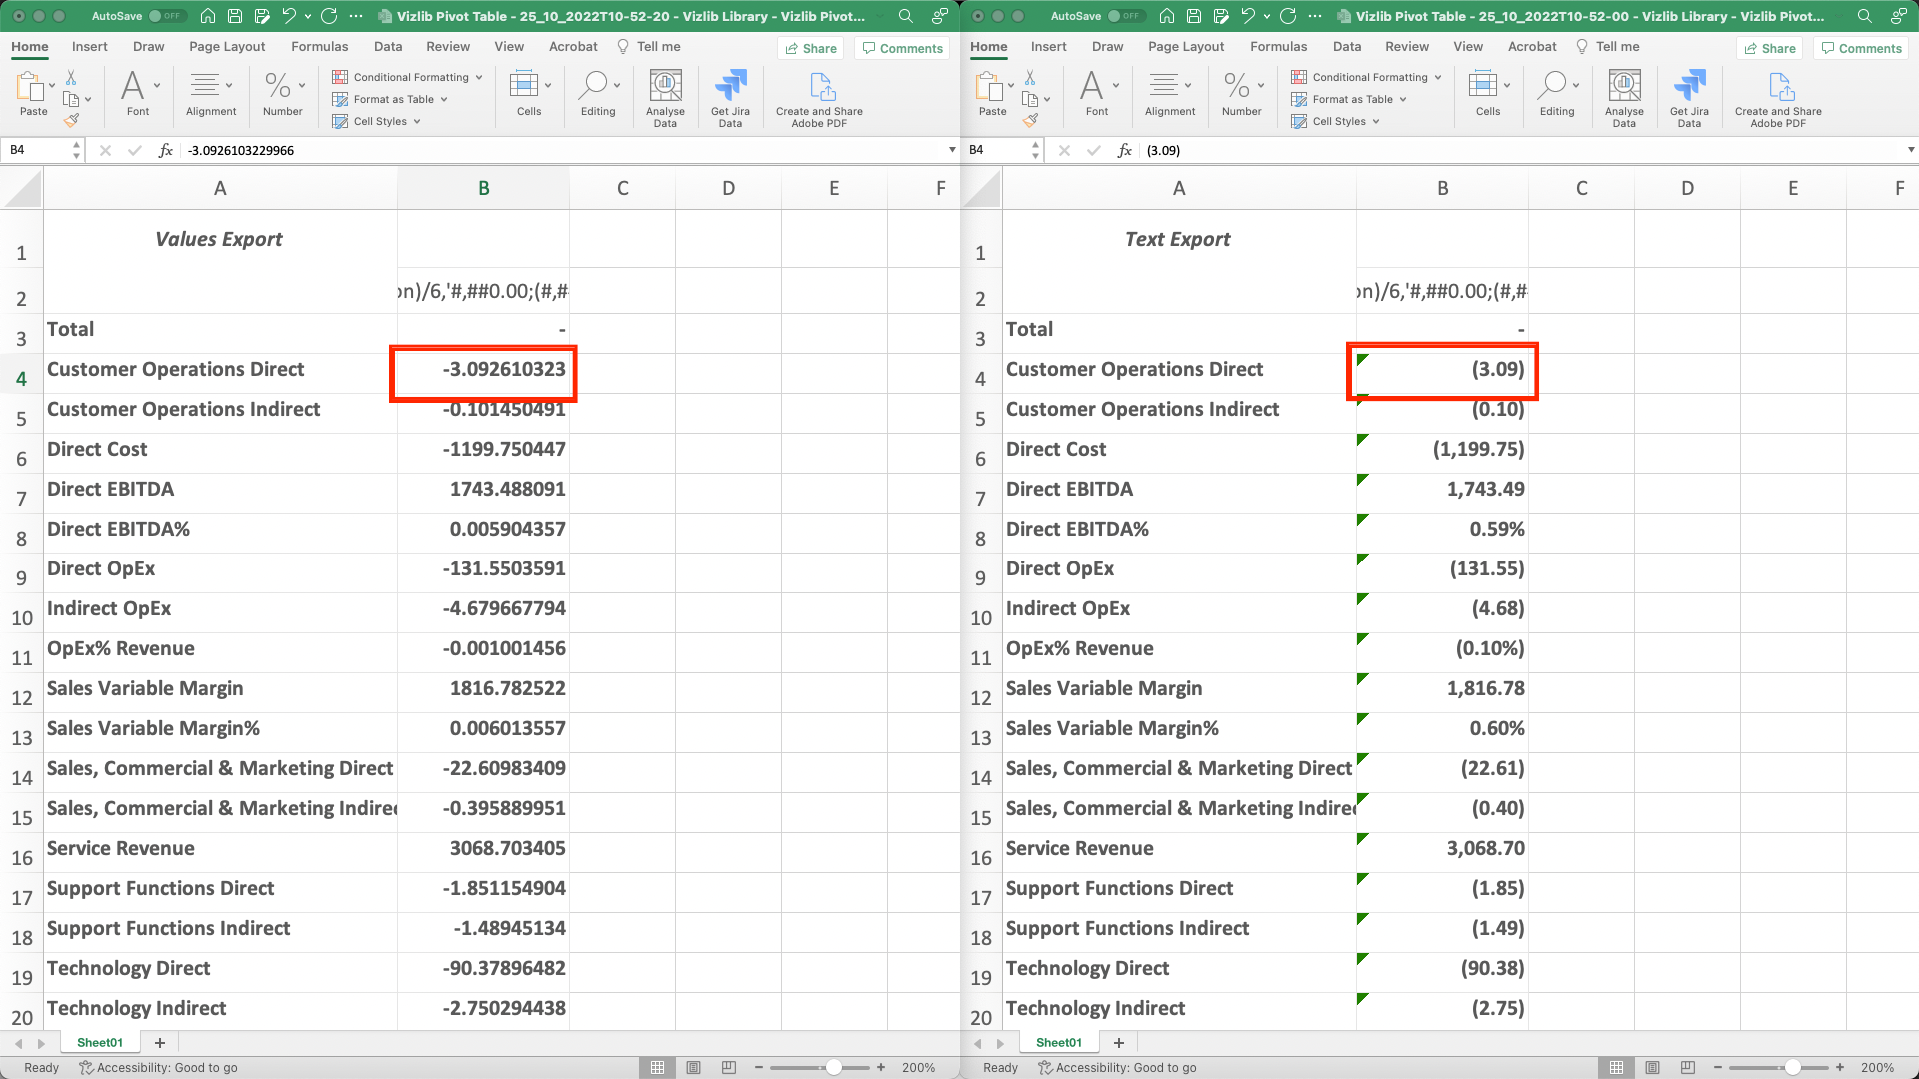
Figure 5: Values Export or Text Export Examples
Pivot Table Exports Using the Quick Export Icon
The Vizlib Pivot Table supports three fast export options by clicking the Excel icon visible on the top-right of the Pivot table.

Figure 6: Quick Export options
-
Formatted export: (Browser export) - Exports the Pivot Table with formatting applied.
-
Straight table: (Server export) - Exports your data unformatted. Downloaded as a straight table.
-
Pivot table: (Server export) - Exports an unformatted Pivot Table.
Note: Qlik Sense API / engine drives the export type, not Vizlib.
Excluding Selections and Titles
By default, the option 'Include selections & titles' is selected. This option adds the Header, Subtitle, and/or Footer data. Deselect the box if you don't want to include titles in your export.
Examples of Pivot Table Quick exports
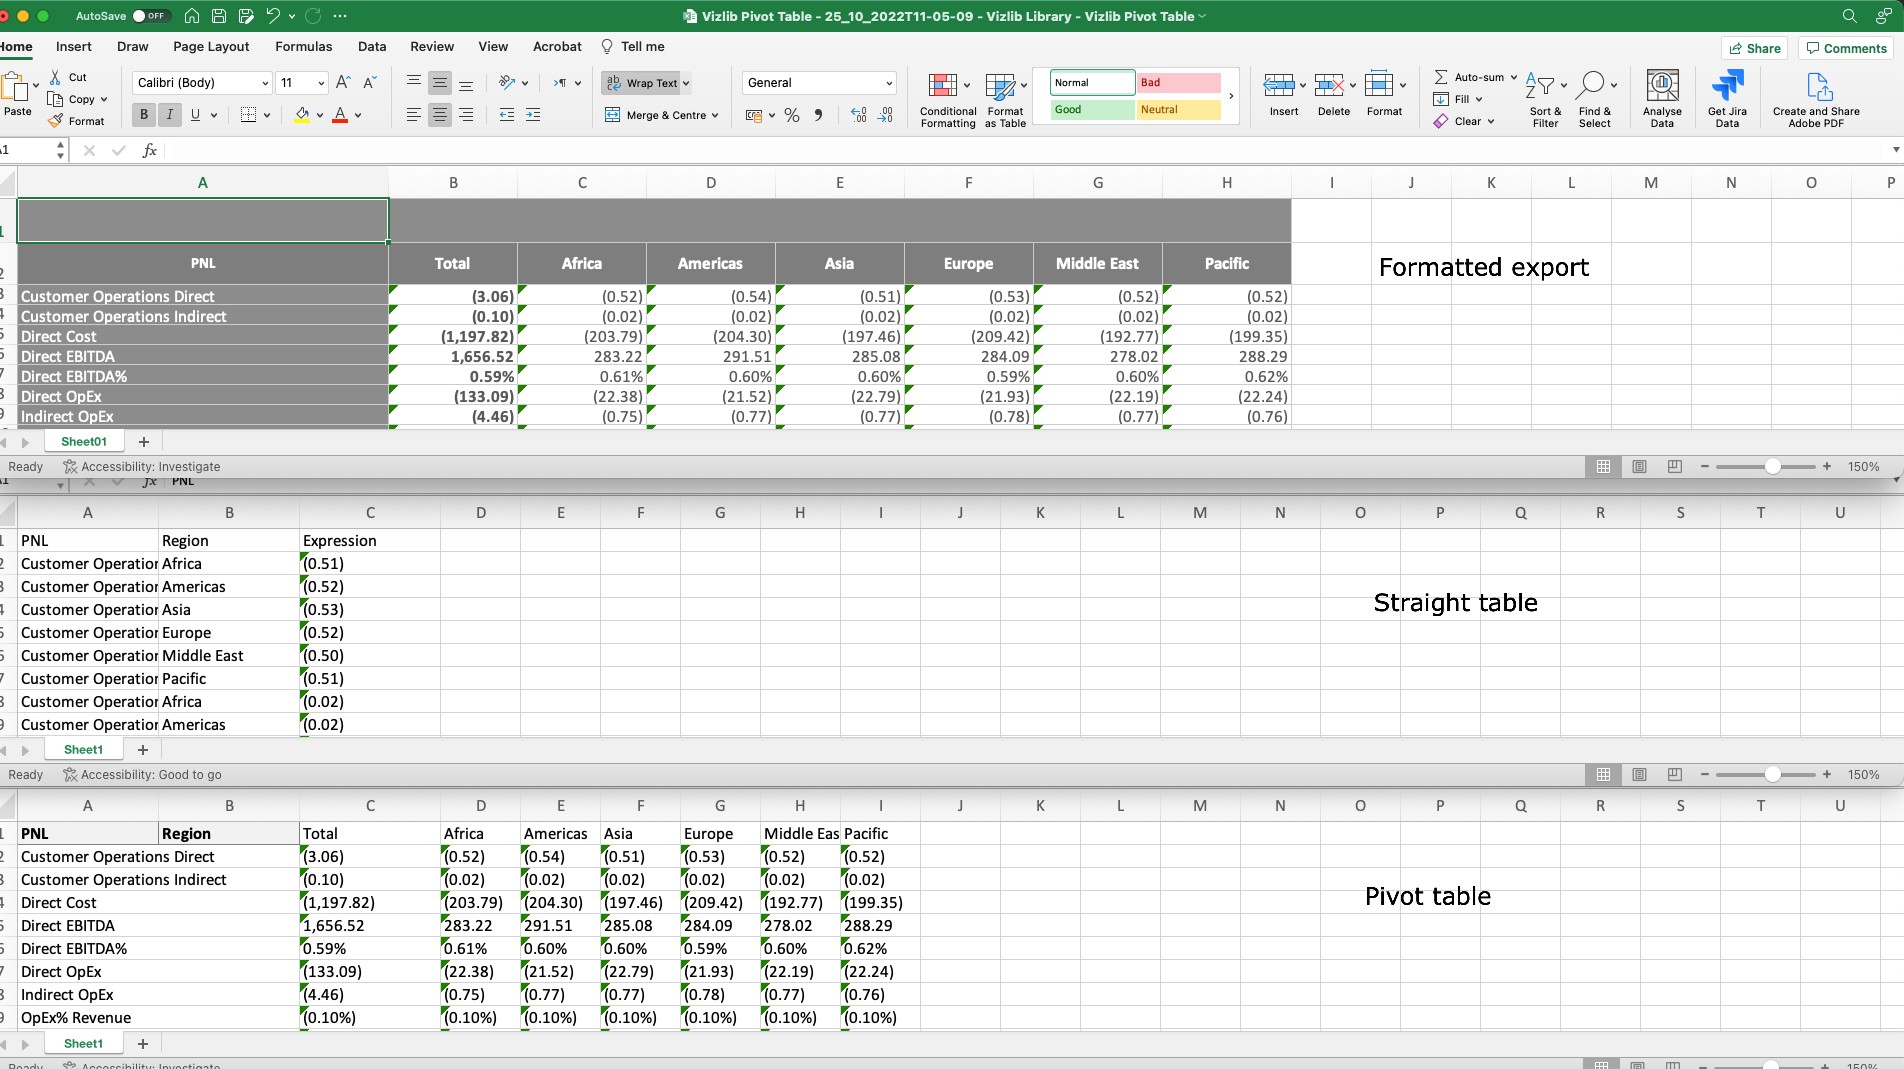
Figure 7: Example of the differences between Formatted export, Straight table, and Pivot table.
Amending Export Permissions
In the Qlik Sense Security Rules, you can amend and restrict export permissions; however, in our Vizlib extension, the Quick Export icon can only be disabled using the Interactivity section in the Property Panel.
Click on your table, and scroll down to the Interactivity section.
In the Pivot Header Actions section, move the slider to the right (the 'on' position) for the section Show Export Button Icon.
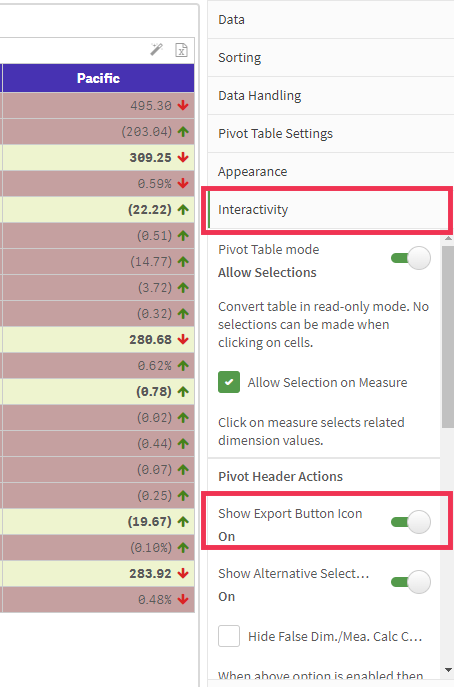
Figure 8: Show or Hide the Export button icon.
