Setup Wizard
Vizlib Pivot Table has a Setup Wizard to help you create a visualization quickly and easily.
This topic contains the following sections:
Getting Started
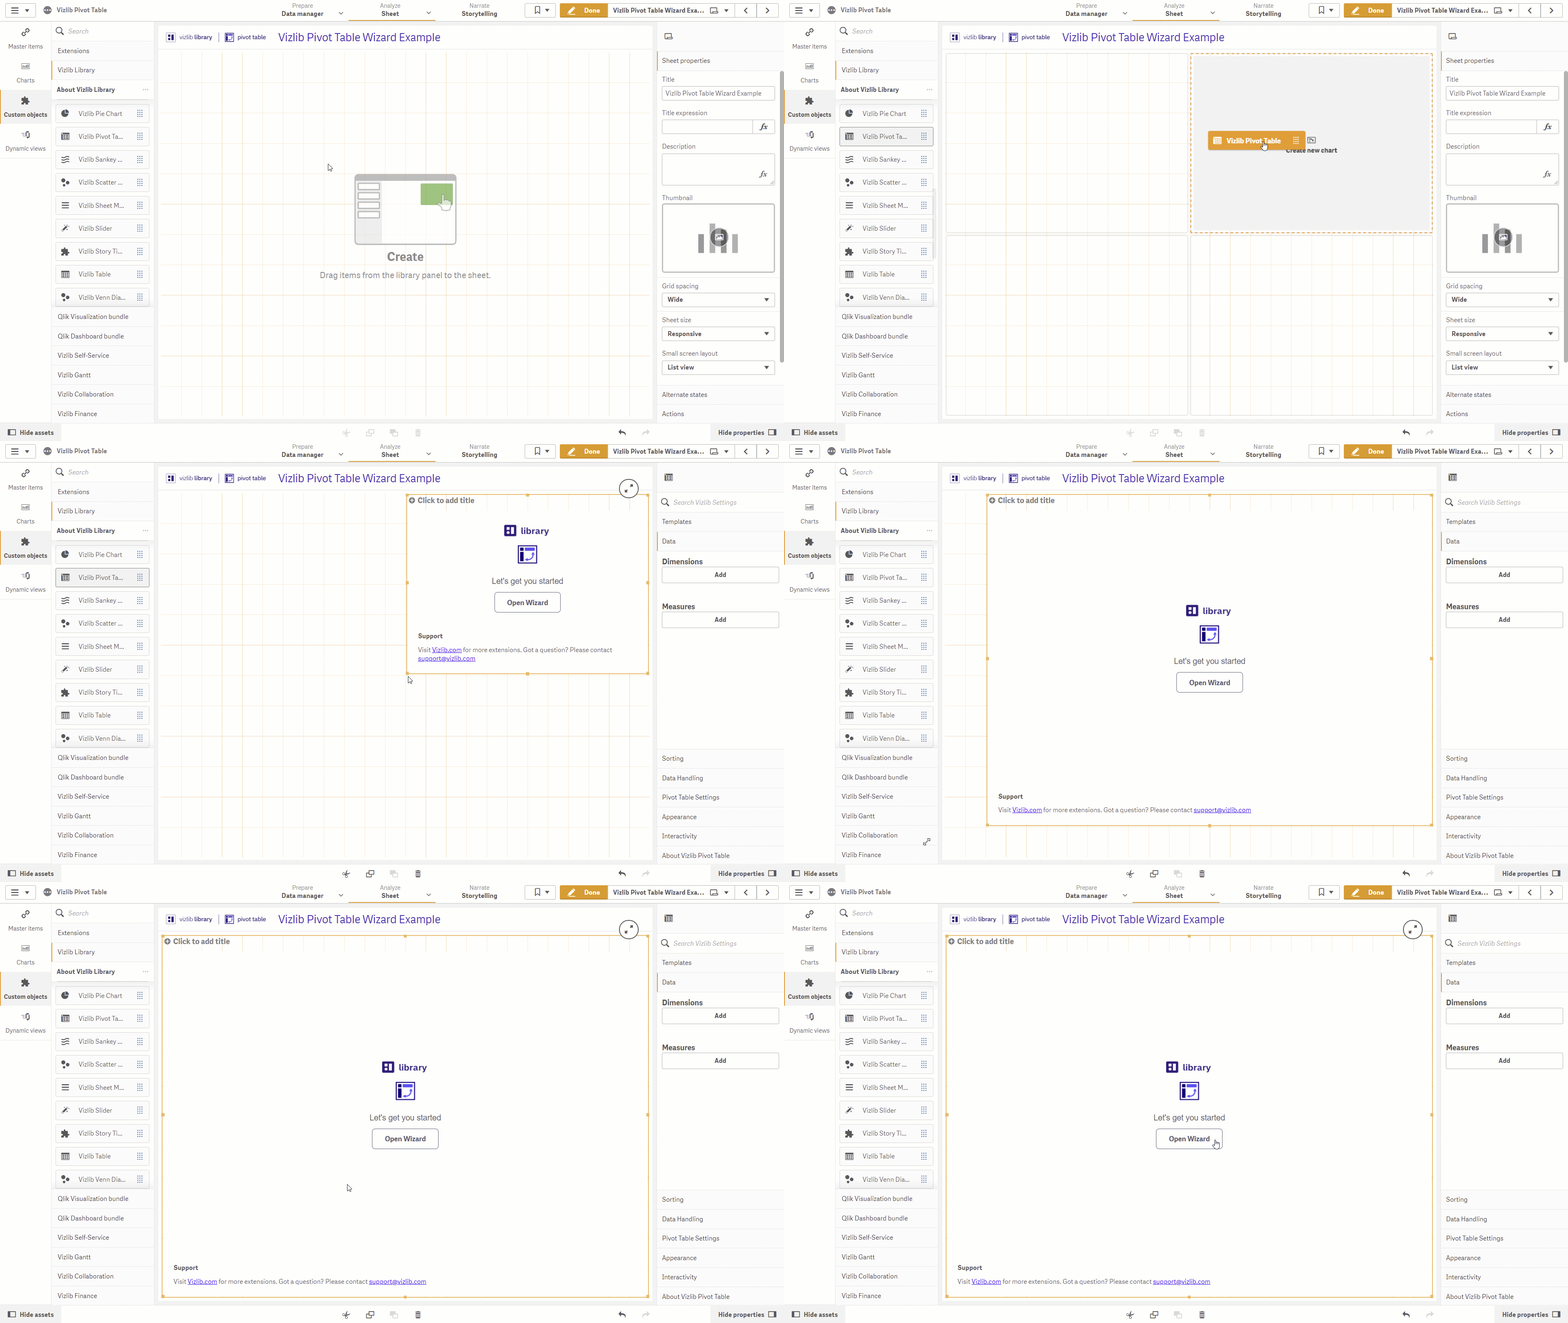
You can start using the setup wizard by adding a Vizlib Pivot Table object to a sheet from the Custom Objects menu (Figure 1).

Figure 1: Open Wizard
-
Click on Custom Objects in the far-left panel, to open the custom objects menu.
-
Select Vizlib Library, then select and hold the cursor on Vizlib Pivot Table.
-
Drag and drop the object into the sheet. If you want to re-size the object, click and drag the table edge.
-
Click Open Wizard.
Building the Pivot Table
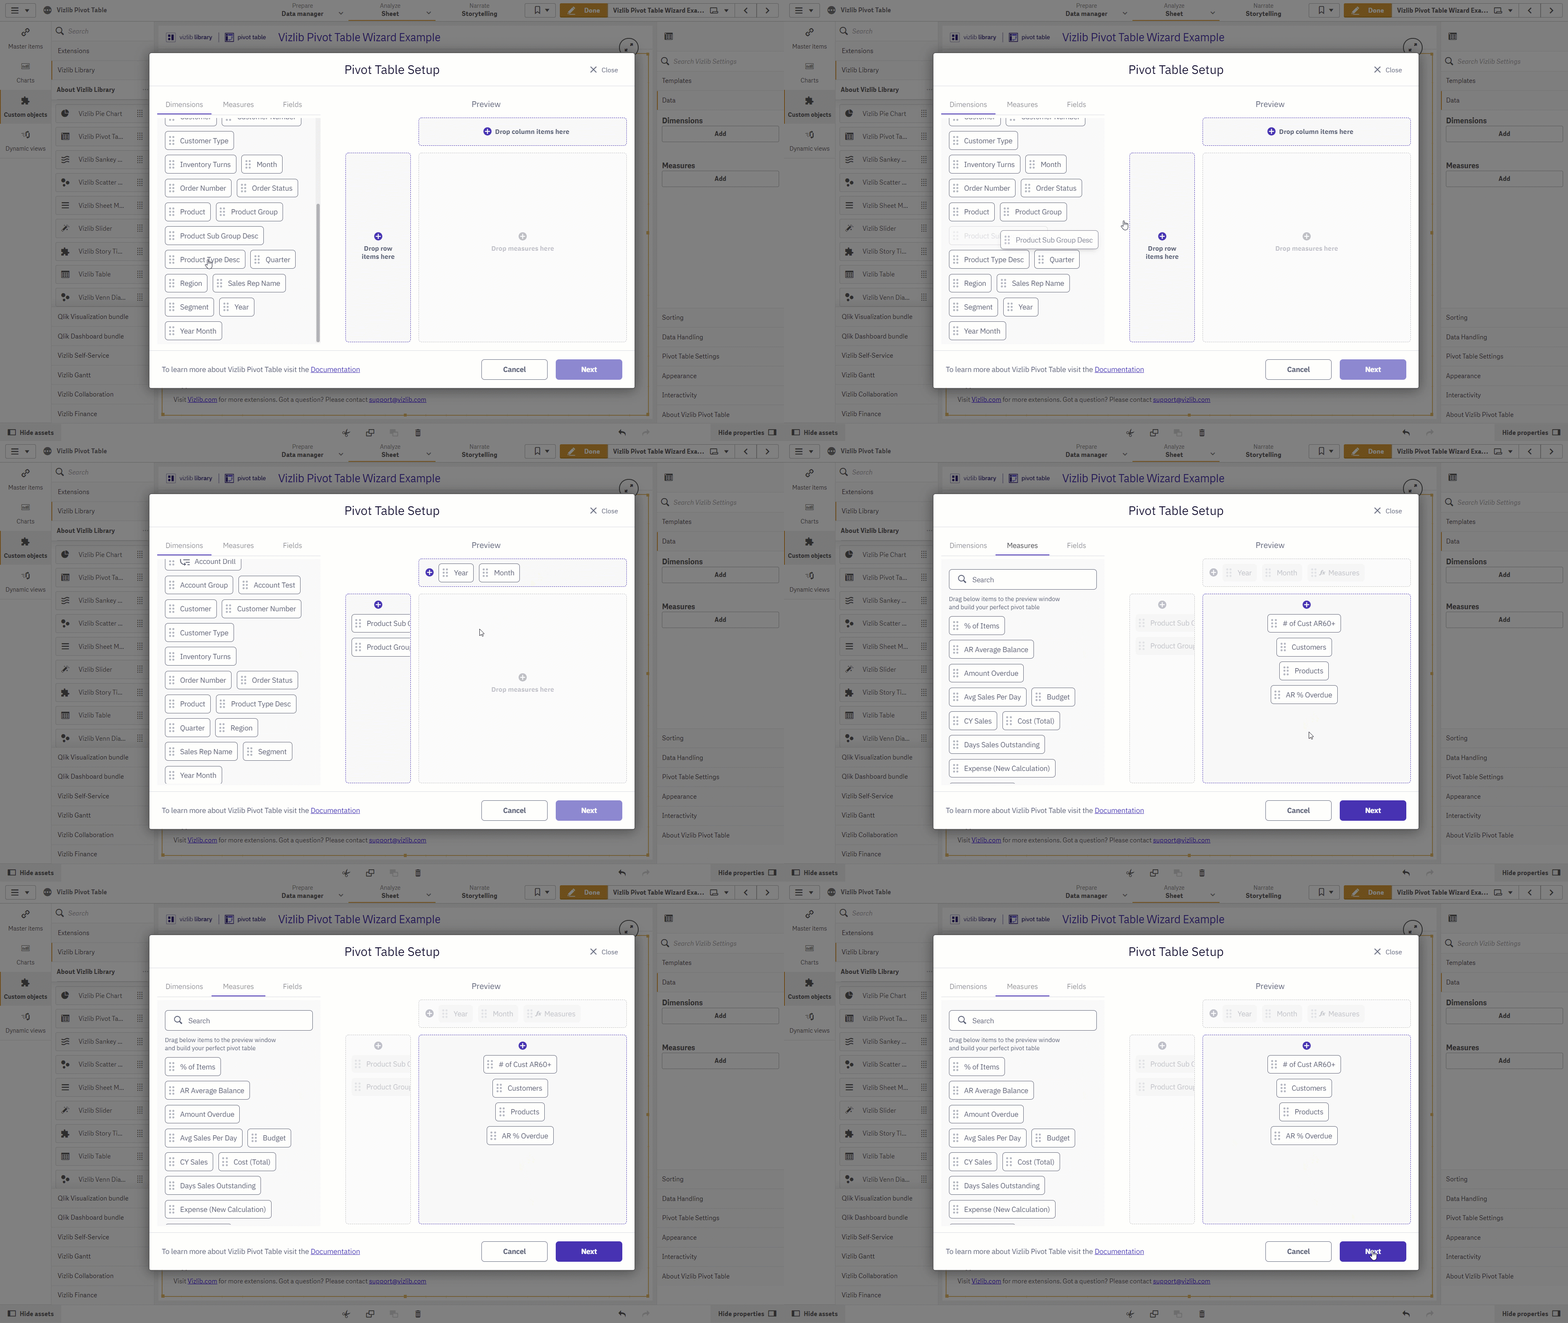
When the wizard opens, you can start building your pivot table (Figure 2).

Figure 2: Building the Pivot Table
There are three tabs on the left hand side which hold the values you can add to build the pivot table: Dimensions, Measures and Fields (the wizard opens on the dimensions tab by default). In the Preview area on the right, there are three panels for Rows, Columns, and Measures.
-
Drag and drop the Dimensions you'd like to use into the Rows and Columns panels.
-
Click the Measures tab and drag and drop the measures into the Measures panel.
-
You can also add Fields to the preview area by dragging them from the Fields tab.
-
When you've completed your selection, click Next.
Pivot Table Appearance
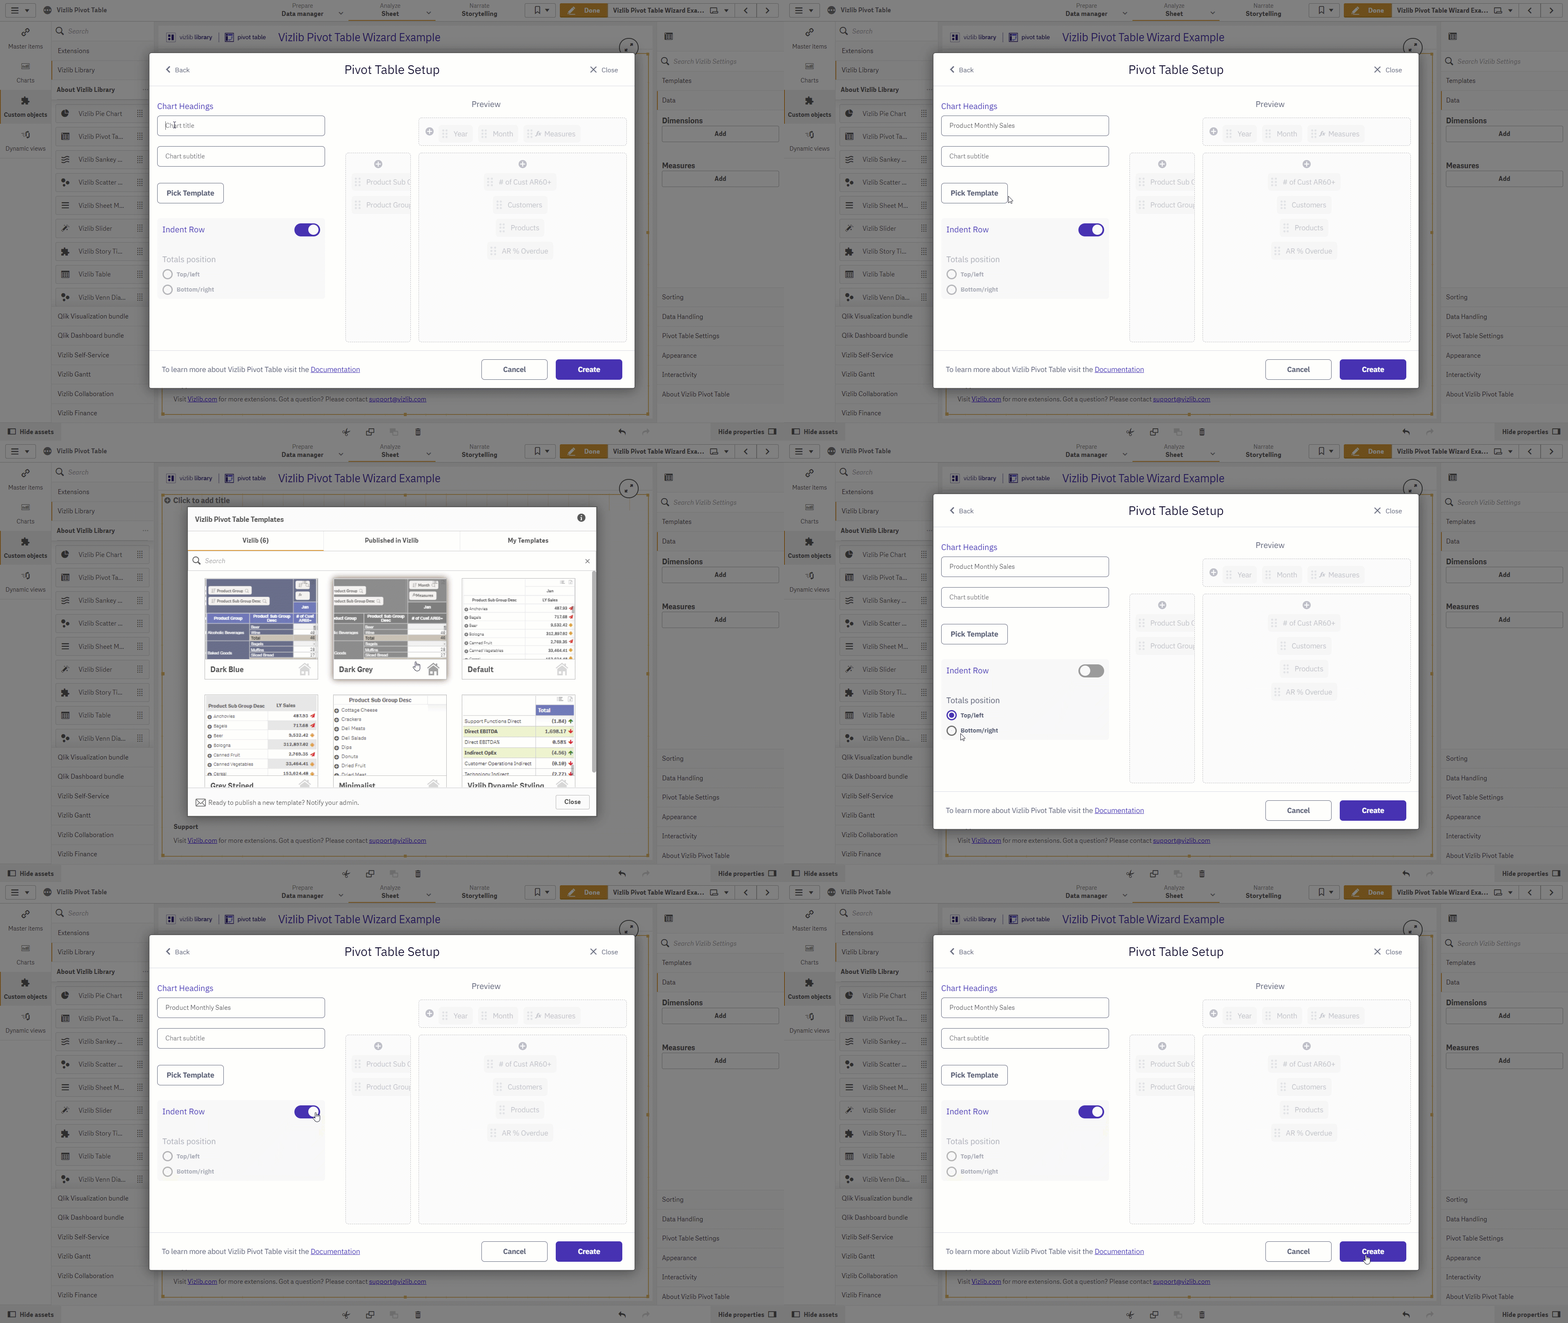
The next screen in the Setup Wizard is where you can define settings relating to the look and feel of the pivot table (Figure 3).

Figure 3: Pivot Table Appearance
On the left, there are three sets of controls you can use to customize the pivot table's appearance: Chart Headings, Pick Template and Indent Row.
-
If you need to, you can enter your own Chart title and Chart subtitle in Chart Headings.
-
Click Pick Template to display a range of templates to customize the appearance of your pivot table. You can apply a template style by clicking on it. If you'd like to read more about templates in Vizlib Pivot Table, click here.
-
If you disable the default setting in Indent Row, you can choose the Totals position for your pivot table.
-
When you've applied the settings you want, click Create to complete the wizard and display the pivot table.
Property Panel Updates
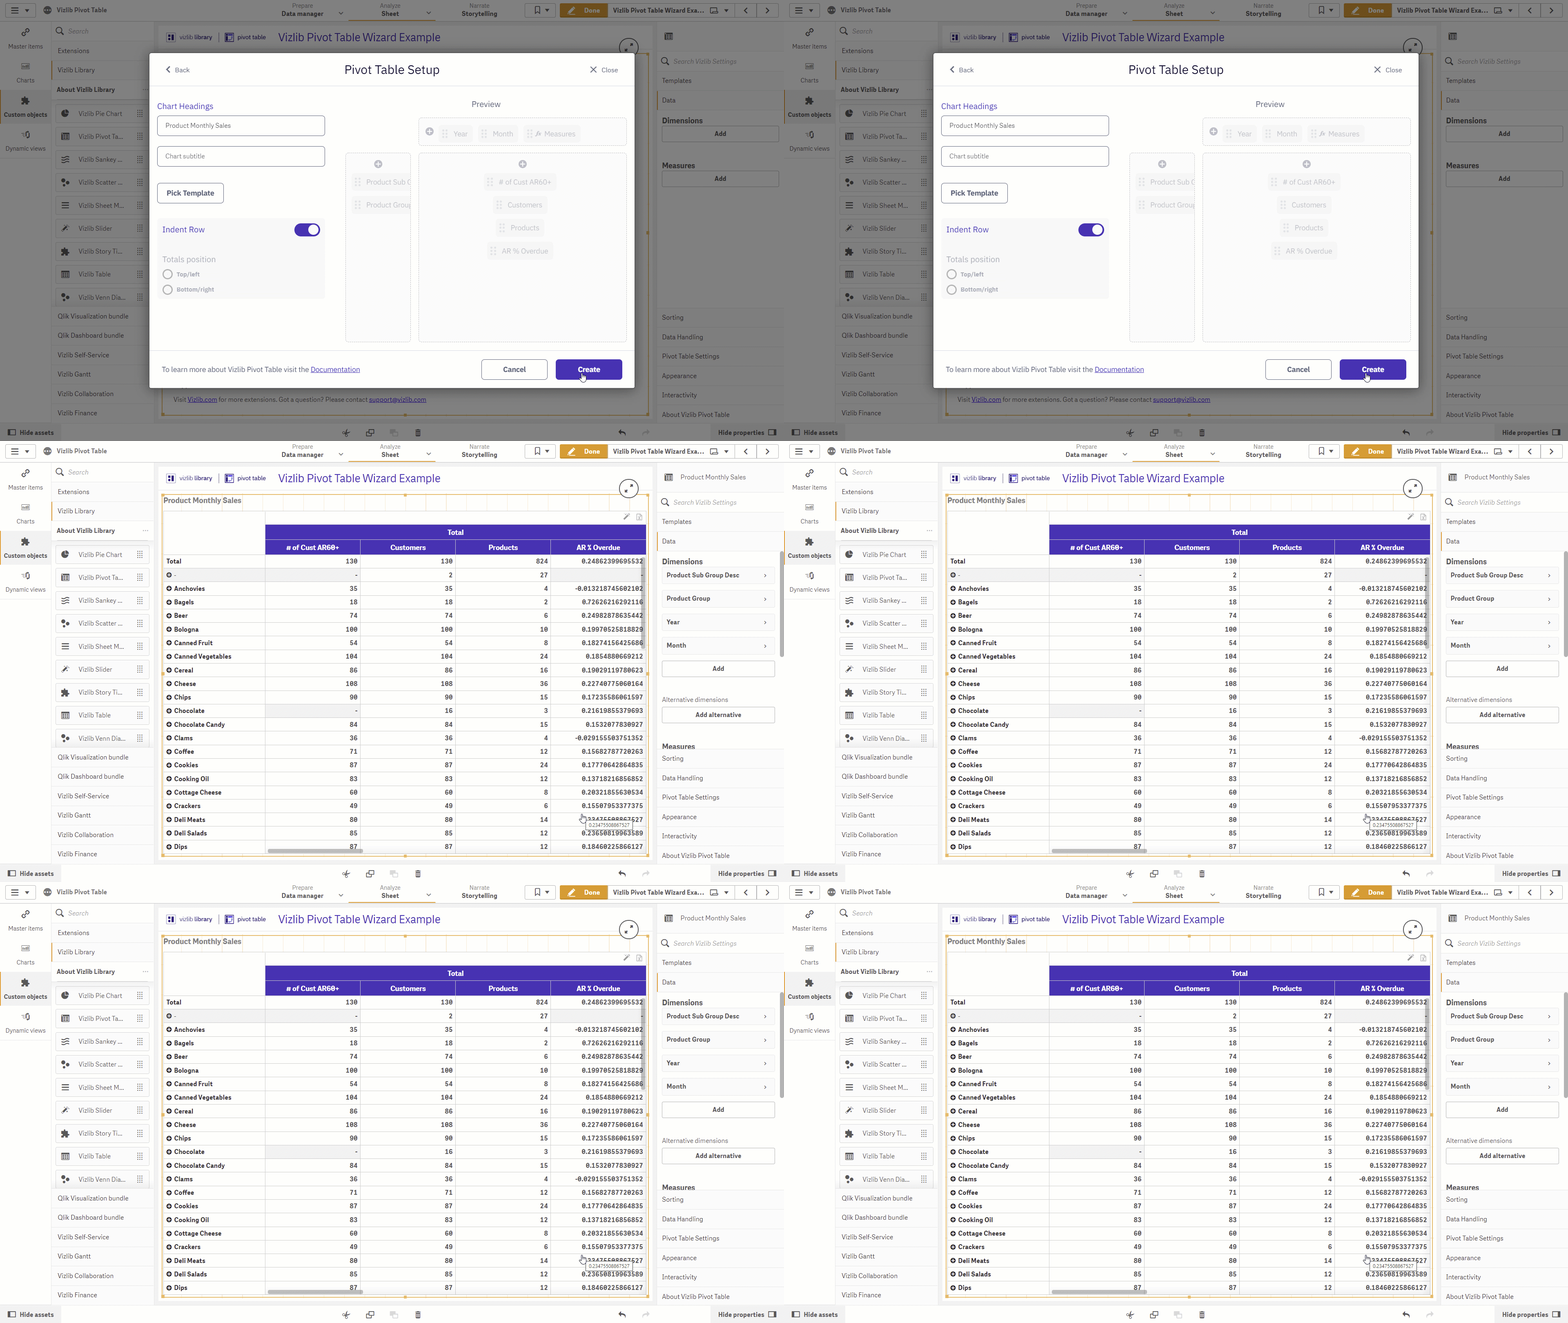
When you click Create, the pivot table will be displayed in the Qlik Sense Hub (Figure 4). You can edit dimension and measure settings for your pivot table in the Data section in the property panel. You can find a full list of articles on Vizlib Pivot Table properties on our Introduction page.

Figure 4: Property Panel Updates