Setup Wizard
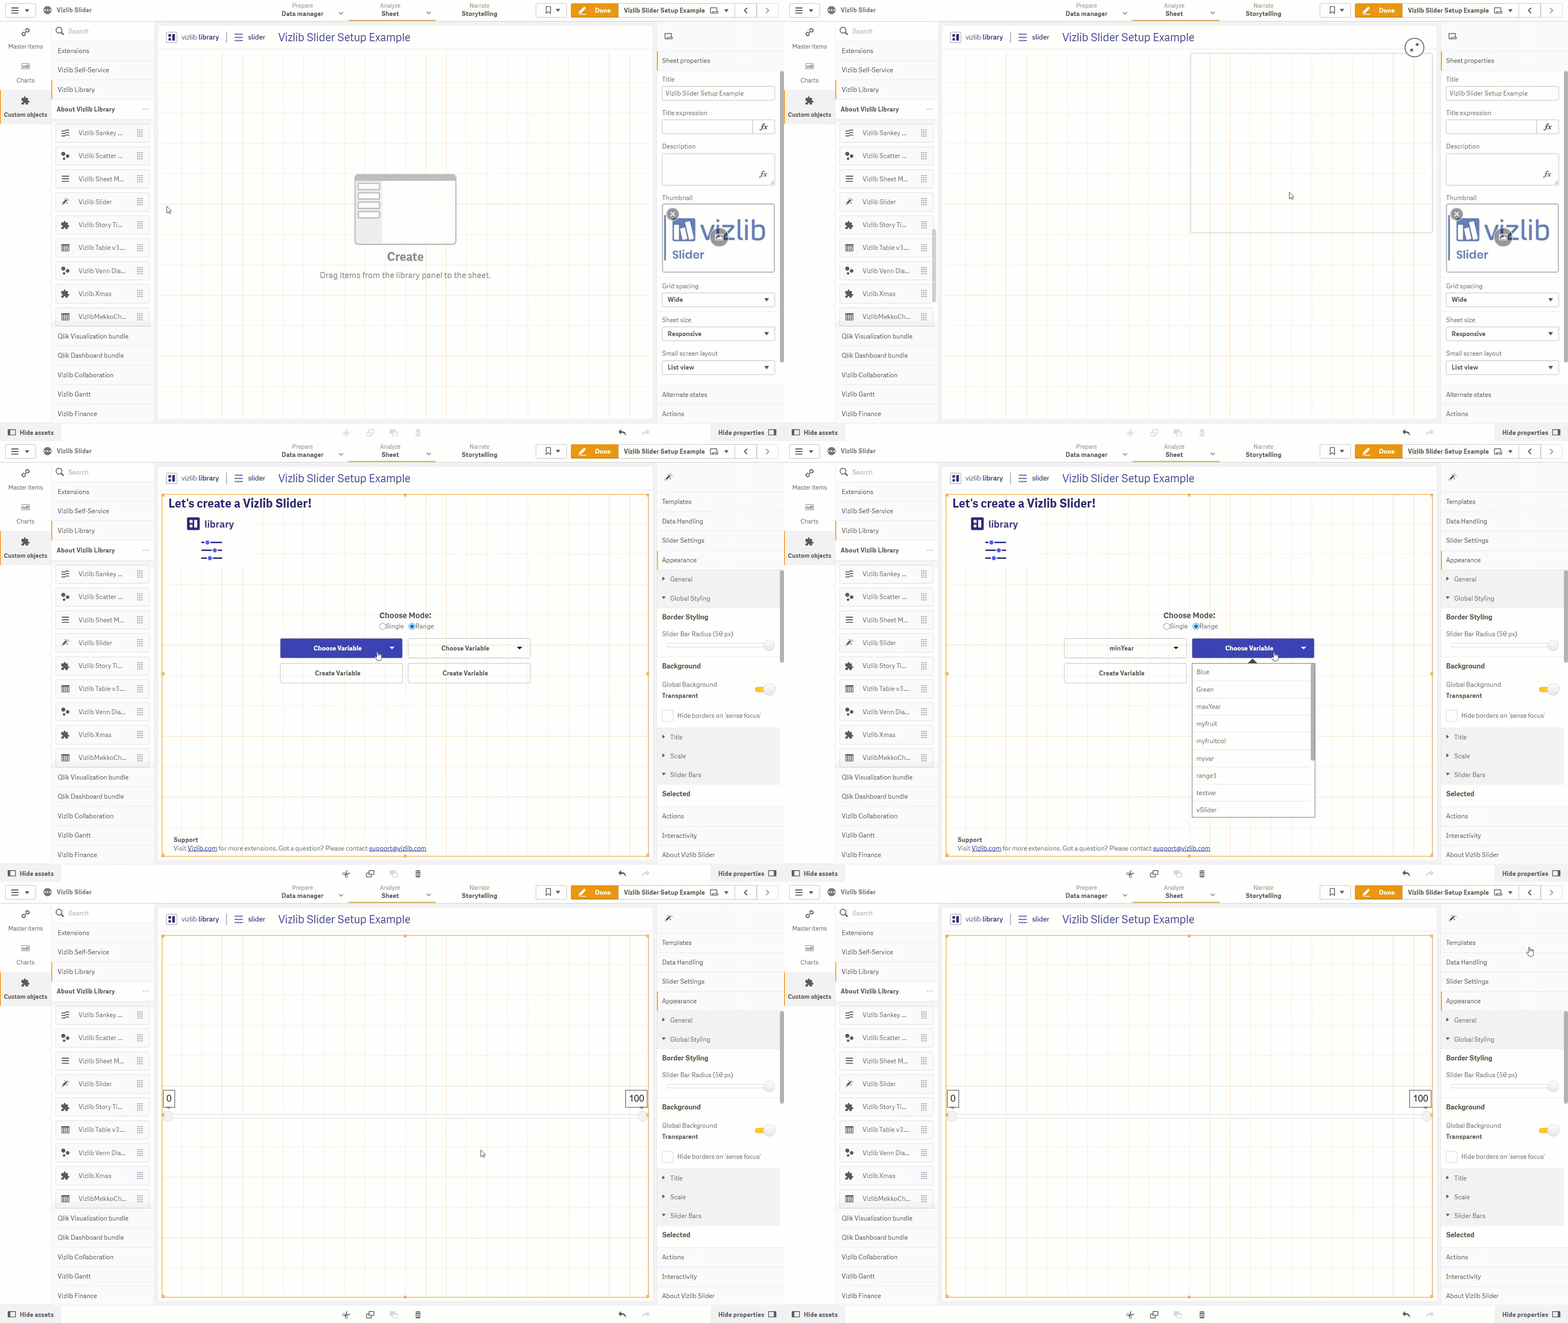
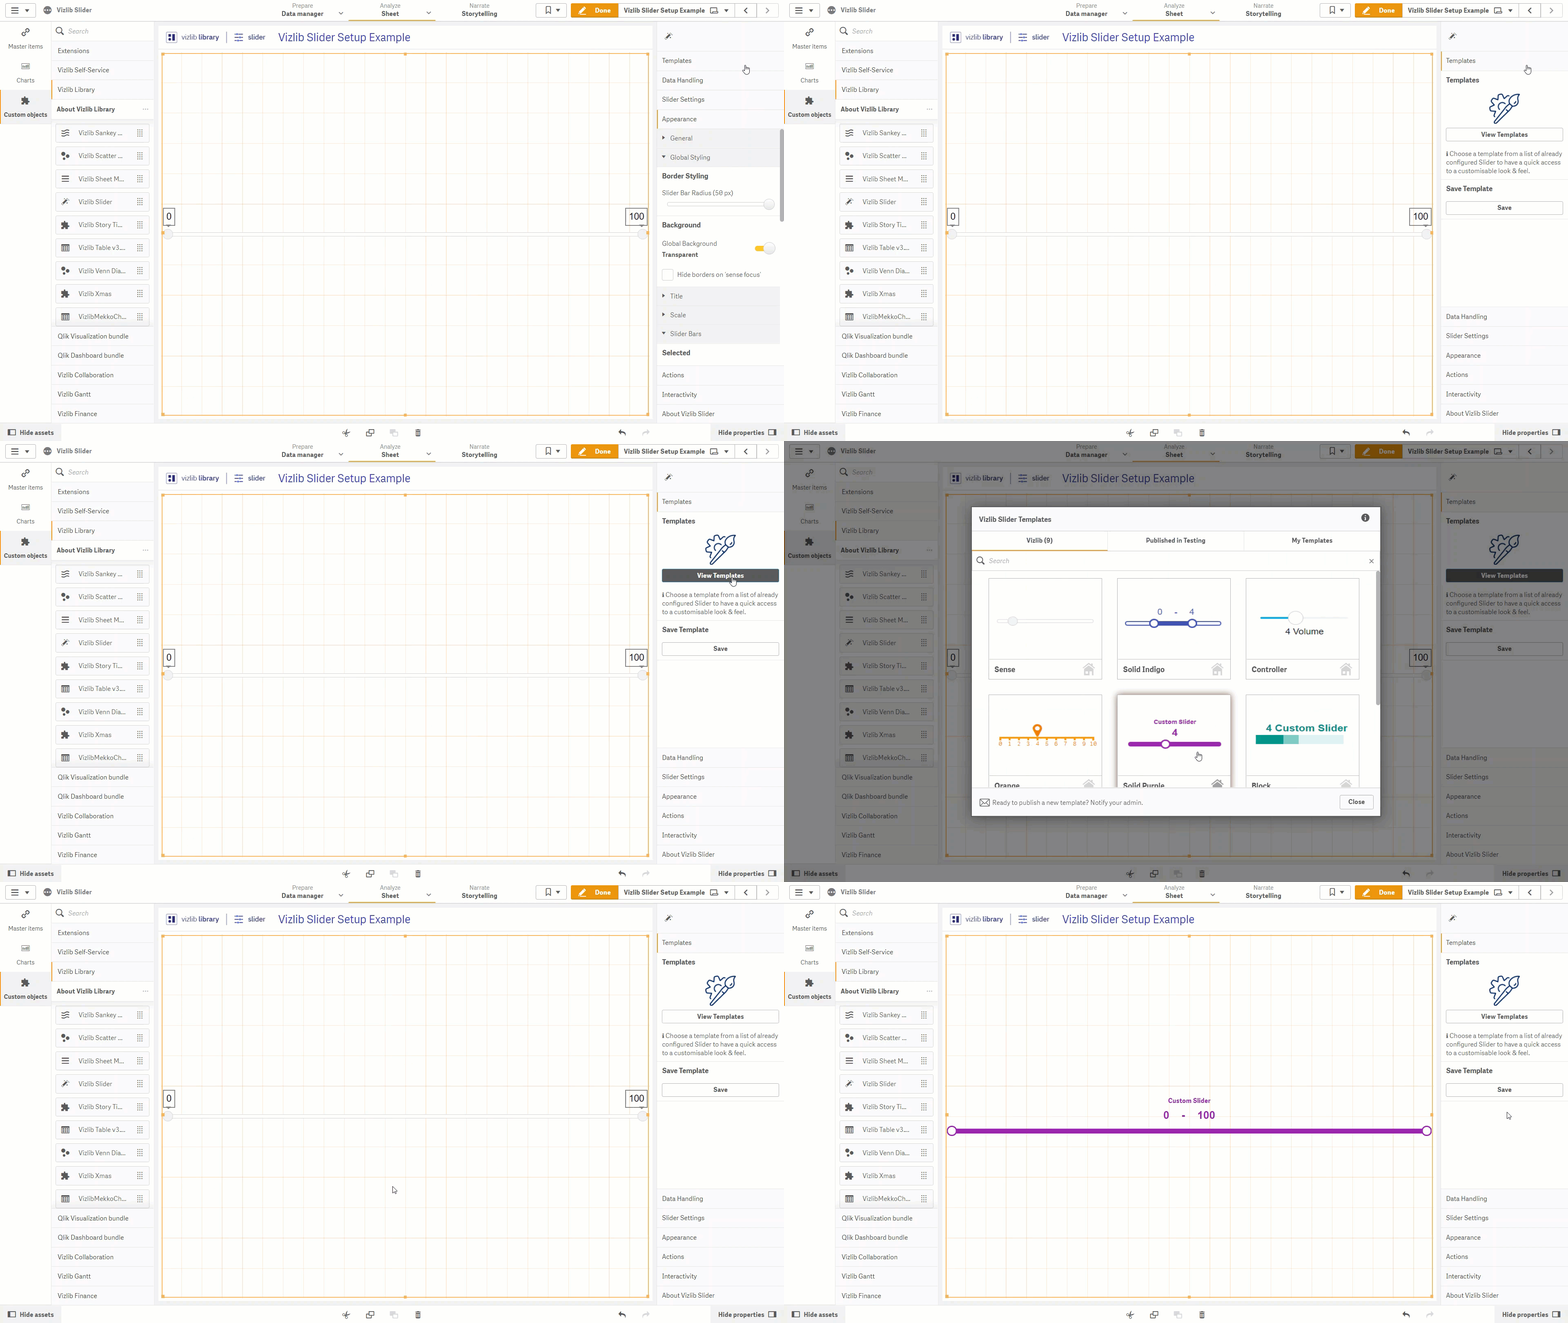
Vizlib Slider has a Setup Wizard to help you create a visualization quickly and easily (Figure 1), either using selections (Figure 1) or applying a template (Figure 2). You activate the wizard when you add a Vizlib Slider object from the Custom Objects menu to a sheet.
This topic contains the following sections:
Setup Wizard

Figure 1: Slider Setup
If you want to use the setup wizard, follow these instructions:
-
Click on Custom Objects in the far-left panel, to open the custom objects menu.
-
Select Vizlib Library.
-
Click and hold the cursor on Vizlib Slider.
-
Drag and drop the cursor into the sheet.
-
Drag the table edge (highlighted in orange) to change the table size.
-
Select a value for Choose mode. Single displays a minimum value and range displays a minimum and maximum value.
-
Select minimum and maximum values by using the drop-down menu in Choose Variable, or by clicking Create Variable and enter your own value.
Now you've created the basic slider, you can choose how to edit the slider appearance.
Templates

Figure 2: Slider Templates
If you want to use templates to set slider properties (Figure 2), follow these instructions:
-
Open the Templates menu in the far-left panel, click View Templates to open the templates screen.
-
Click on the template you want to apply the settings.
-
Click Create to return to the sheet.
Property Panel

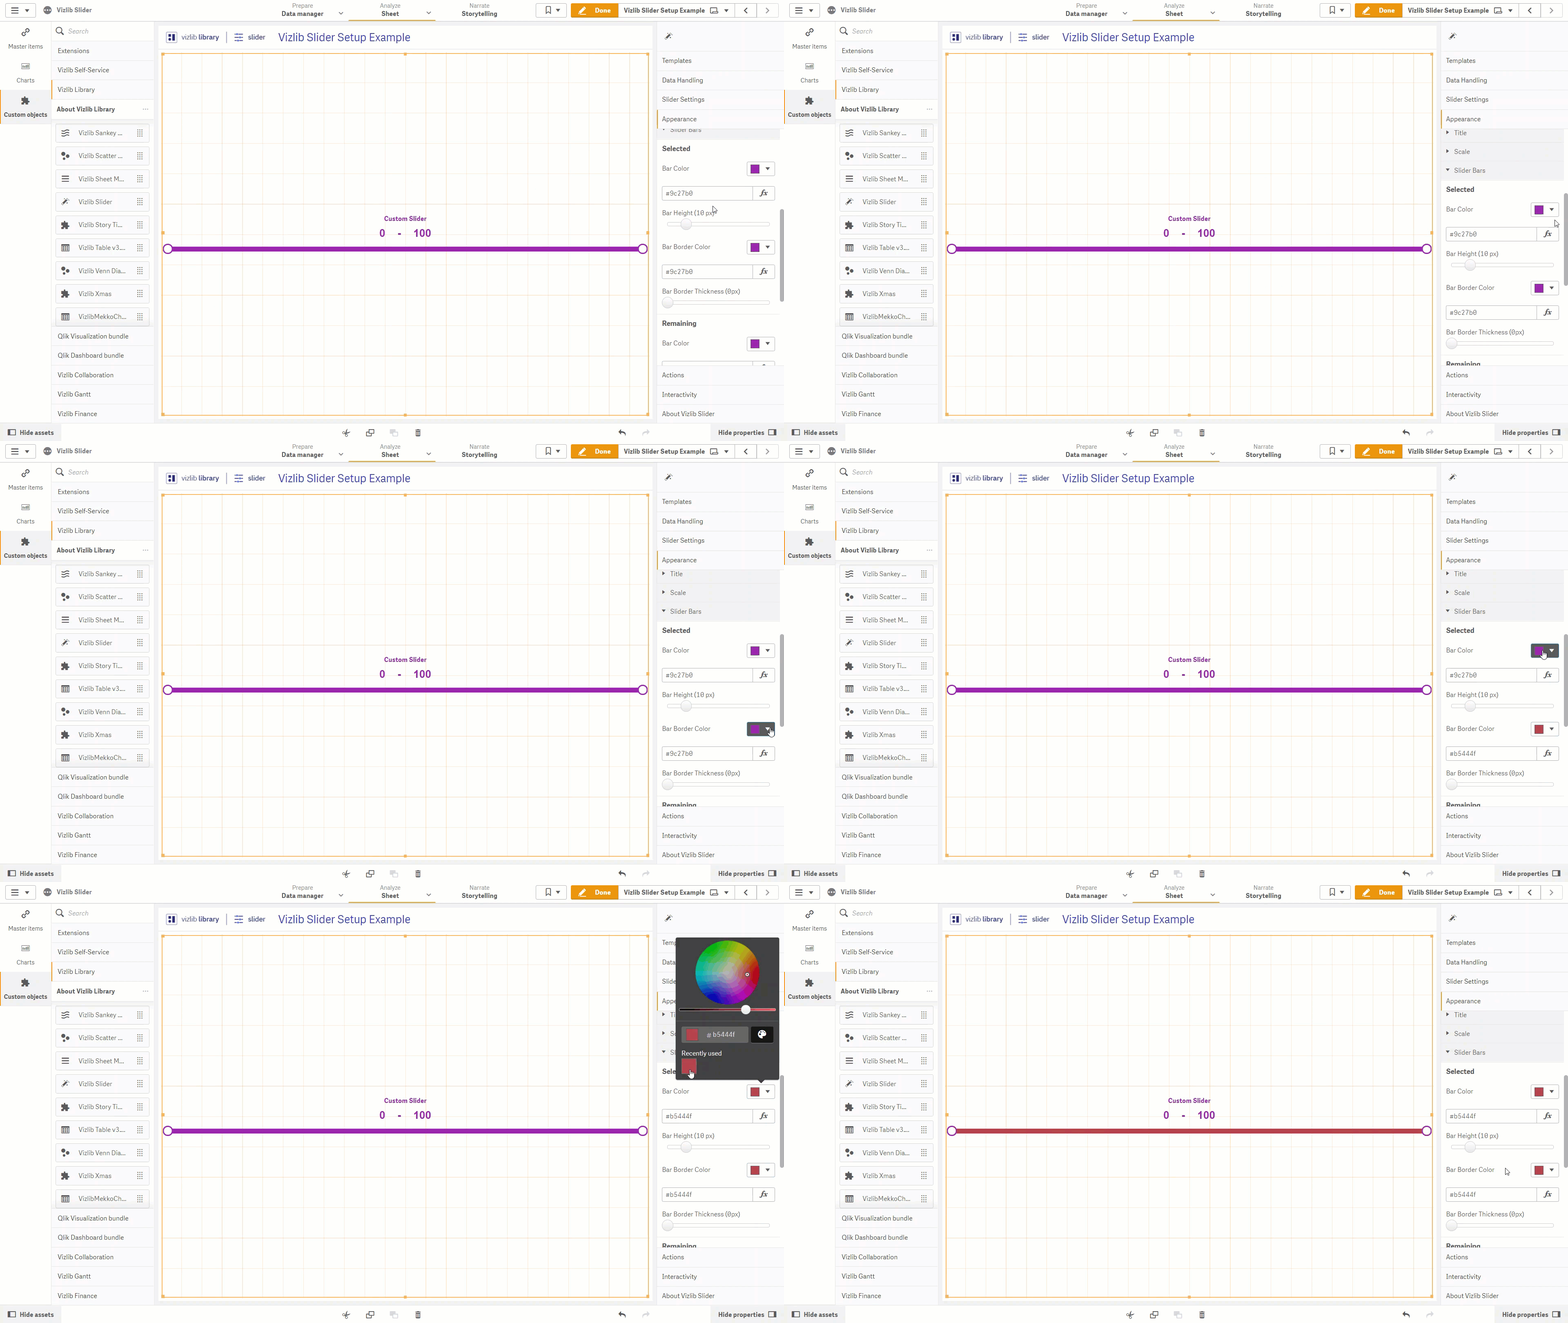
Figure 3: Property Panel
If you want to use the property panel to set slider properties (Figure 3), follow these instructions:
-
Open the Appearance menu, then click View Templates to open the templates screen.
-
Click on the template you want to apply the settings.
-
Click Create to return to the sheet.
Further Edits
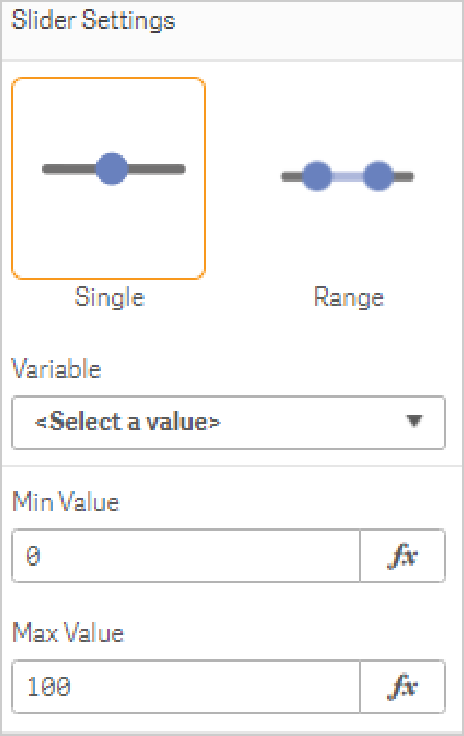
Once you've created the slider, you can edit the slider values by either using Slider Settings in the property panel (Figure 4, see article here).

Figure 4: Slider Settings