Getting Started with Writeback Table
This guide will help you get started with Vizlib Writeback Table without Vizlib Server. We will introduce you to how to configure everything you need to be able to close the analytics loop and create interactive dashboards and analytic apps.
This topic includes the following sections:
1. Prerequisites and Checklist
Before you start the guide, make sure you have all the information and permissions you need. Work through all the items in this checklist and then you'll be ready to start. This guide will focus on running Vizlib Writeback Table without Vizlib Server, in Qlik Sense Desktop. It's also possible to follow this guide using Qlik Sense Enterprise but some of the steps might be slightly different.
-
Qlik Sense Desktop, one of the six latest versions. Can be downloaded from here.
-
A folder where you can store the data in a QVD file.
If you plan to use Qlik Sense Enterprise instead of Qlik Sense Desktop, you need this rather than the checklist above.
-
Professional license - analyzer license is only supported when using Vizlib Writeback Table with Vizlib Server.
-
Access to a folder data connection where you can store the data in a QVD file.
-
Security rules to enable reload of apps - follow this guide.
-
Permission to create applications.
Note:
Using Vizlib Writeback Table without Vizlib Server is great for prototyping, development and quickly getting up and running. Using it without Vizlib Server in production is not recommended. There are several reasons why you want to use Vizlib Server in production environments.
-
Prevent your application to get out of sync with the data when concurrent write-backs are clashing. Vizlib Server has many features and ways to improve concurrent write-backs, e.g. auto-locking destinations and Loop & Reduce.
-
Let Vizlib Server handle permissions to the write-back destinations with security rules. No need to grant the users full access to the data connection used, which can be a big security risk.
-
Save money by allowing users with an Analyzer license to do write-back.
2. Download Extensions from Vizlib Portal
If you have already installed the latest version of Vizlib Writeback Table, skip the next steps and go to Step 4 instead.
Open a new browser tab and go to home.vizlib.com. Click the Log in button and sign in to the Vizlib Portal.

Figure 1: Homepage of Vizlib
Click the Collaboration section under Products. Open up the Extensions pop-up by clicking Extensions under Download product in the panel to the right of the page.
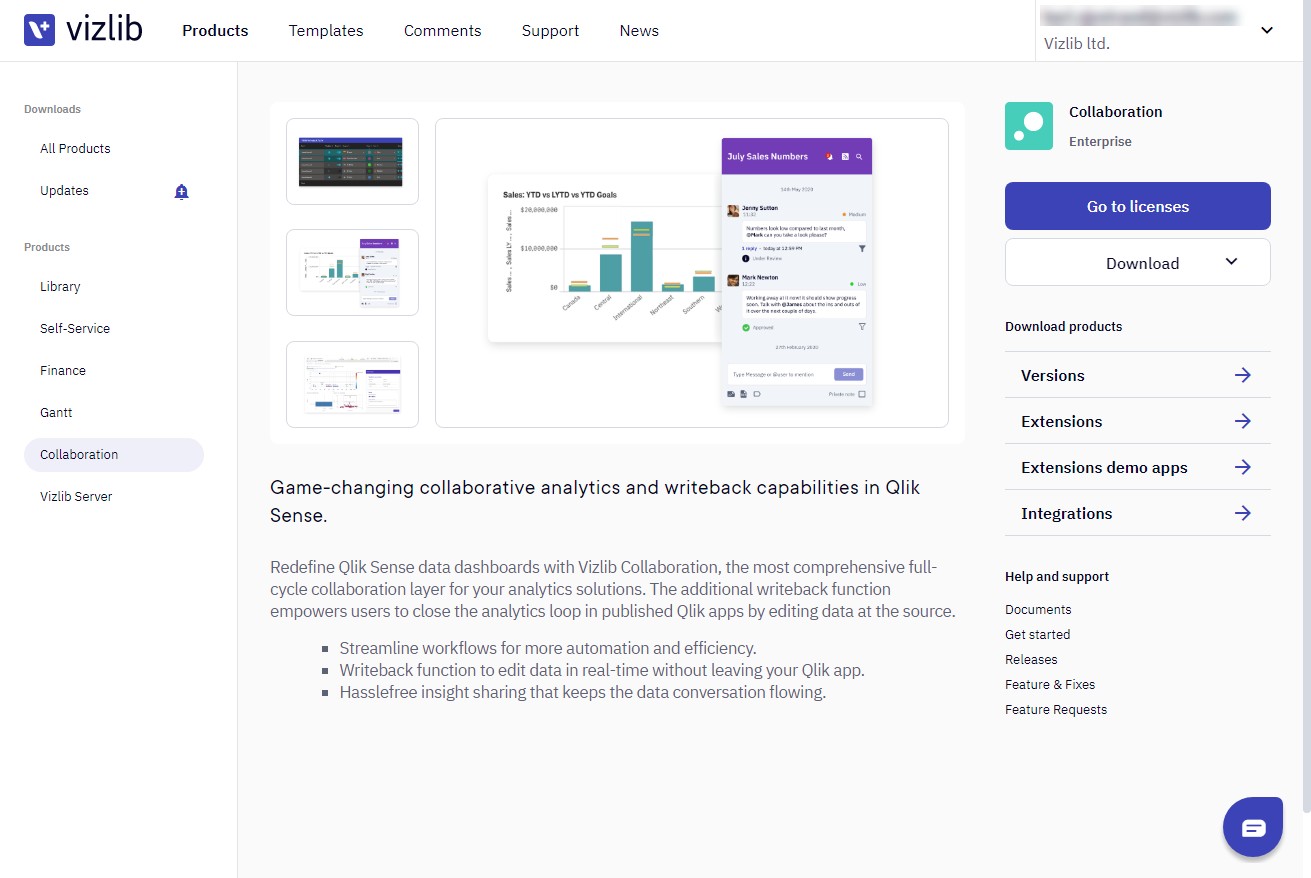
Figure 2: Collaboration section in the Vizlib Portal
This will open up the Extensions pop-up with all the versions of the extensions included in the Vizlib Collaboration product.
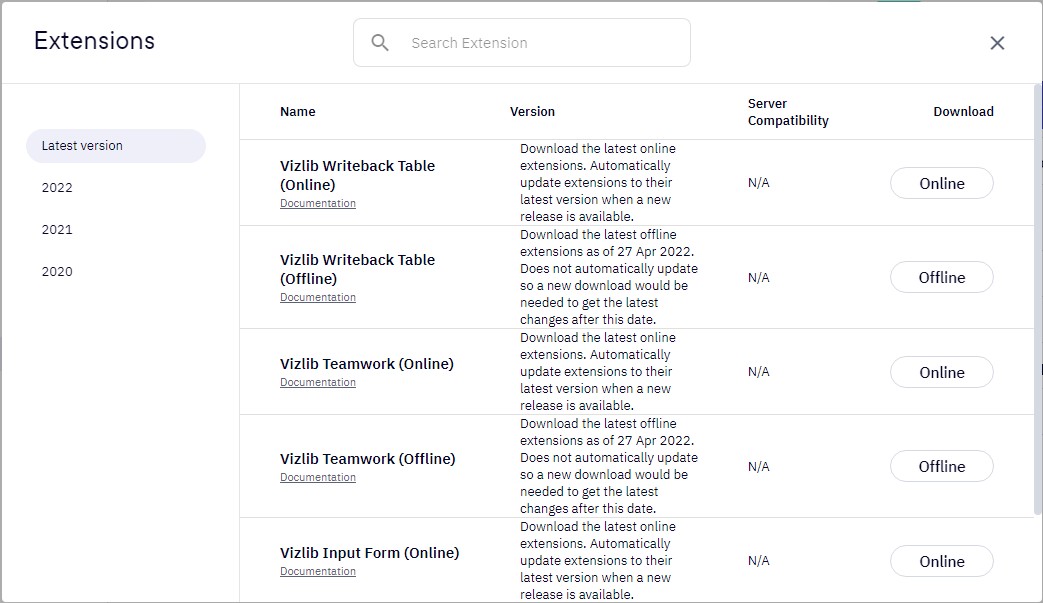
Figure 3: Extensions pop-up
Start by filtering the version by typing Table in the search input at the top to only show the Vizlib Writeback Table versions. Find the latest version with an Offline version to download. Click the Offline download button to download the extension. It's important to download the offline version when using Vizlib Writeback Table with Vizlib Server because the online version will be automatically updated and make the extensions incompatible with the Vizlib Server version installed. The Collaboration extensions and Vizlib Server needs to be upgraded at the same time to make sure the versions are compatible. This guide is for Qlik Sense Desktop without Vizlib Server and the online version would work, but it's a good habit to use the offline version of the Collaboration extensions.
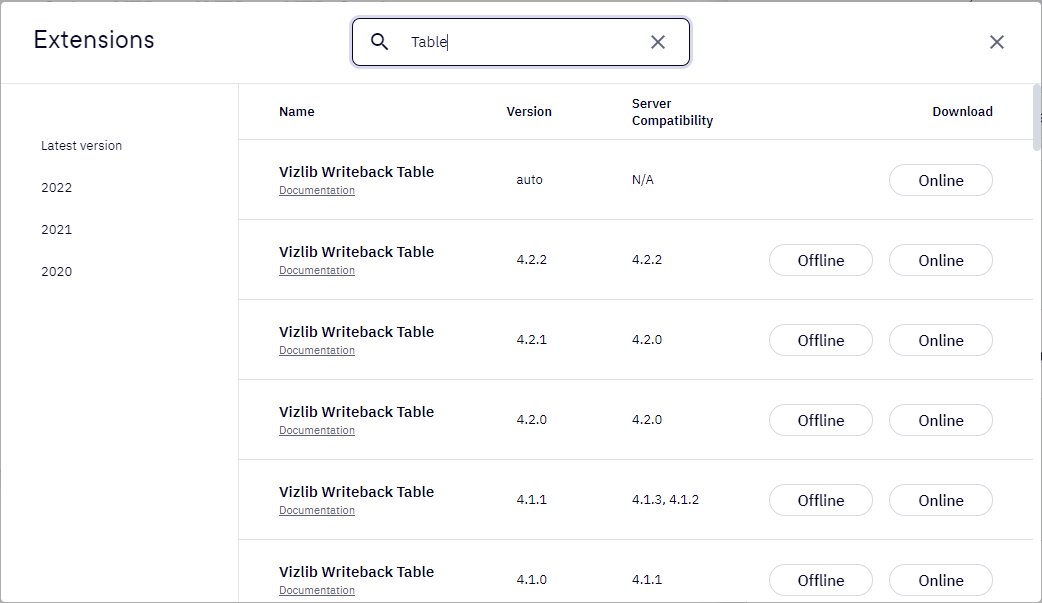
Figure 4: Filtered Vizlib Writeback Table versions in Extensions pop-up
3. Install/Update Extensions
Now it's time to install the extension we download from the Vizlib Portal in the previous steps. Open up the file explorer and navigate to your Qlik Sense Desktops extensions folder, C:\Users\%USERNAME%\Documents\Qlik\Sense\Extensions\. If you have an older version of Vizlib Writeback Table already installed delete the VizlibWritebackTable folder.
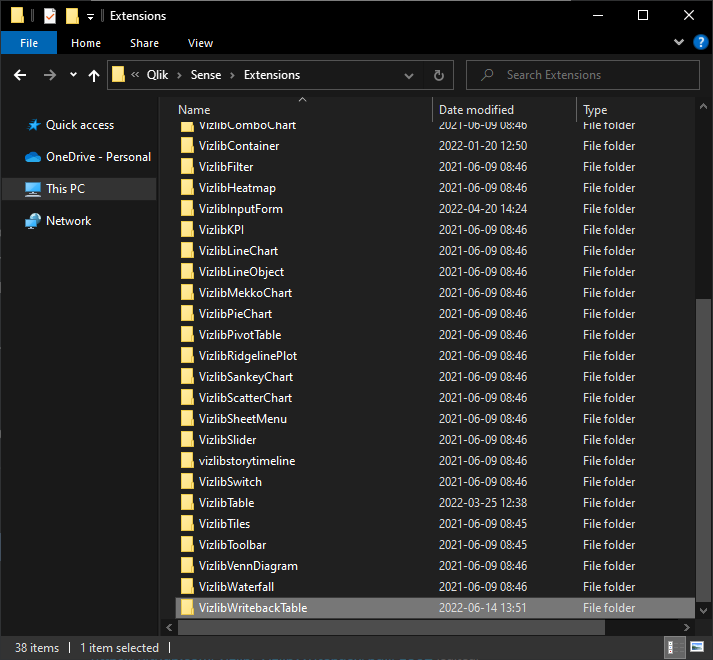
Figure 5: Extensions
Navigate to the extension zip file you downloaded from the Vizlib Portal.
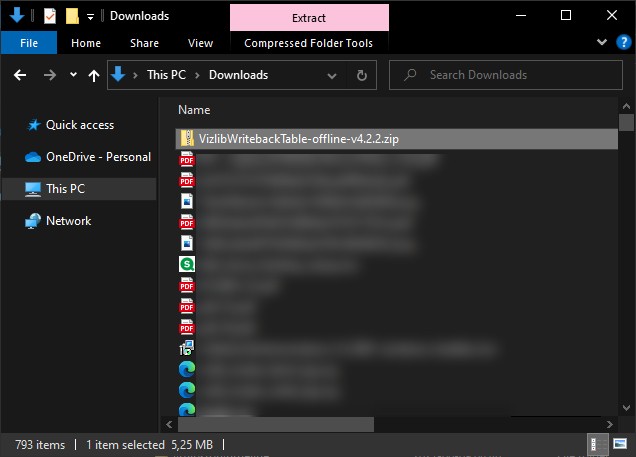
Figure 6: Zip file
Select the file and click the pink Extract tab in the File Explorer window to reveal the Compressed Folder Tools. Click the Extract all button.
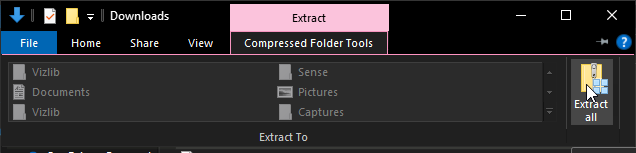
Figure 7: Extract all
In the Compressed Folder Tools window, click the Browse button and navigate to your extensions folder or type it in the folder input. Click Extract.
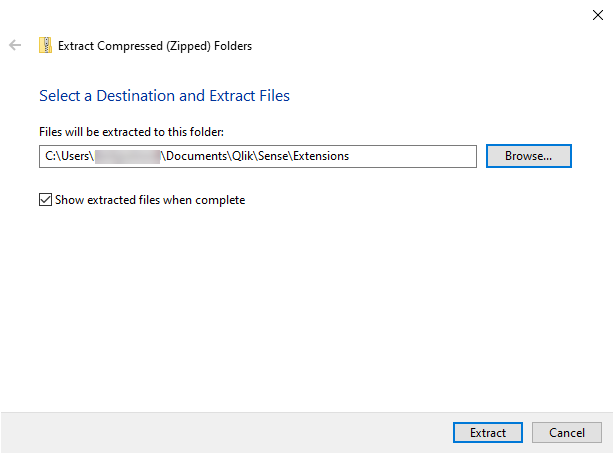
Figure 8: Compressed Folder Tools window
Verify that the VizlibWritebackTable folder now exists in the Qlik Sense extensions folder.
Figure 9: Extensions folder with VizlibWritebackTable
4. Open Qlik Sense Desktop and Create a New Application
Start Qlik Sense Desktop by clicking the Desktop shortcut or searching for Qlik Sense Desktop in the start menu. Click the Qlik Sense Desktop app to open Qlik Sense Desktop.
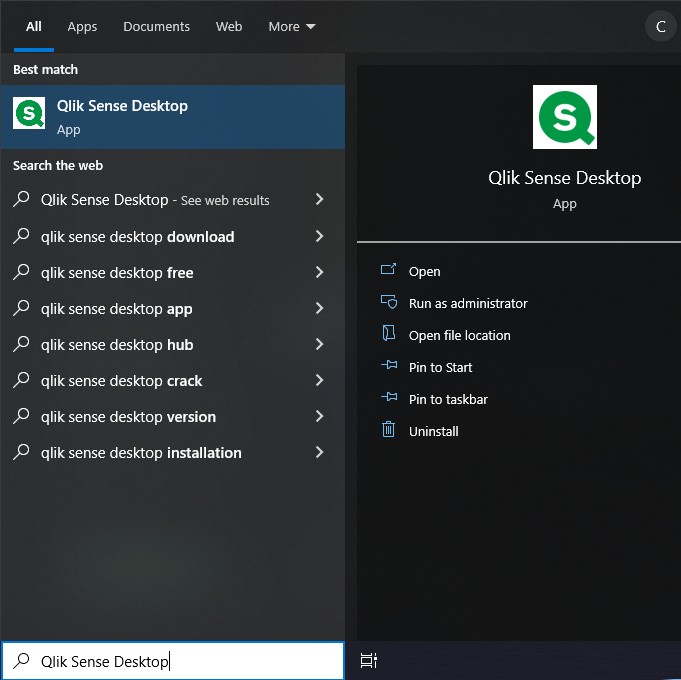
Figure 10: Start menu - Qlik Sense Desktop
Sign in to Qlik Sense Desktop.
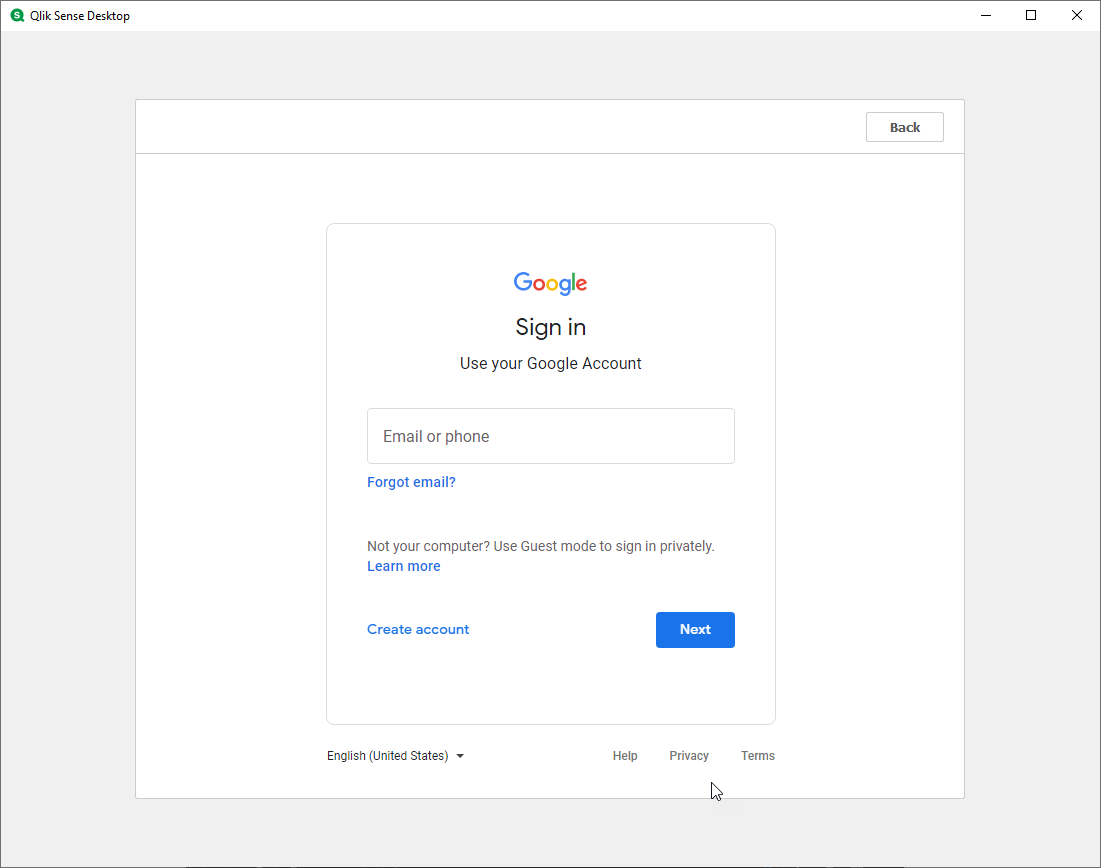
Figure 11: Qlik Sense Desktop sign-in screen
Once you are signed in to Qlik Sense Desktop open your browser of choice, we recommend using Chrome or Edge (2020 or later). Type localhost:4848/hub in the URL input of the browser to open Qlik Sense Desktop in the browser.
Important: Using Qlik Sense Desktop in the app window is not supported with Vizlib extensions.
Click the CREATE A NEW APP button or the Create new app button to create a new app.

Figure 12: Qlik Sense Desktop in Edge browser window
Give the new application a name, e.g. VizlibWritebackTable and click Create.
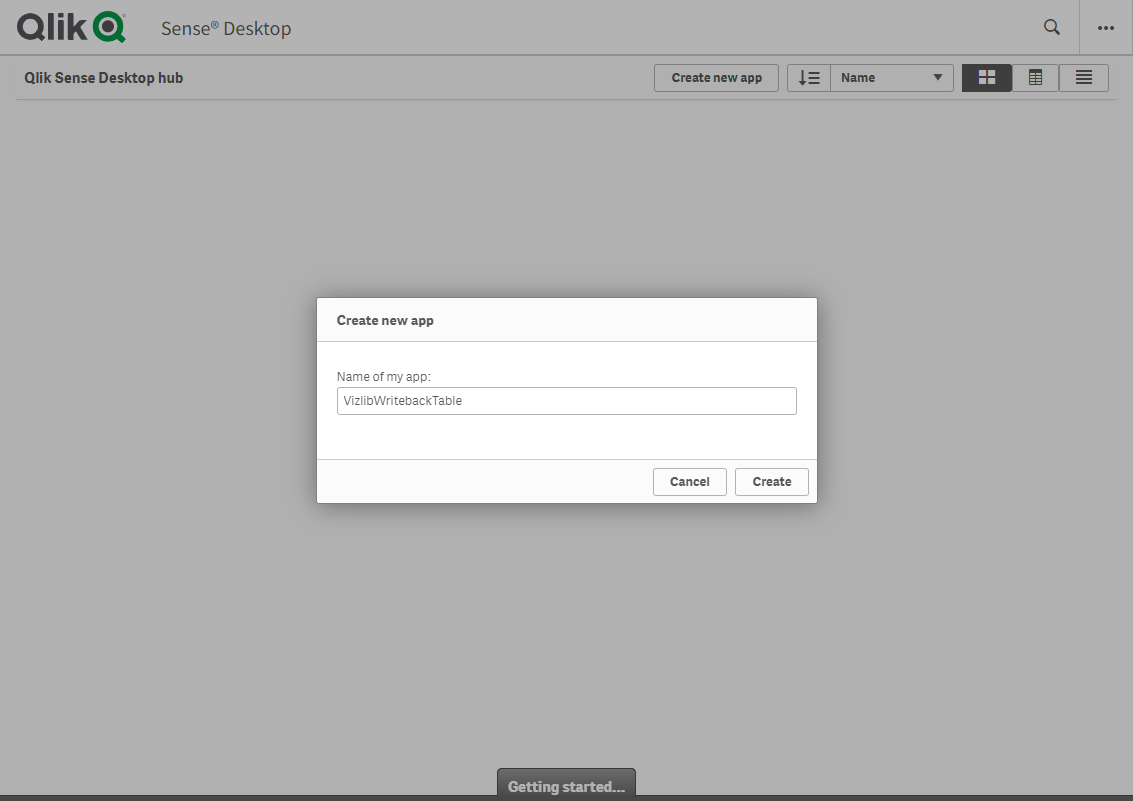
Figure 13: Create new app dialog
Then, click Open app.
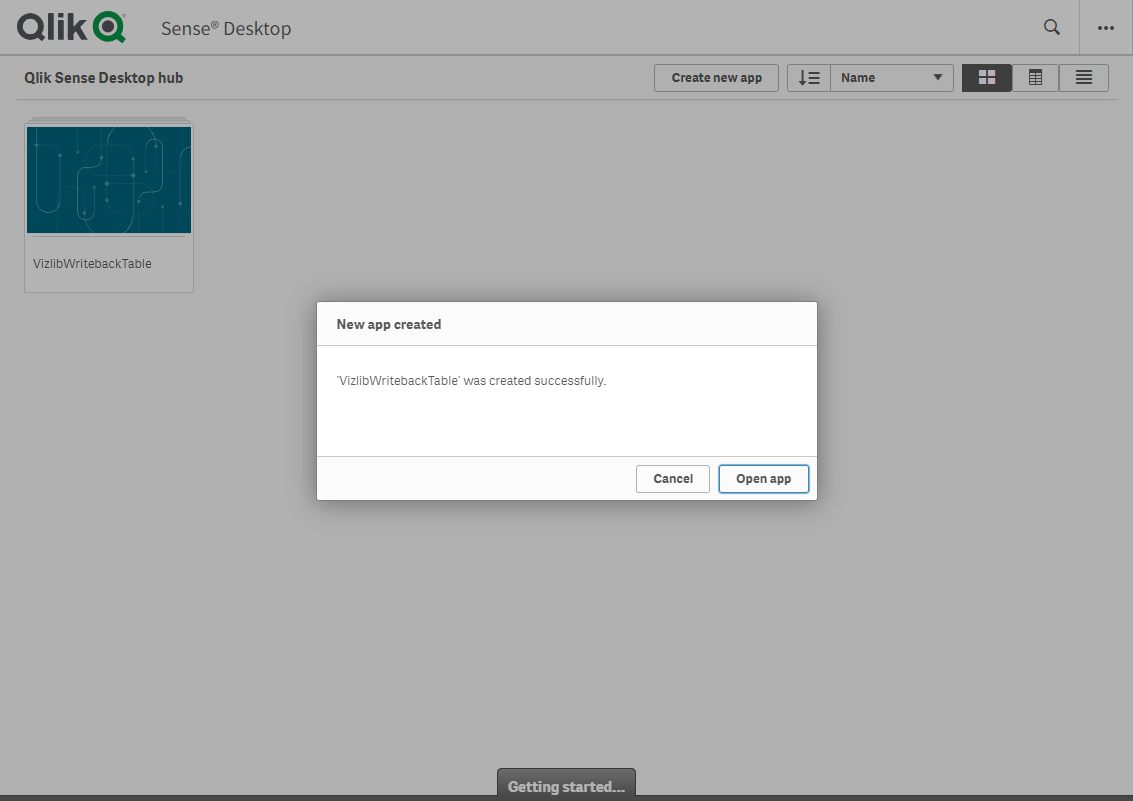
Figure 14: New app created dialog
5. Add the Template Script and Reload the Application
Now that you have created a new application we need to add data to the application. Click the Data load editor button on your screen to add some dummy data with the Qlik Sense template script.
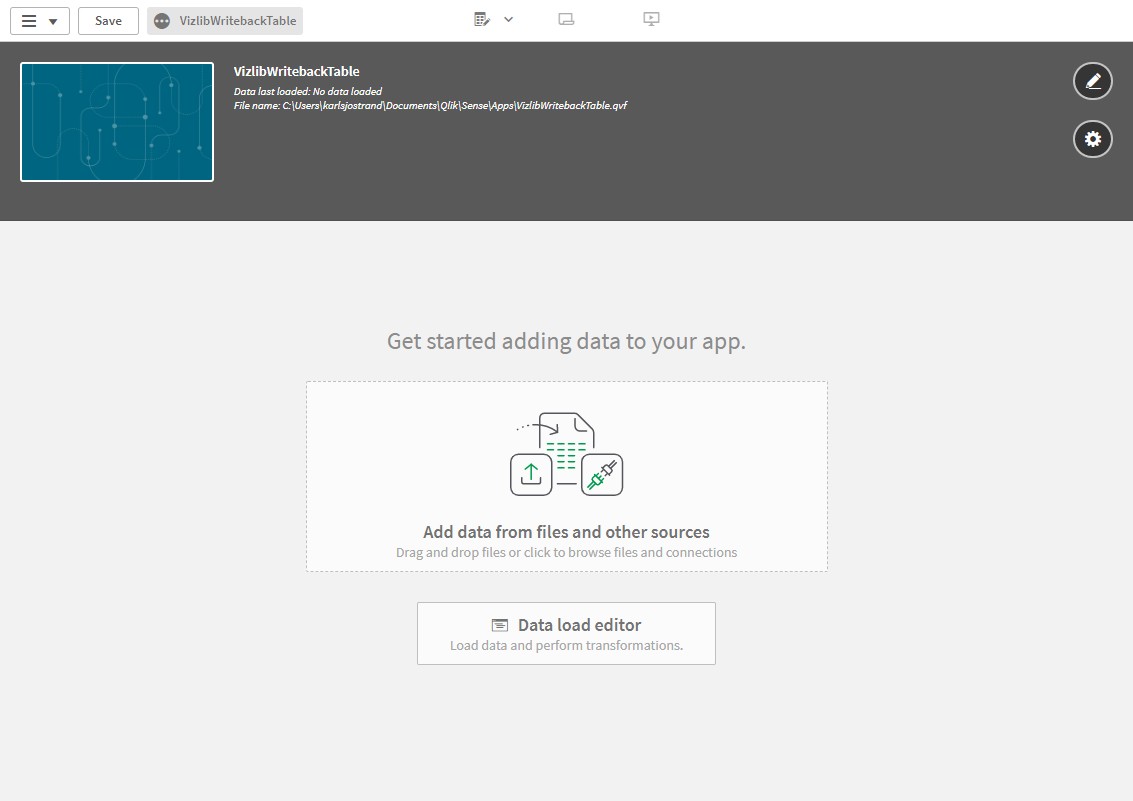
Figure 15: Empty application
In the Data load editor, click the load script on the last row (row 20 in Figure 16) and press enter to insert a new row. Hold down the Ctrl key and press 0 twice to insert the Qlik Sense template load script.
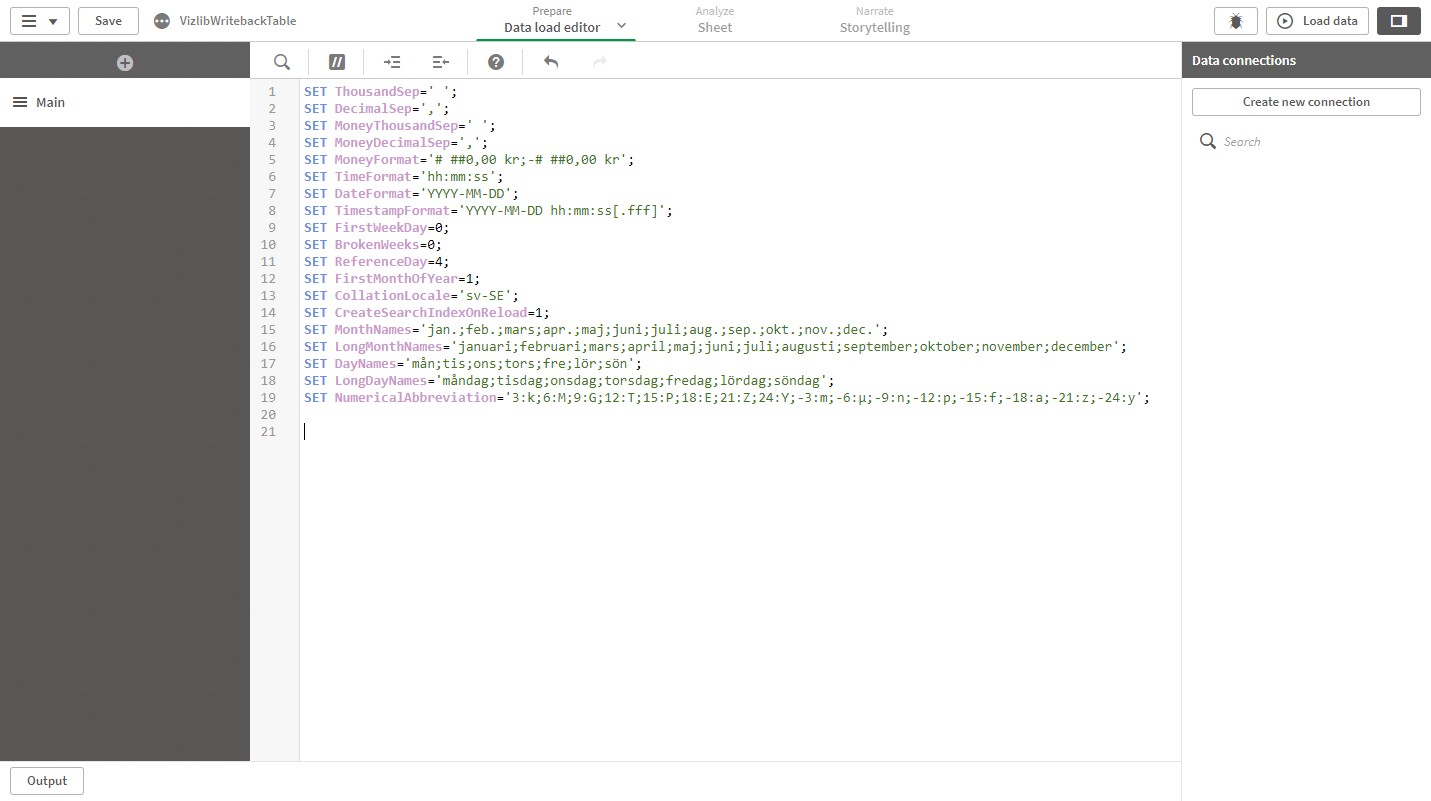
Figure 16: Data load editor
This should insert the template script and it should look something like Figure 17. The template generates some dummy data that we can use as a starting point for our application.
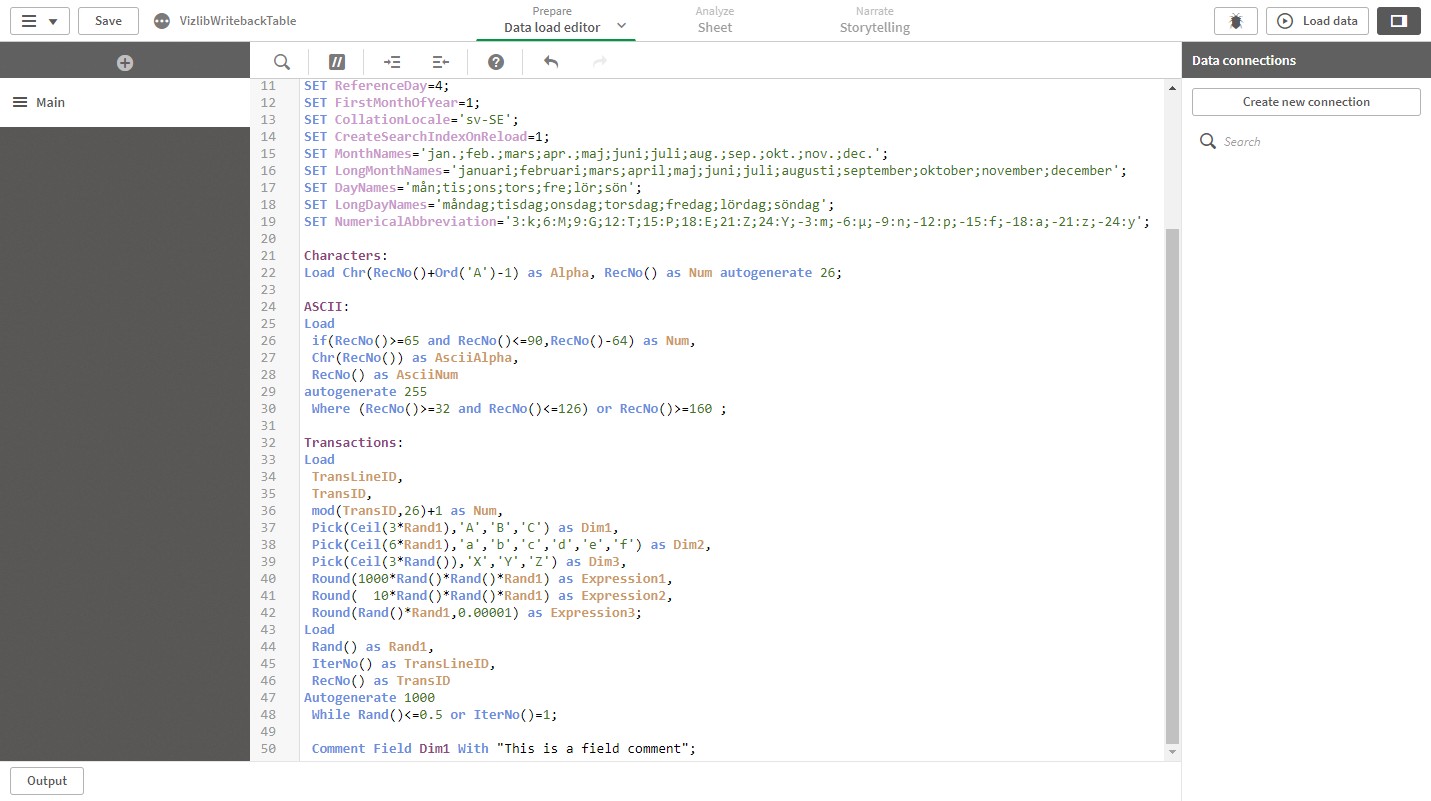
Figure 17: Data load editor with template script
Load data to run the template script by clicking the Load data button in the top right corner.
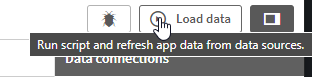
Figure 18: Load data button
Wait for the Data load to be complete and Close the Data load progress dialog.
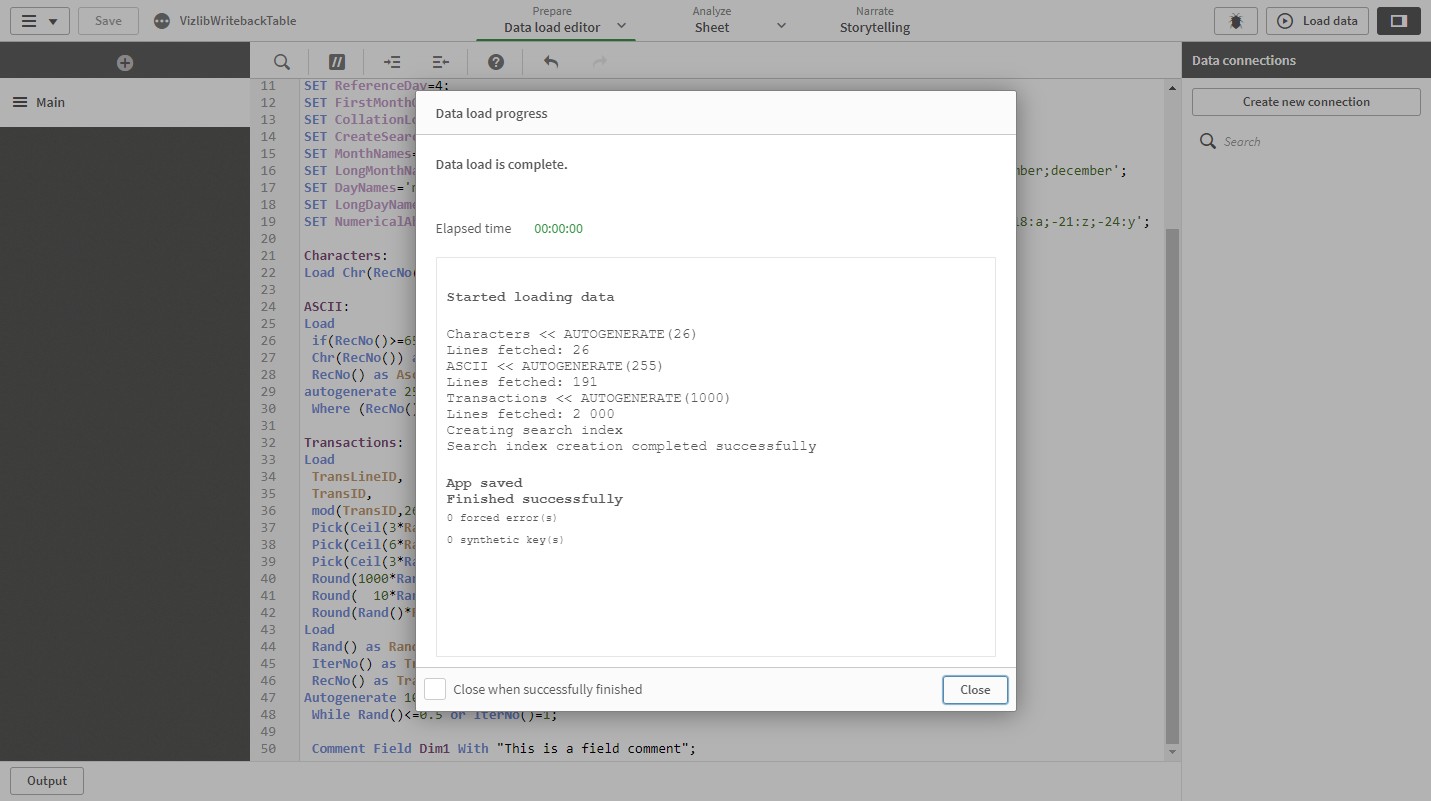
Figure 19: Data load progress complete
6. Create a Folder Data Connection
Before we create a new sheet and add the Vizlib Writeback Table we need a folder data connection to store the user-generated data in a QVD file. Click the Create new connection button under Data connections.
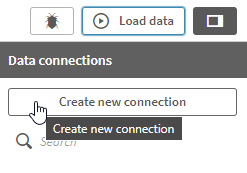
Figure 20: Create new connection
Select Folder in the Create new connection dialog.
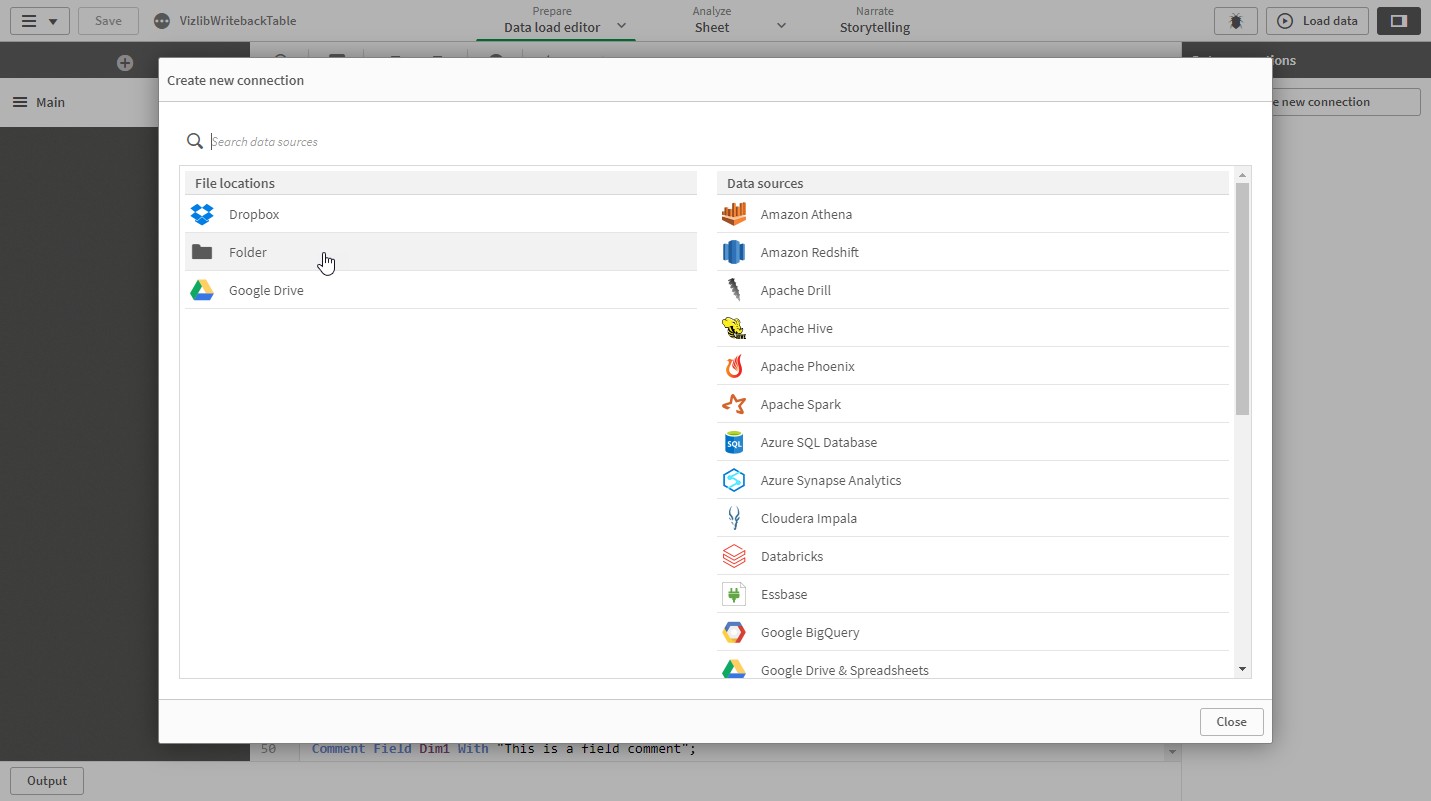
Figure 21: Create new connection dialog
Select an existing folder or create a new folder and browse to that path and name the new connection, e.g. VizlibWritebackTable. Make sure you do not have any files in the folder that you might accidentally overwrite when using the data connection.
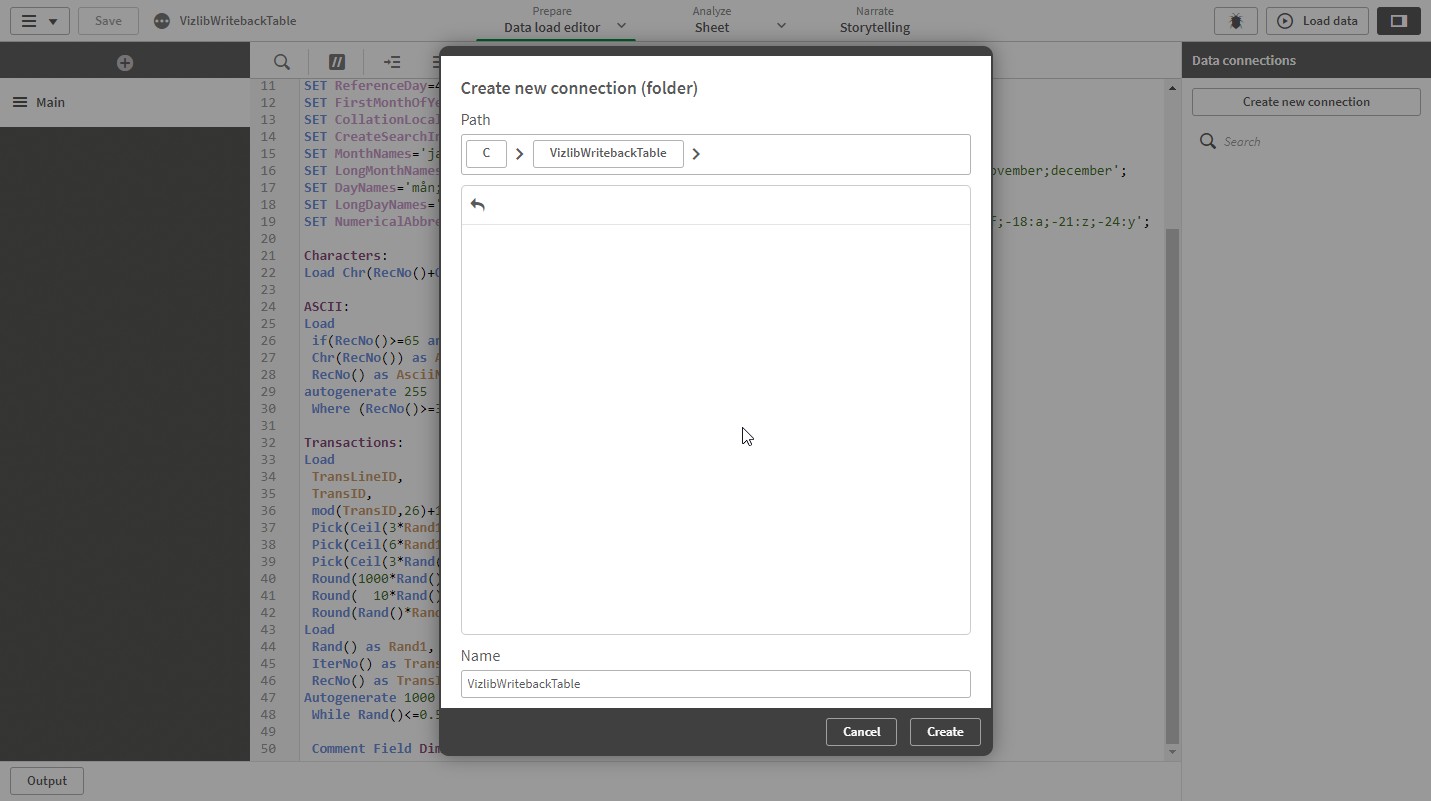
Figure 22: Create new connection (folder)
7. Create a New Sheet and Add the Vizlib Writeback Table
Now that we have both data and a data connection, we can create a new sheet. Click the Sheet navigation button in the top middle of your window to create a new sheet.
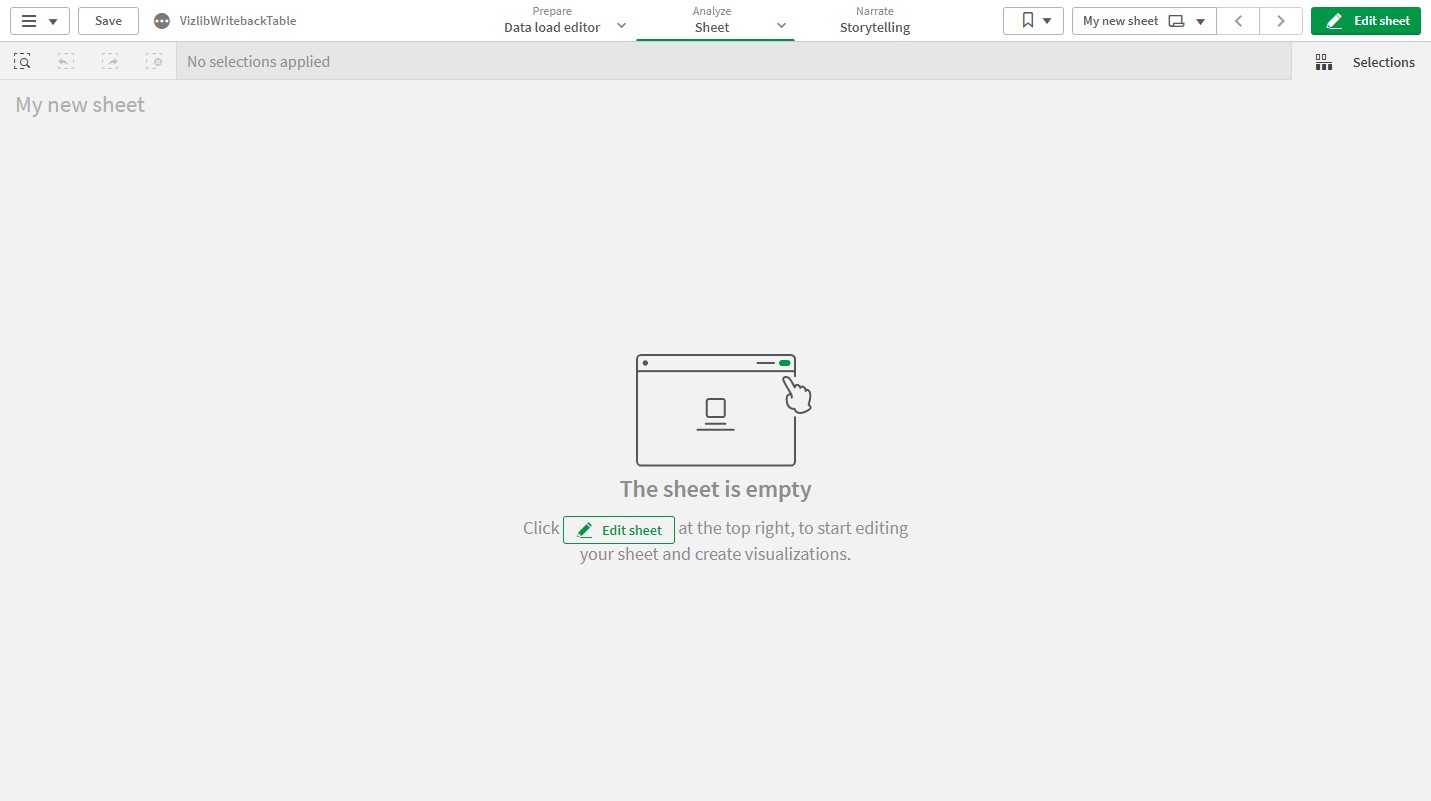
Figure 23: New sheet
To be able to add objects to the sheet we need to start editing the sheet. Do that by clicking the Edit sheet button in the top right corner.

Figure 24: Edit sheet button
In edit mode click the Custom objects in the navigation panel to the left.
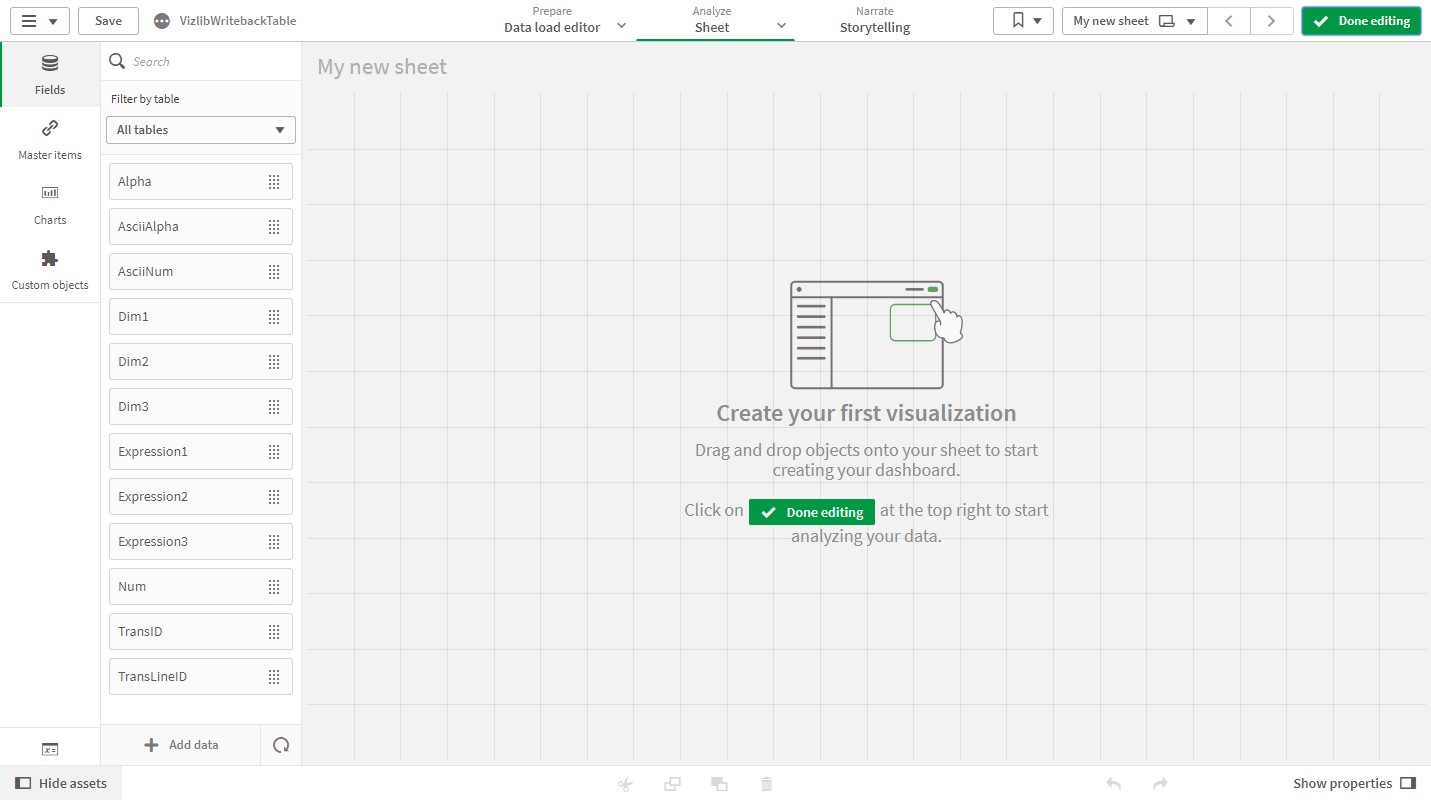
Figure 25: Edit mode
Click the Vizlib Collaboration section to show the Collaboration extensions.
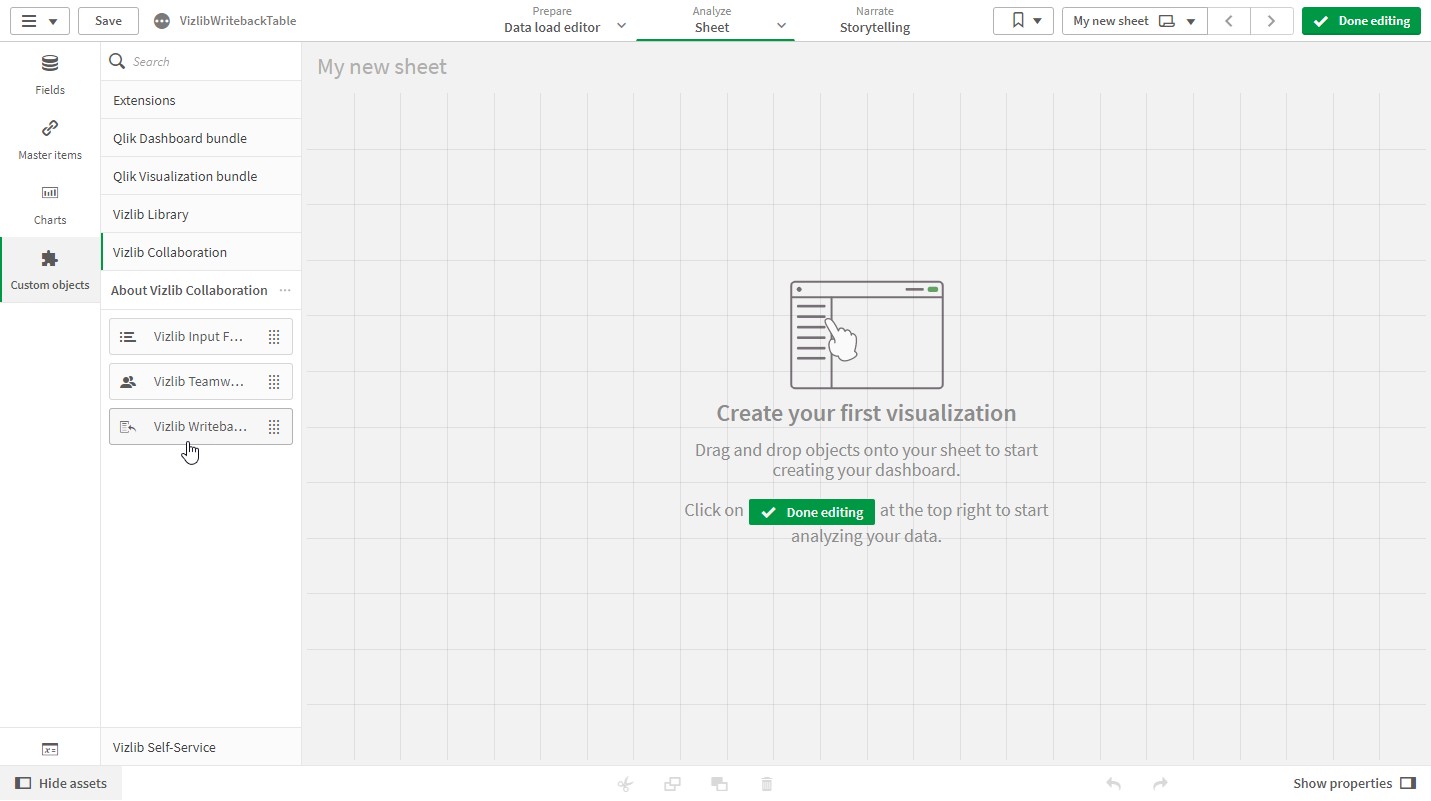
Figure 26: Custom objects Vizlib Collaboration
Drag the Vizlib Writeback Table extension to the sheet grid and resize it to fit the entire sheet, like in Figure 27.
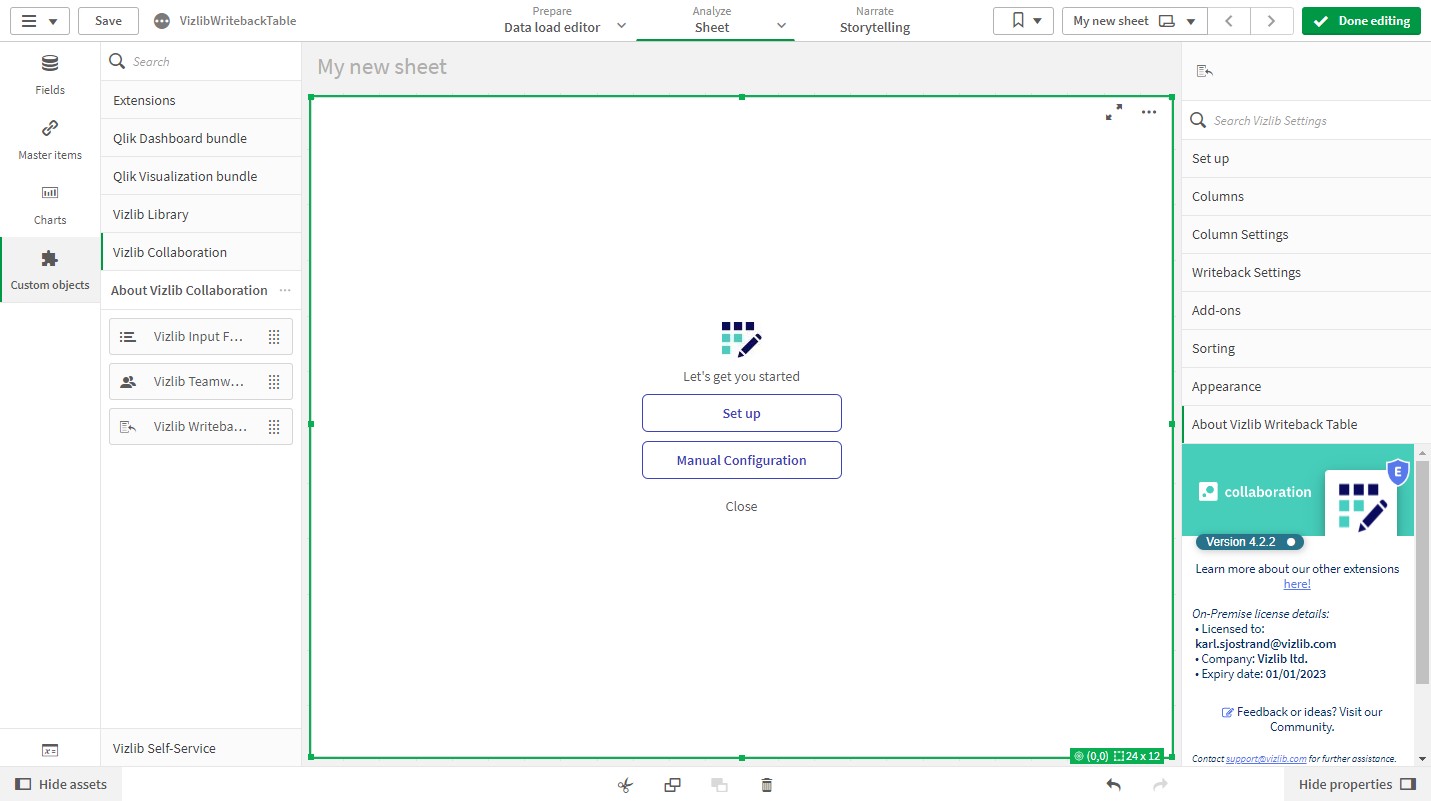
Figure 27: Resize sheet
8. Configure the Vizlib Writeback Table
Click the Set up button in the Vizlib Writeback Table object on the sheet to open up the setup wizard.
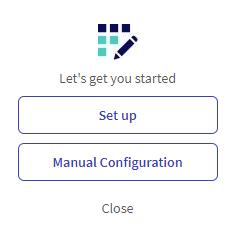
Figure 28: Set up and Manual Configuration
8.1 Select Destination
Start by selecting the Data connection created in step 6 in the Data Connection drop-down and give the QVD a name in the File Name input, e.g. AlphaComments.

Figure 29: Select destination dialog in set up wizard
The Select destination dialog should look like Figure 30 when you are ready to proceed to the next step in the wizard. Click Continue.
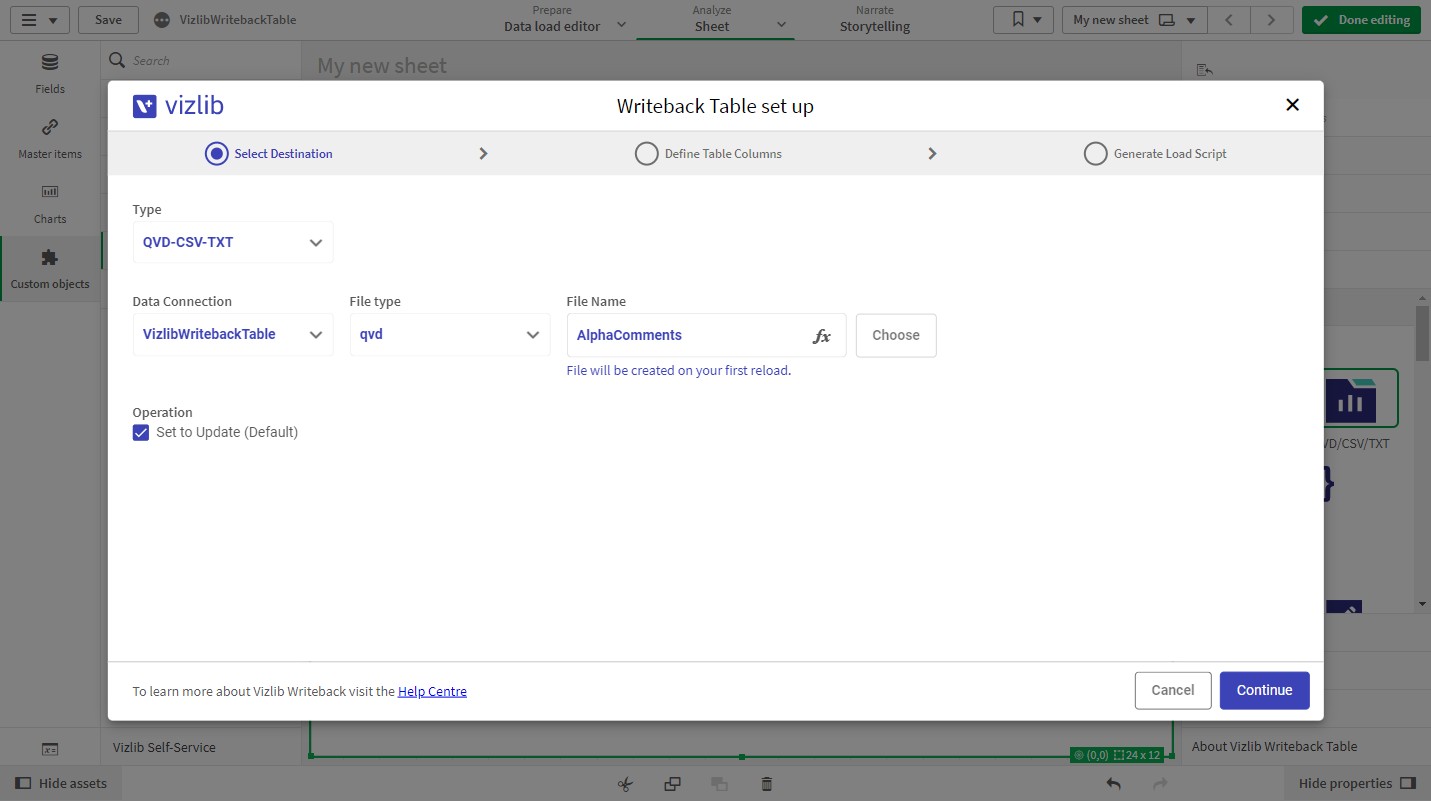
Figure 30: Select destination dialog in set up wizard
8.2 Define Table Columns
A common use case is to enrich data with comments from the users and other information. In this guide, we will use the Alpha dimension from the template data and create another field called Comment. We will store the Alpha and the Comment field in the AlphaComments.qvd. A real-world example would be a Product or a Customer etc instead of Alpha.
Check the Alpha field in the Fields section to the left, by clicking the check box or the name of the field.

Figure 31: Define Table columns dialog
Click the + button to add the Alpha field as a dimension to the Vizlib Writeback Table. Leave the type to Auto (wand icon), it will look at the field's values in the selected field and determine what is a good column type based on the data in the field. In this case, Alpha has text data and will convert it to a Text type column.

Figure 32: Define Table columns dialog with Alpha field
Let's add a new column where users can enter comments for the values in the Alpha field. Click the Create column button.
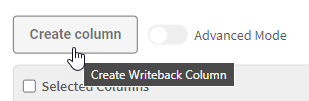
Figure 33: Create column button
Click the Text/Text Area option in the menu.
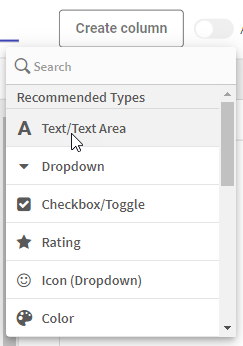
Figure 34: Column type menu
This will add a new text column to the column's definition with the name Text.

Figure 35: New text column
Rename the text column to Comment, which is a better fitting name.
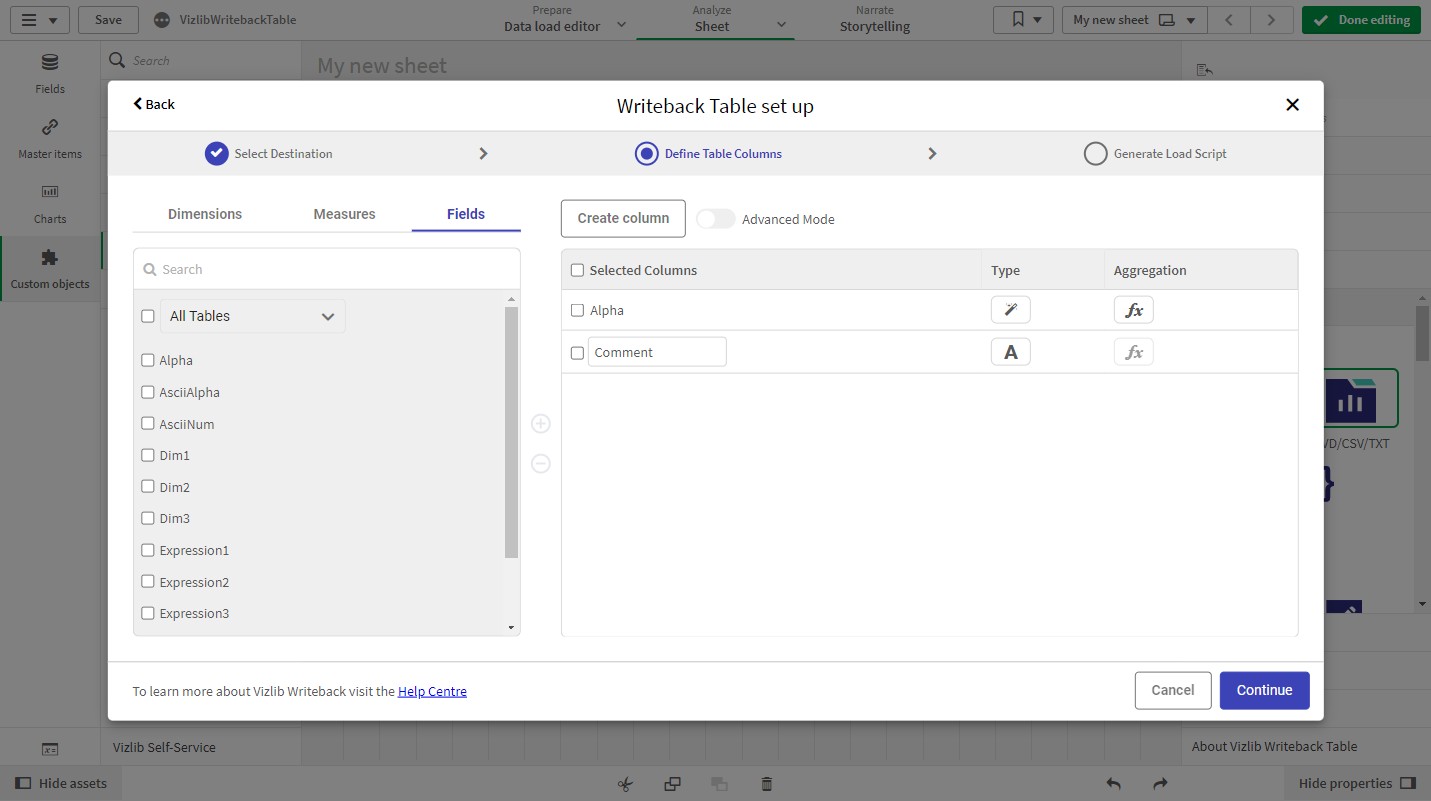
Figure 36: Renamed text column to Comment. Click Continue now that we defined our columns
8.3. Generate Load Script
We have configured the Vizlib Writeback Table to write to a new QVD (AlphaComments.qvd) and the QVD is not loaded in the load script. For changes to show up after writeback we need to load the data from the QVD into the application. The wizard lets you with a click of a button inject a load script to the application.
Note: If you are using an existing QVD that is already loaded into the application, this step should be skipped because injecting the load script will result in the data being loaded twice.
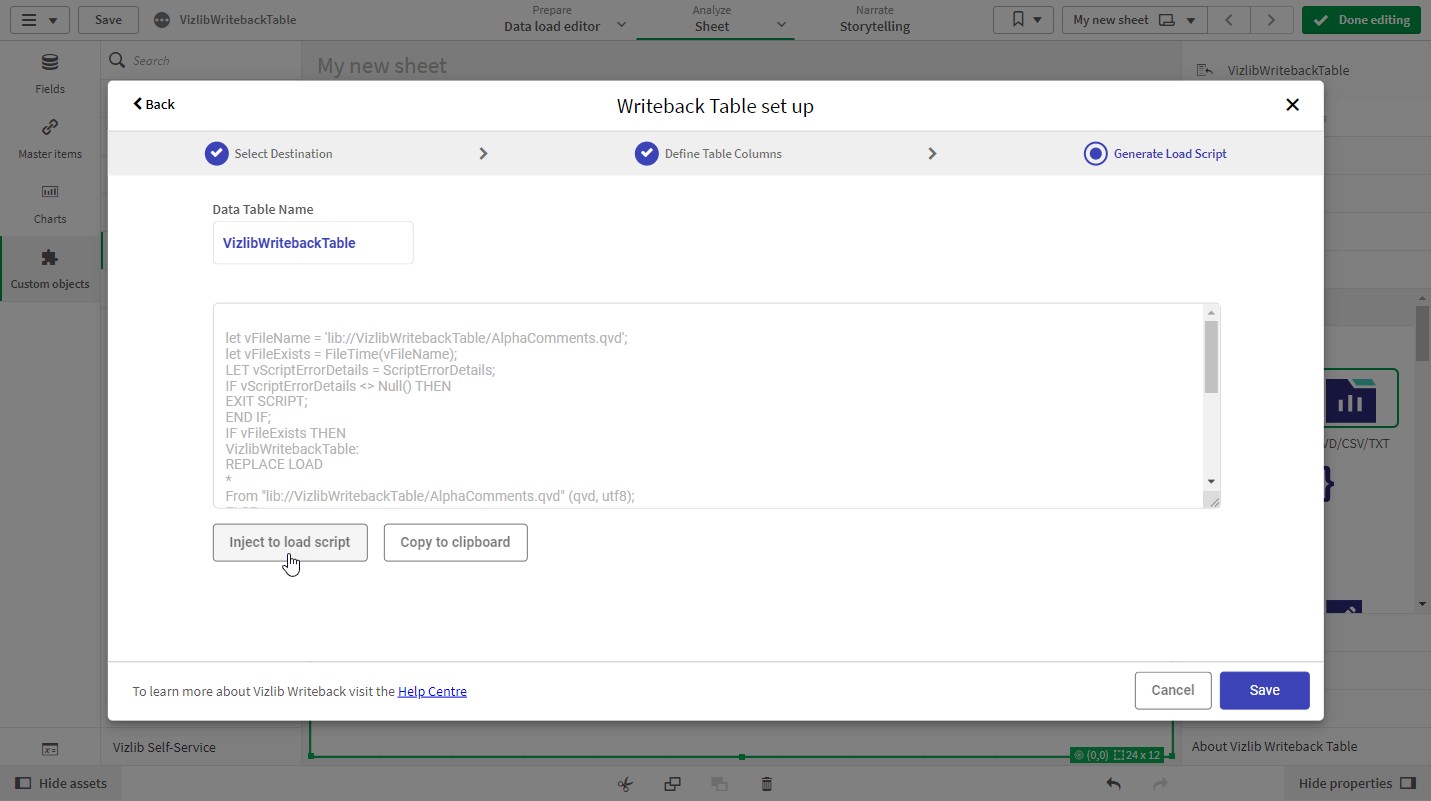
Figure 37: Inject to load script button
When the load script is successfully injected into the application a toast will show at the bottom of the screen with the message Script Injected.
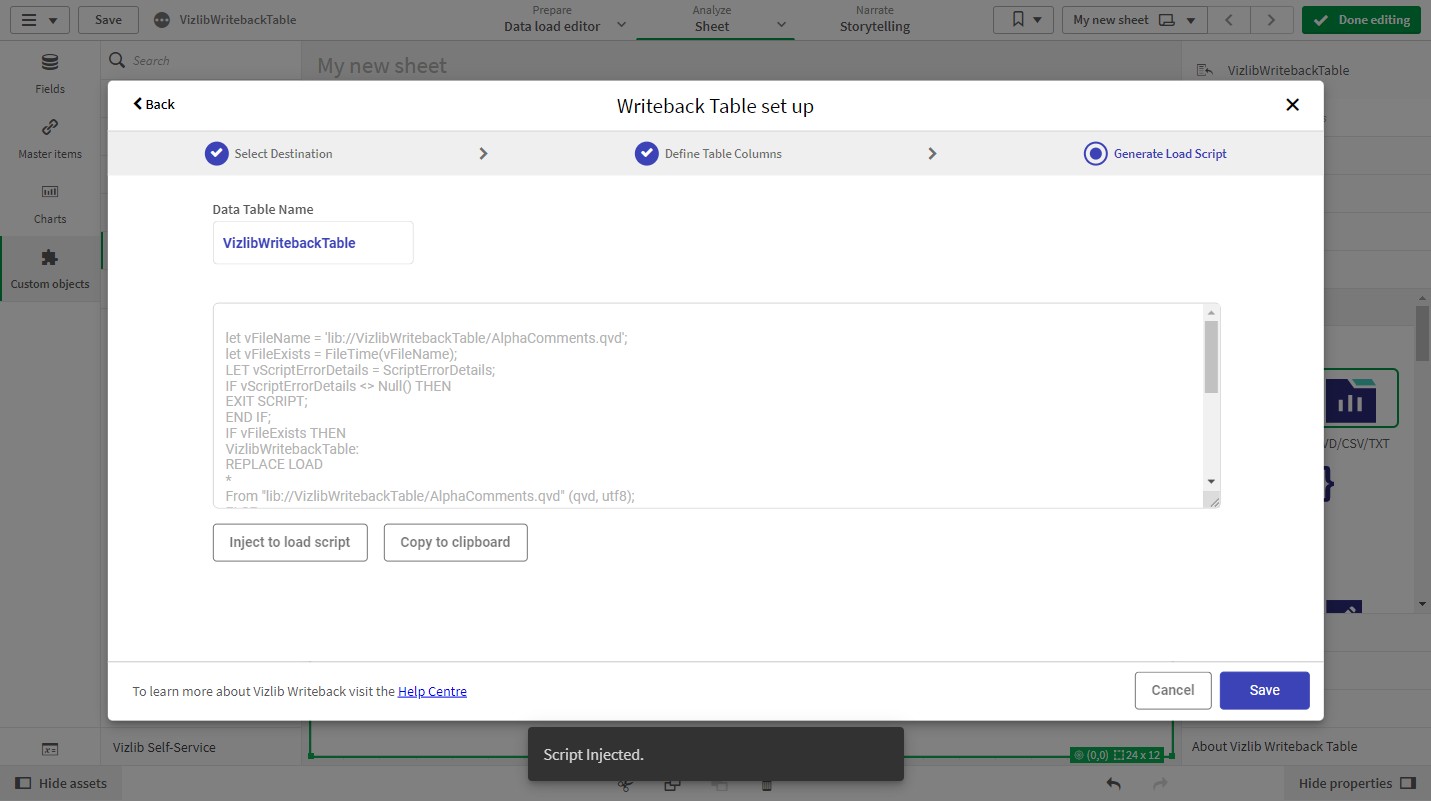
Figure 38: Script injected toast
Click the Save button to save your changes.
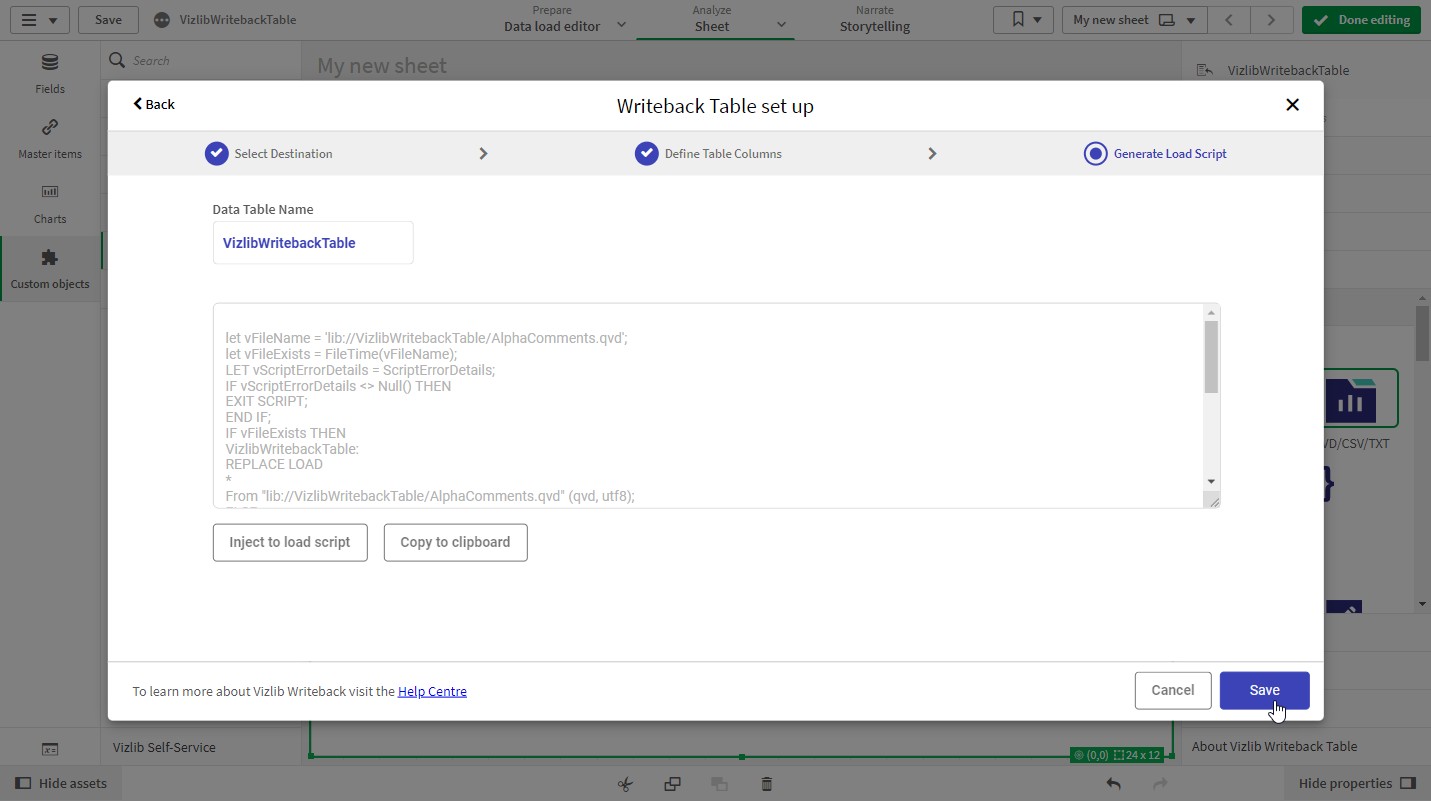
Figure 39: Save the Setup wizard dialog
Qlik Sense Desktop does not auto-save your changes so now it's a good time to save the application by clicking the Save button in the top left corner. Do this before you do your first write-back, otherwise, your changes might be lost after the application is saved after reload.
You might notice that the Alpha column is not editable and the Comment column is editable. These are the default settings for data-driven columns (fields, dimensions, and measures) and non-data- driven columns. In our example here this is what we want so we can leave it.
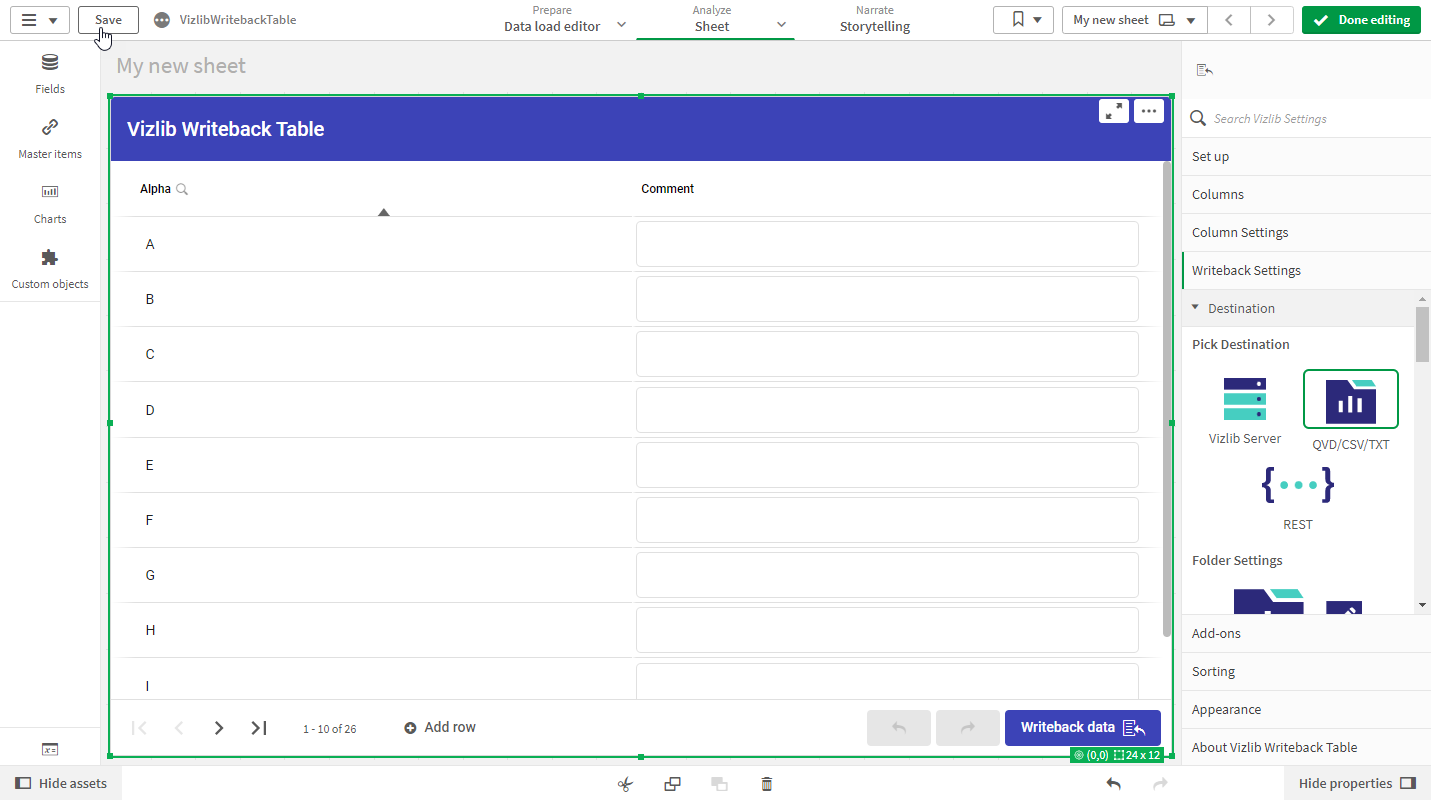
Figure 40: Save the application
If you would like to change that it's possible to do that with the Editable if property in the column's property panel section under the Data section (Figure 41).
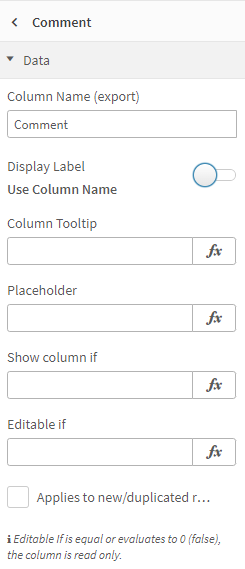
Figure 41: Editable if
Go to the Data load editor to inspect that the load script is injected. A new section should be added to your app's load script and it should look something like Figure 42.
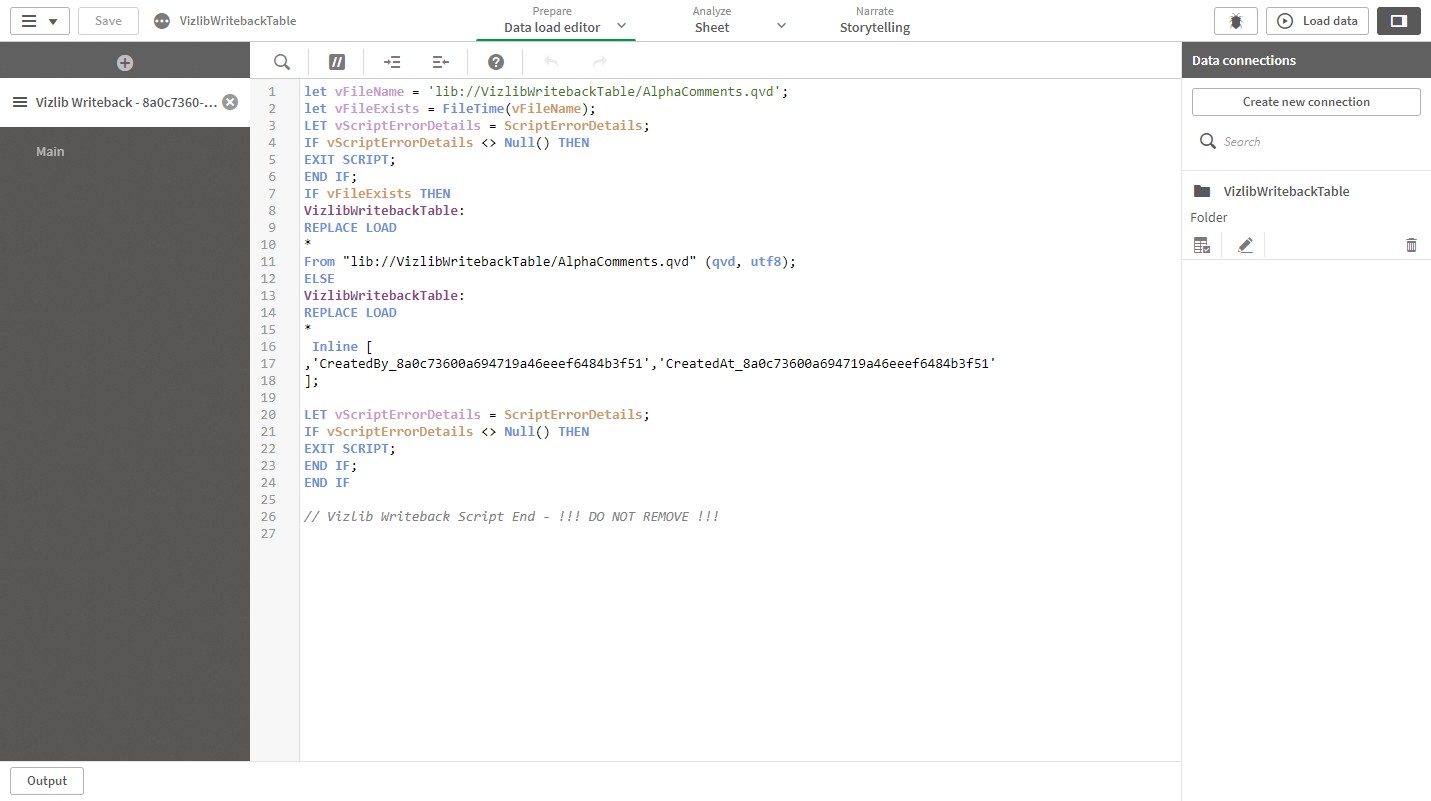
Figure 42: Injected load script
9. Write Back Data
At this point, the Comment column is a non-data-driven column (it's not a dimension, field, or measure). Once we do the write-back and the Comment field is loaded from the QVD to the data model the Vizlib Writeback Table will convert the column to a dimension column, a data-driven column, and will have the values from the field in the data model. This happens automatically if there is a field in the data model that matches a column name in the Vizlib Writeback Table.
If you want to prevent this you should uncheck the Convert to field property in the properties of the column under the Data section.
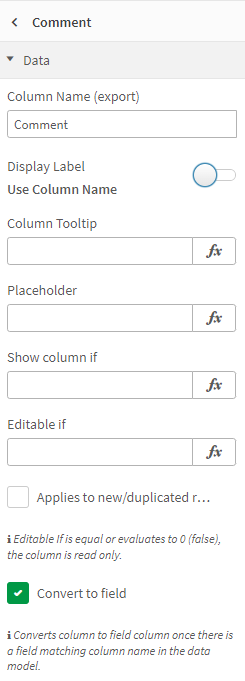
Figure 43: Convert to field
Go back to the sheet and exit edit mode by clicking the Done editing button.

Figure 44: Done editing button
Note: Remember to save the application if you made changes to the application or the objects before you do a writeback.
Add a comment to the first row with Alpha value A.
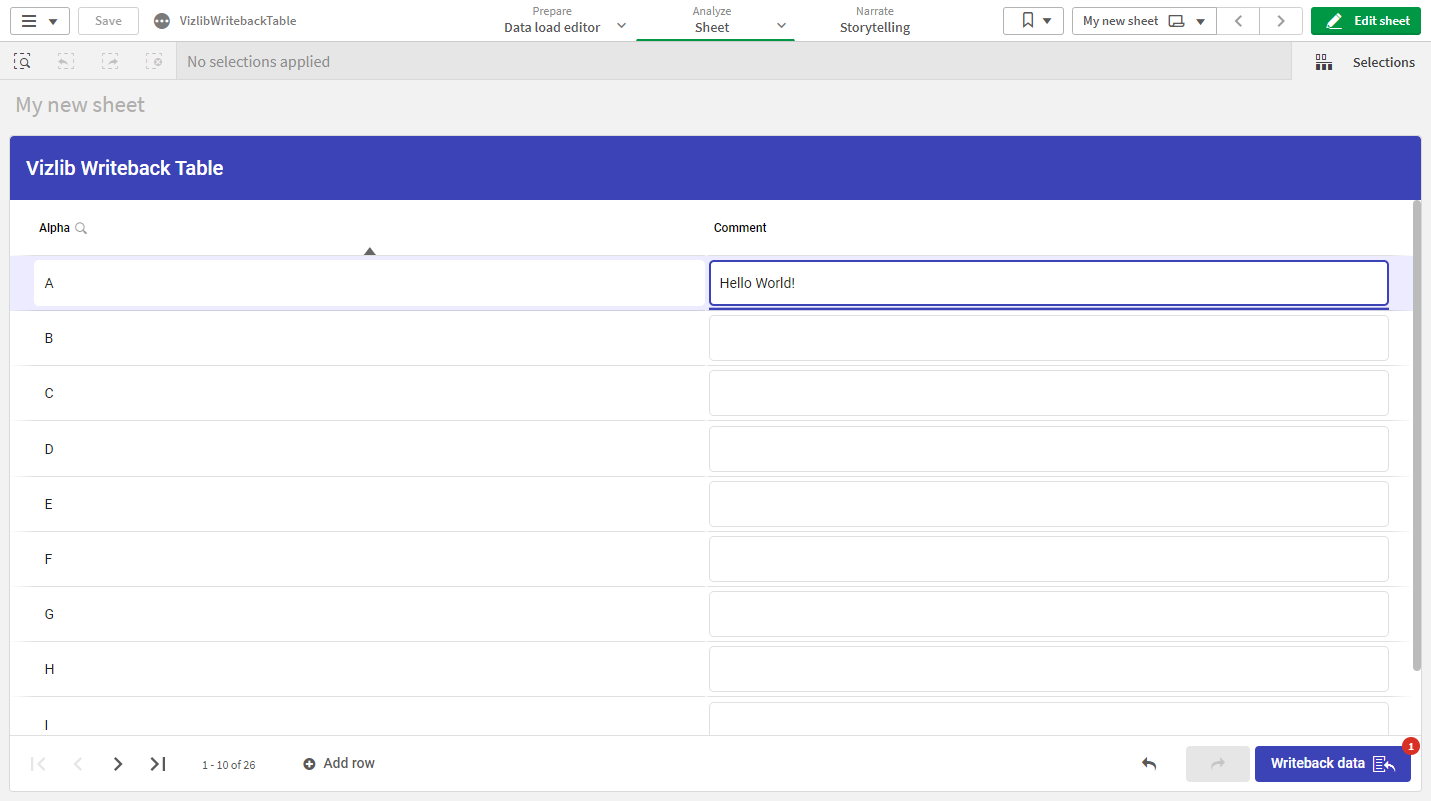
Figure 45: Comment for Alpha value A
Click the Writeback data button to write back your first comment.
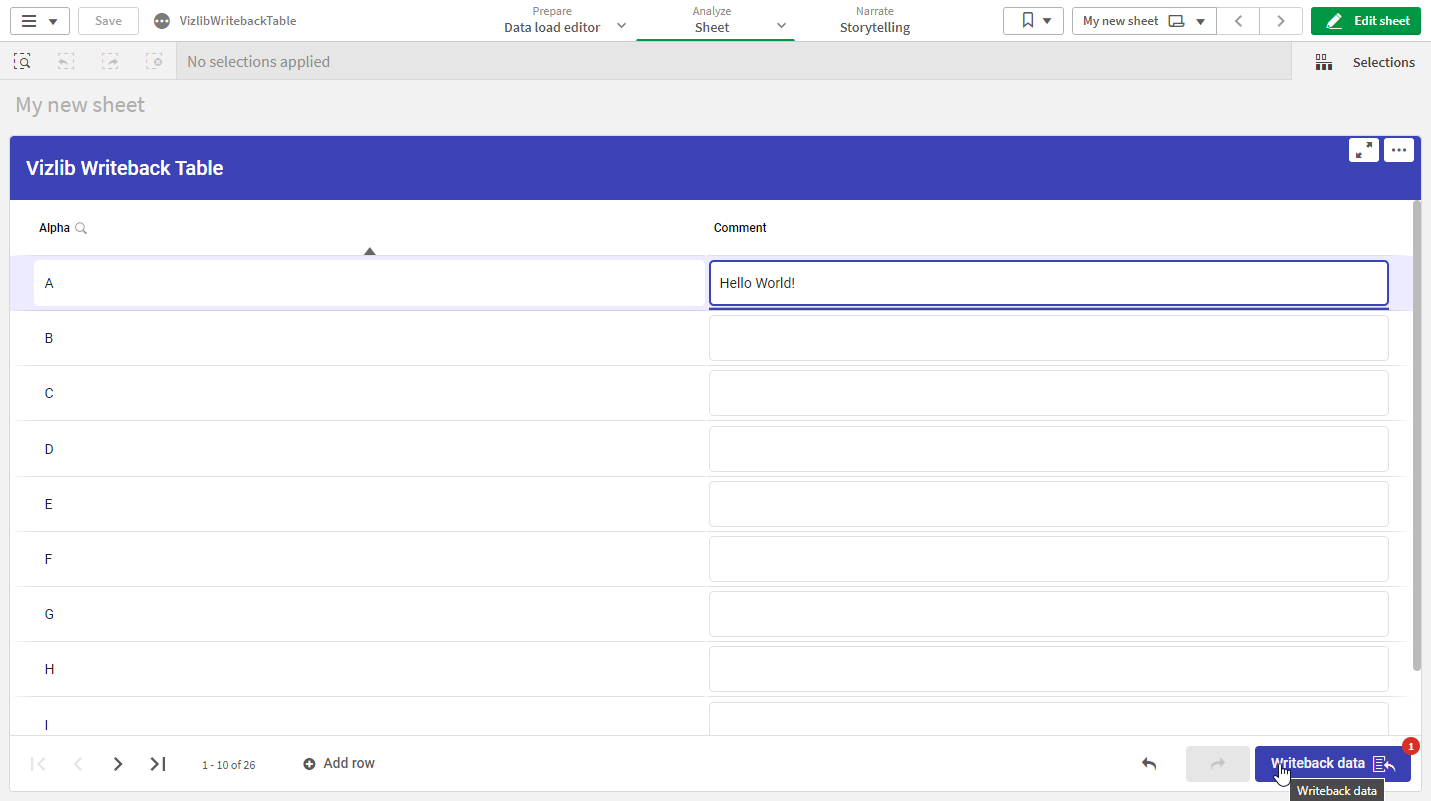
Figure 46: Writeback data button
Since we are writing back to a file that does not exist yet, we will be prompted if we want to create the file. This dialog is possible to suppress, a good option if you are using dynamic filenames and Insert operation type.
Click the Ok button to proceed.
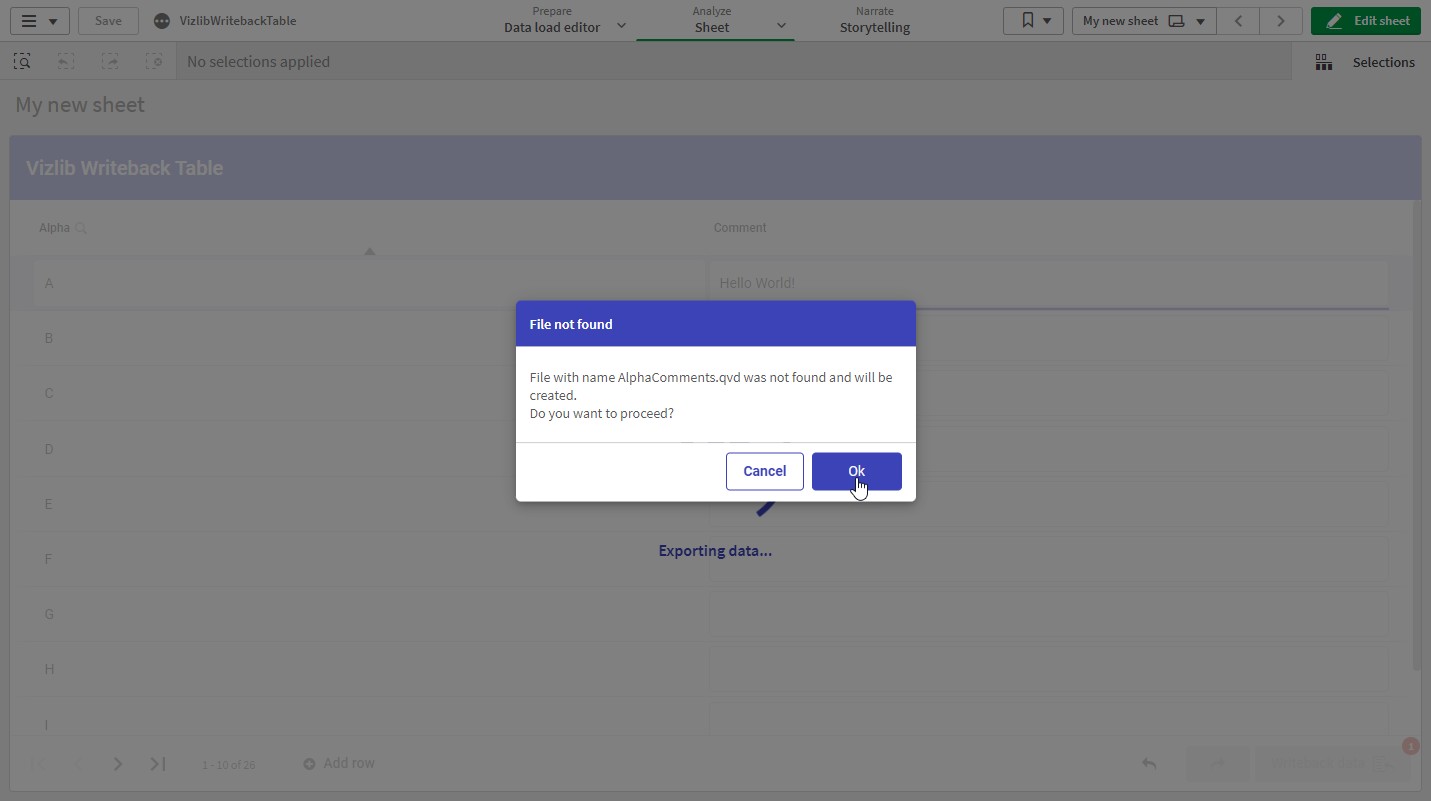
Figure 47: File not found dialog
Once the writeback process is done and the app is reloaded and saved. The comment you made should be persisted in the QVD and loaded to the data model and show up in the Vizlib Writeback Table, as in Figure 48.
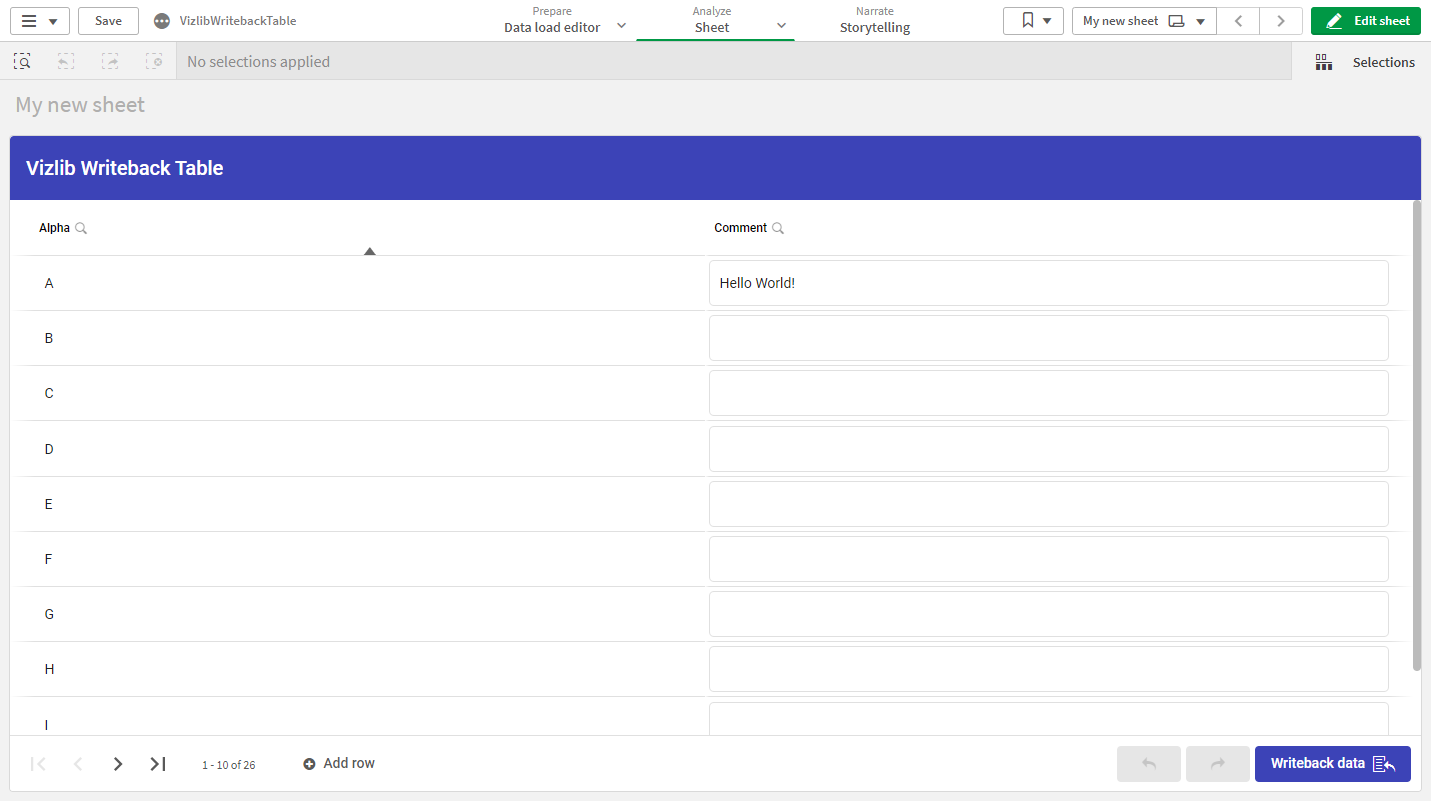
Figure 48: Comment persisted and visible in Vizlib Writeback Table
The Comment column has now been converted to a Field column, which is a data-driven column and populated with the data from the Comment field in the data model of the application. To check this enter edit mode and click the Vizlib Writeback Table and click the Columns section in the property panel and click the Comment column.
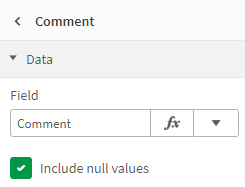
Figure 49: Field column Comment
10. Add a New Column
It is not uncommon that your requirement changes over time and you might need to add columns to your Vizlib Writeback Table. This is what you would do to change the columns and the structure of the QVD. Go to the Set up section in the property panel of the Vizlib Writeback Table we created in the previous steps. Click the Open Set up button to open the Writeback Table set up wizard again.

Figure 50: Open Set up button in the Set up section of the property panel
Click the Continue button or the Define Table Columns label in the top stepper menu.
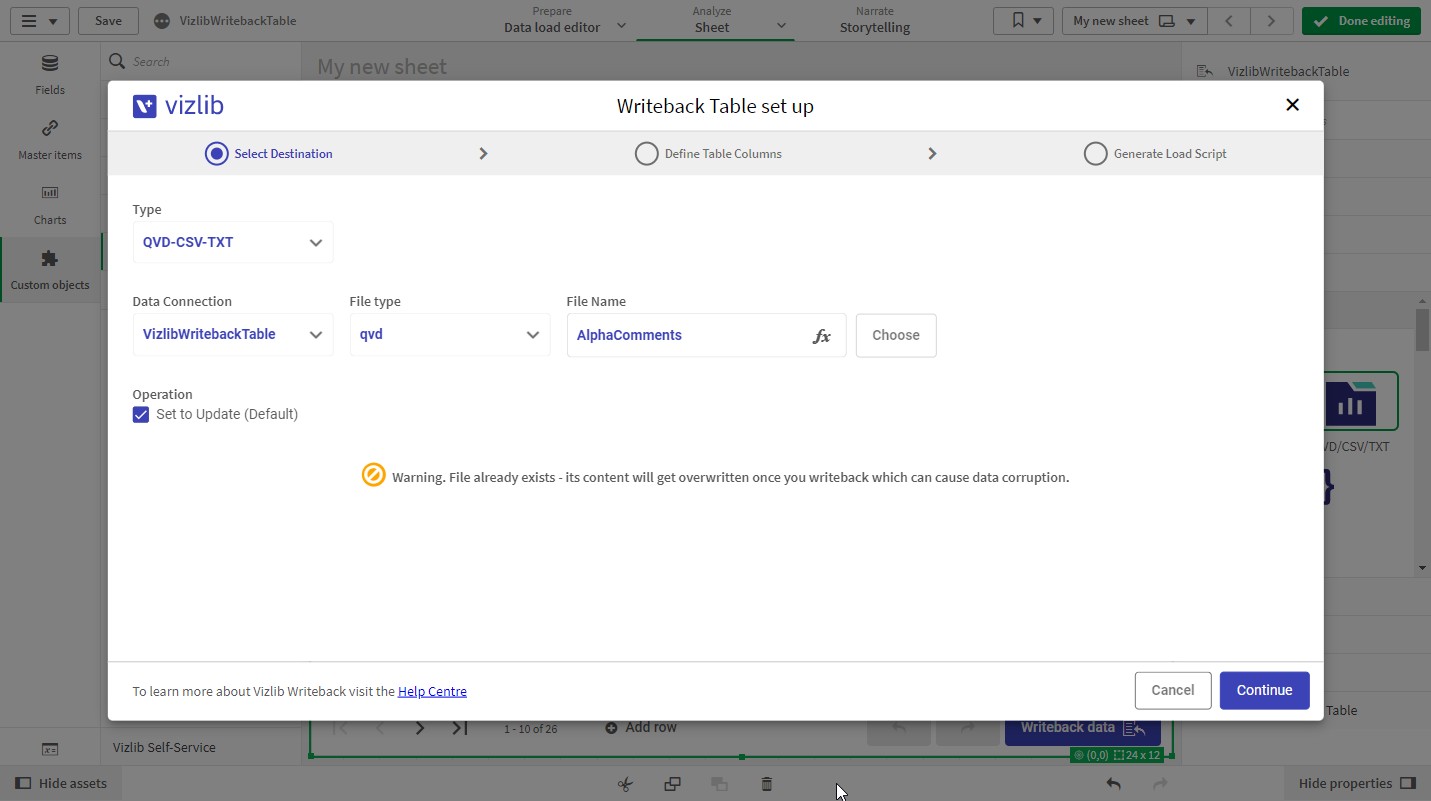
Figure 51: Select Destination
Click the Create column button.
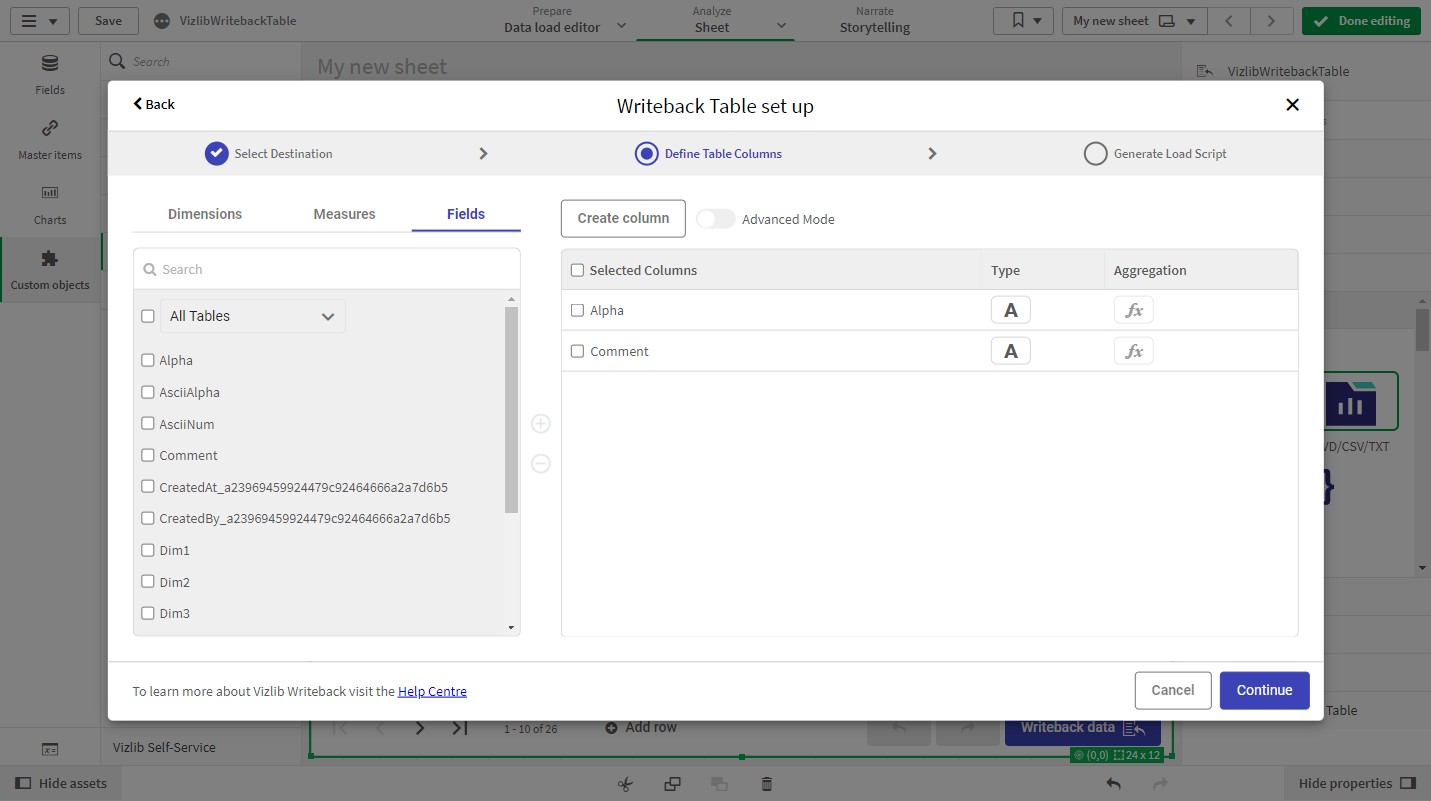
Figure 52: Define Table Columns
Select the Checkbox/Toggle option in the drop-down menu.
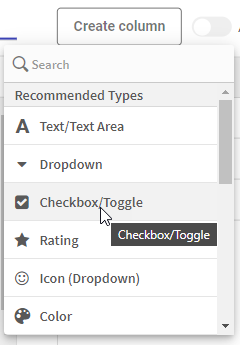
Figure 53: Column type options menu
This will add a new column of the type Checkbox. Click Continue.
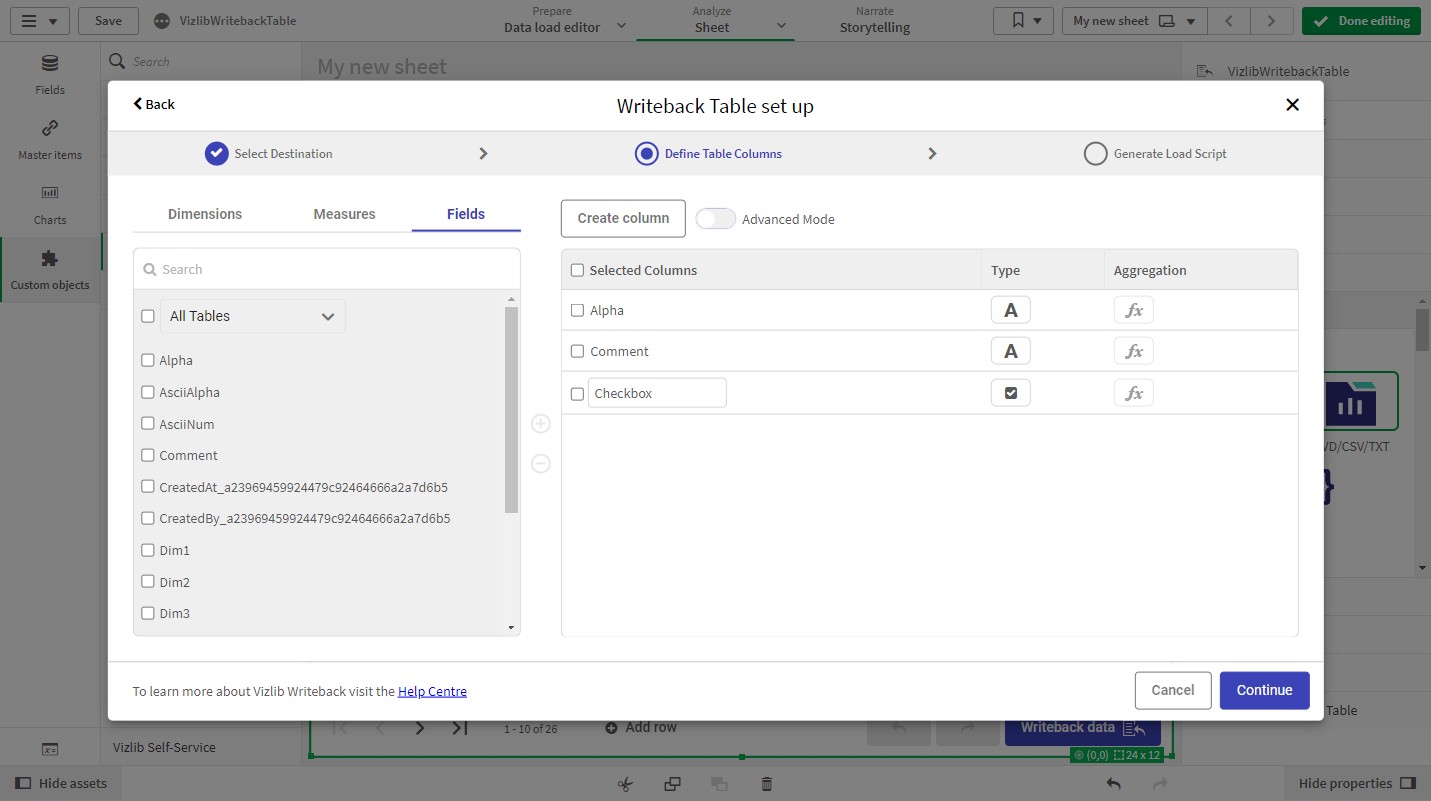
Figure 54: New check box column
The injected load script is using a star load ( Load *) so changing the structure of the columns does not require an update of the load script. Click the Save button to save your changes and close the wizard.
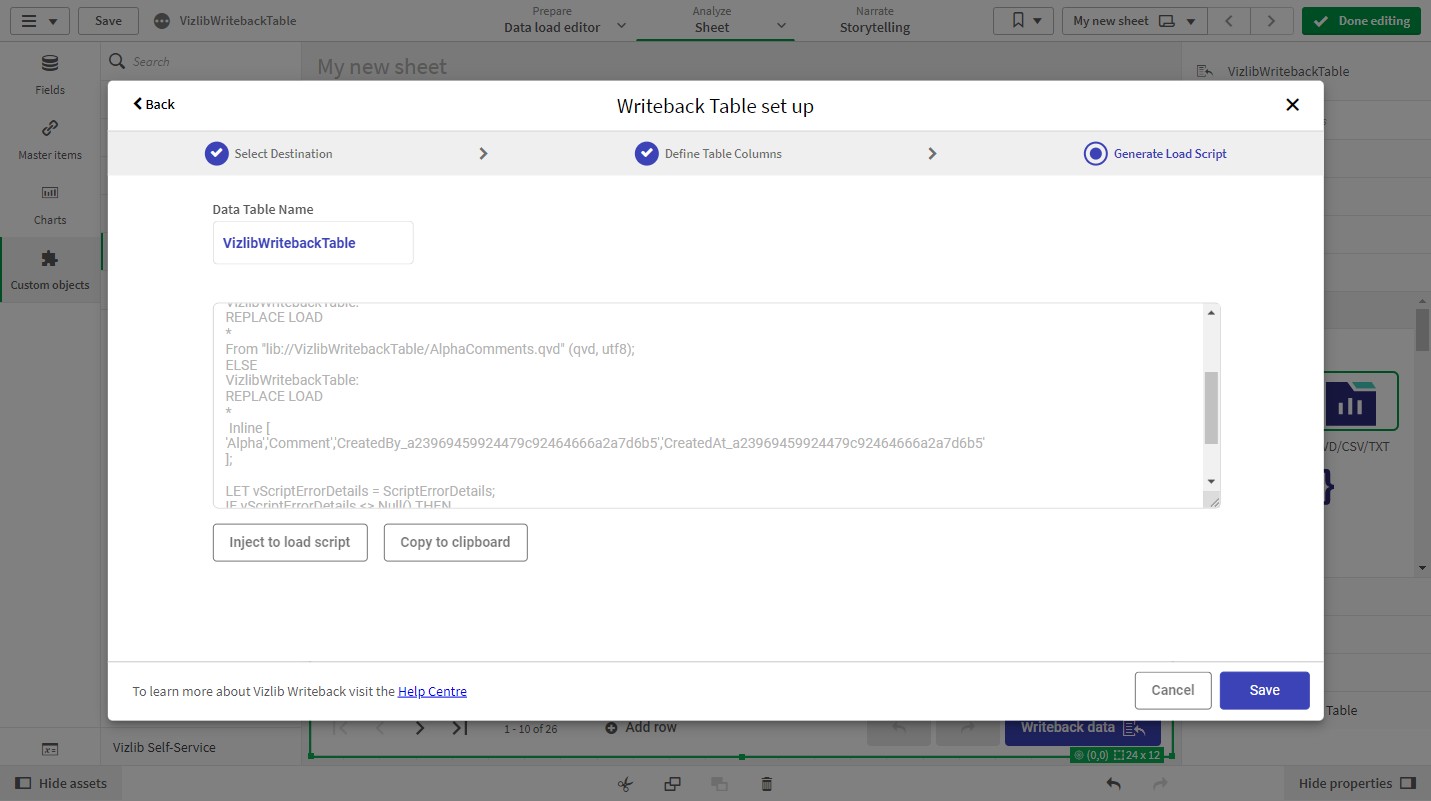
Figure 55: Generate Load Script
Now you should see the new Checkbox column in the Vizlib Writeback Table.
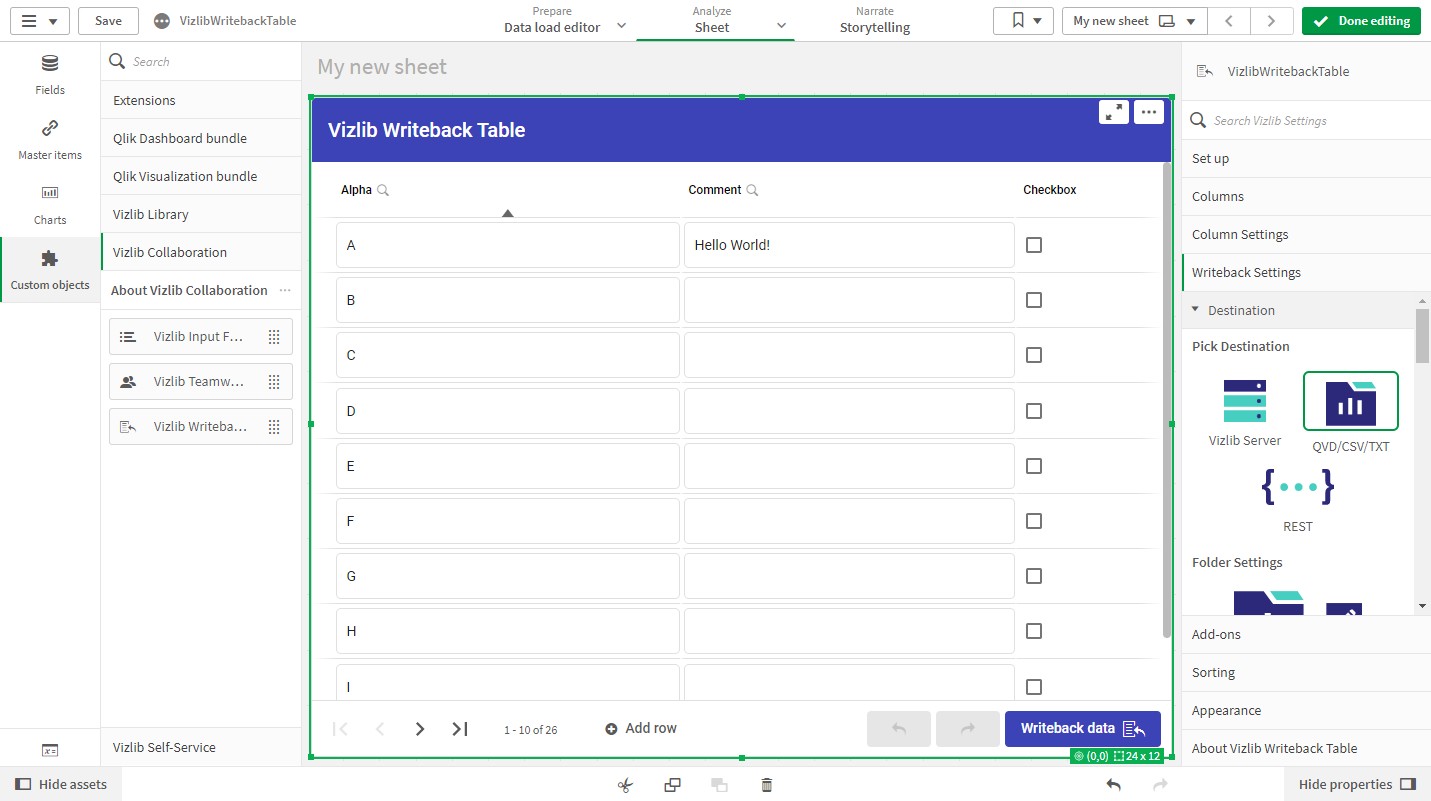
Figure 56: Vizlib Writeback Table with checkbox column
11. Write Back Data to Modify the QVD Structure
The Checkbox column does not exist in the data model or in the QVD yet. To add the new column we can do a write-back and we will be prompted if we want to add the new column when it does not exist in the QVD. Check the Checkbox for Alpha value A and click the Writeback data button.
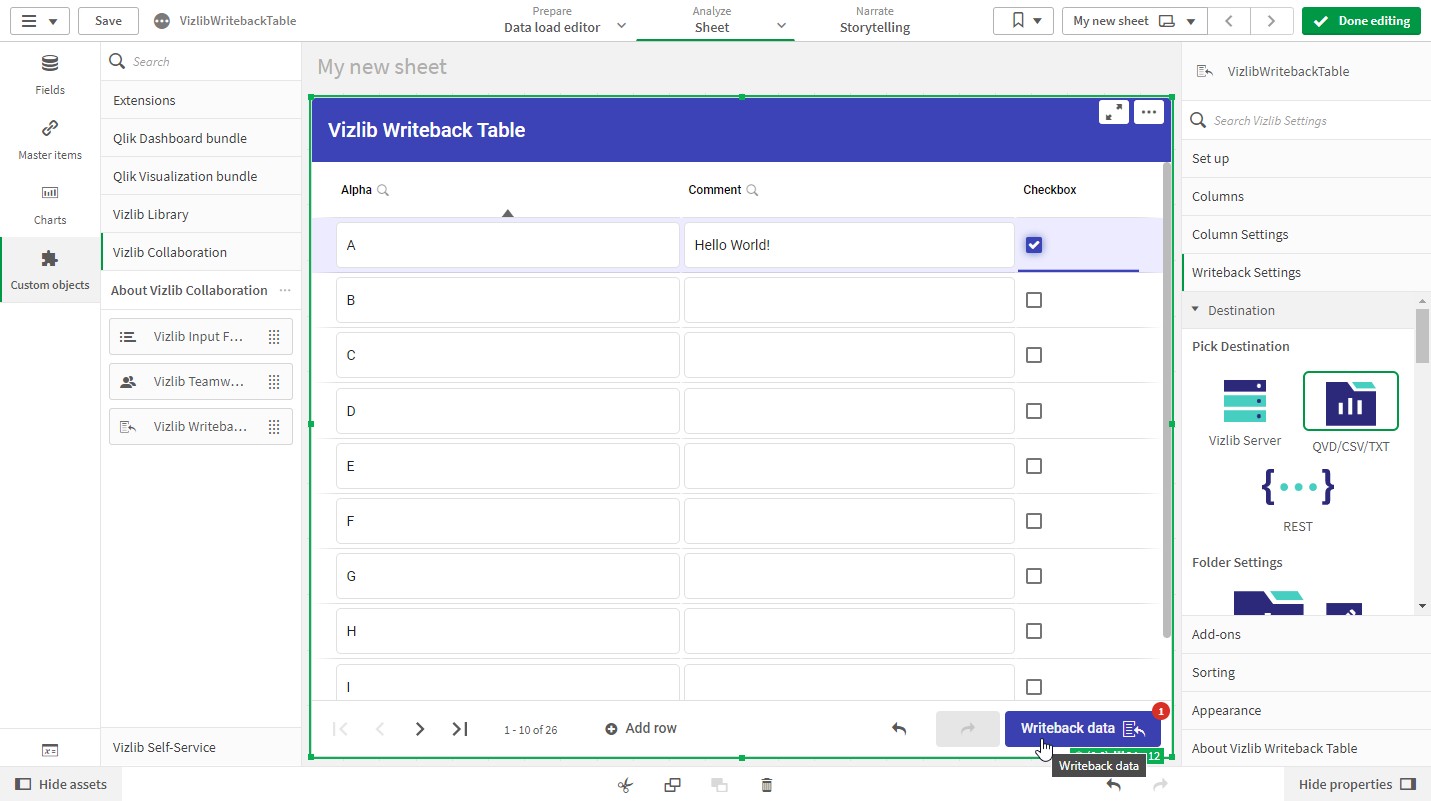
Figure 57: Writeback Checkbox value to add the new field to the QVD
Since the fields in the Vizlib Writeback Table and the fields in the QVD do not match you are prompted with a dialog if you want to add the new column to the QVD. Click the Ok button to proceed.
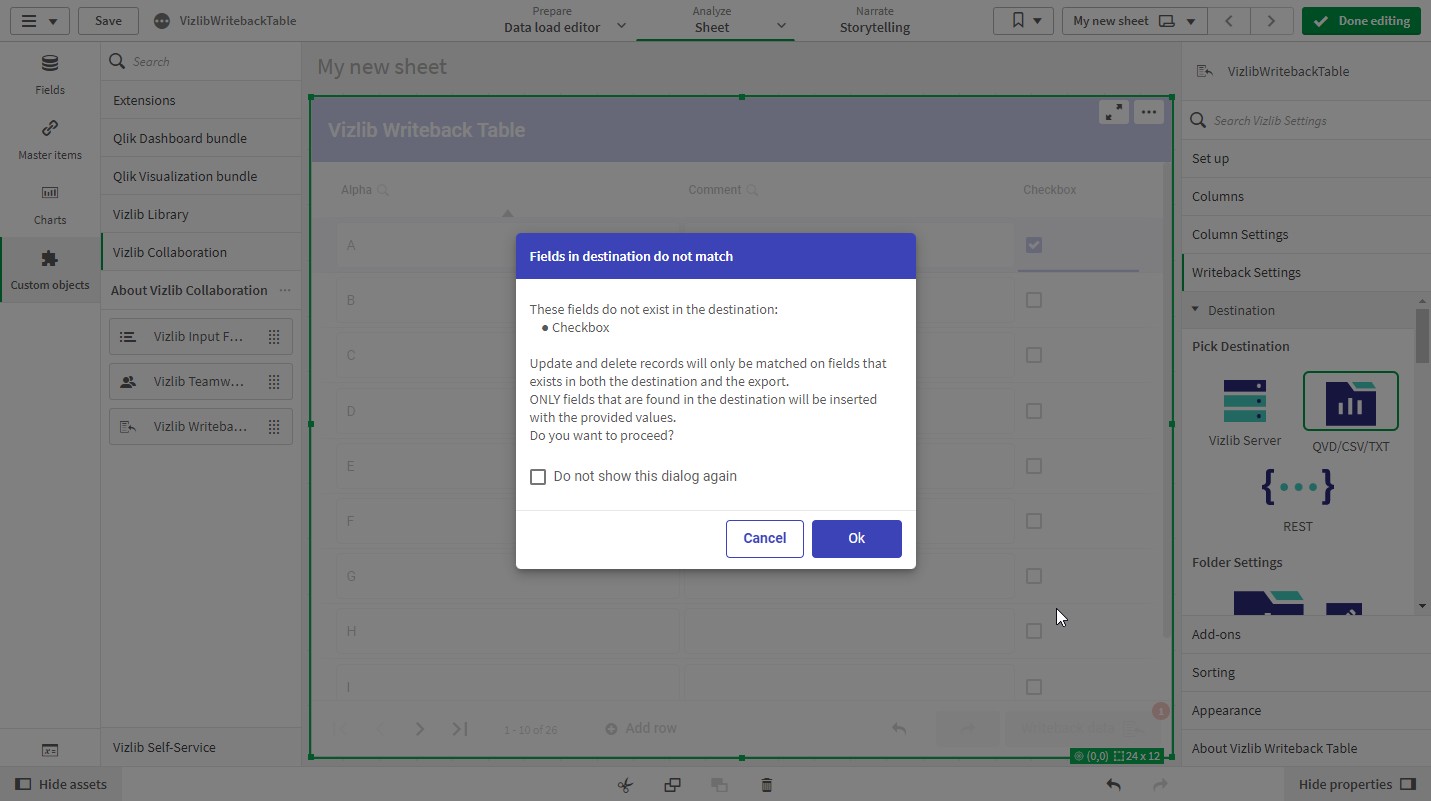
Figure 58: Fields in destination do not match dialog
After the writeback process is done you should see the change in the Checkbox column persisted in the data model.

Figure 59: Checkbox for Alpha value A checked
We can verify that the QVD structure changed with the added column and changed data. Use the Data load editor or a tool like the EasyQlik QViewer to inspect the QVD. EasyQlikQViewer can be downloaded from here.
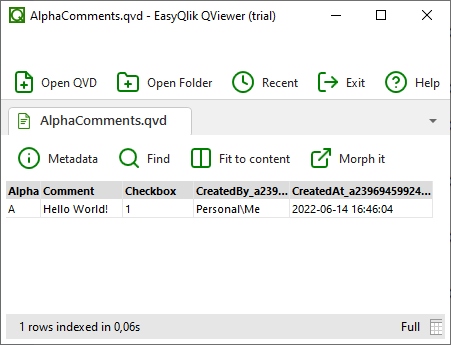
Figure 60: AlphaComments.qvd
12. Rename the Checkbox Column
What if you want to rename a column in the QVD? You can't just rename the column, you have to overwrite the QVD with the new structure. This is also what you need to do if you want to remove a column from the QVD. These easy steps show you have to do that. Let's start with renaming the Checkbox column to Important. Enter Edit mode and click the Checkbox header in the table to navigate to the column properties of the Checkbox column. This is a nice shortcut that saves a lot of clicks.
Note: It's also possible to change the structure of the QVD with the load script or delete the QVD and recreate it on the first write-back. This is not covered in this guide.
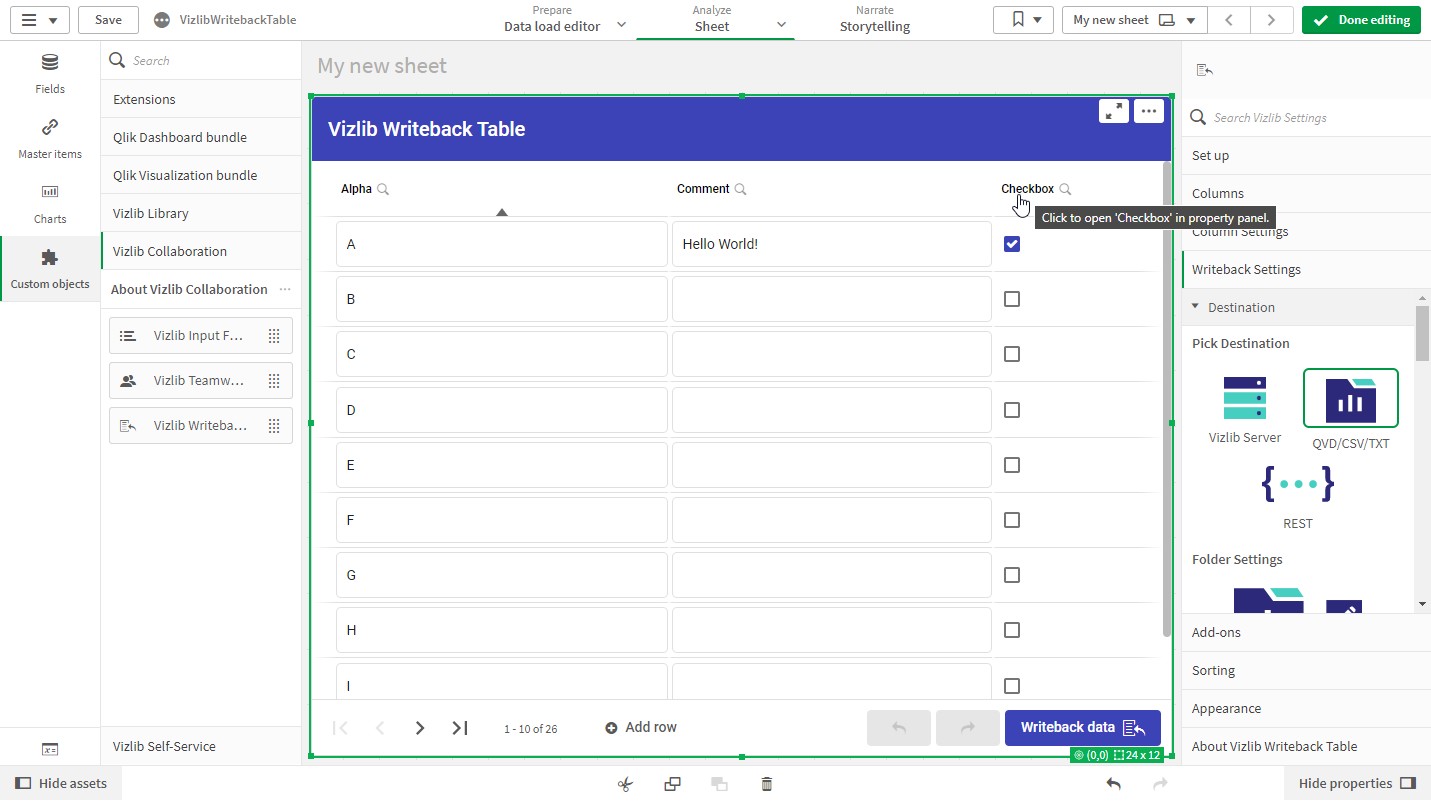
Figure 61: Column header shortcut
Expand the Data section.
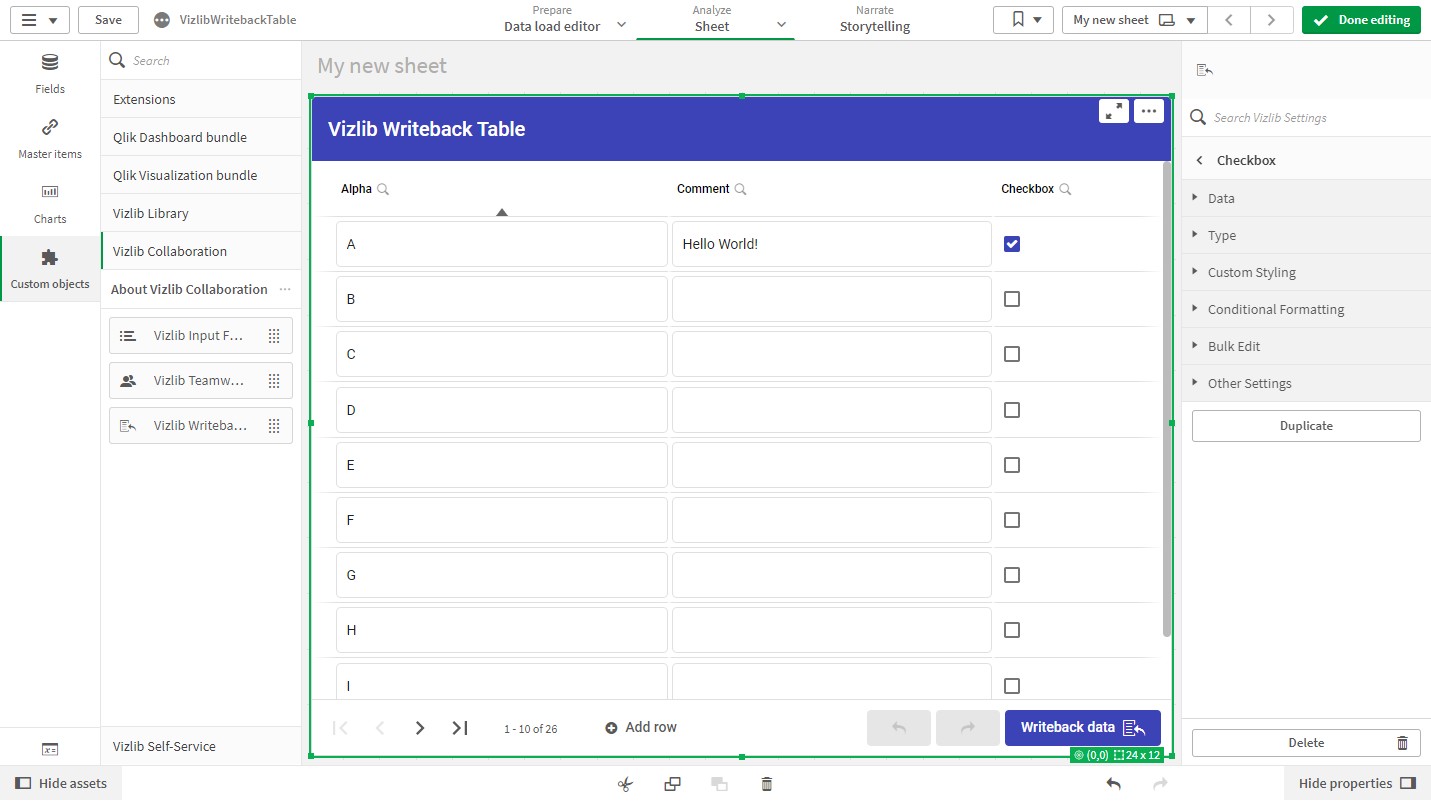
Figure 62: Checkbox column properties
Change the Column Name (export) property from Checkbox to Important.
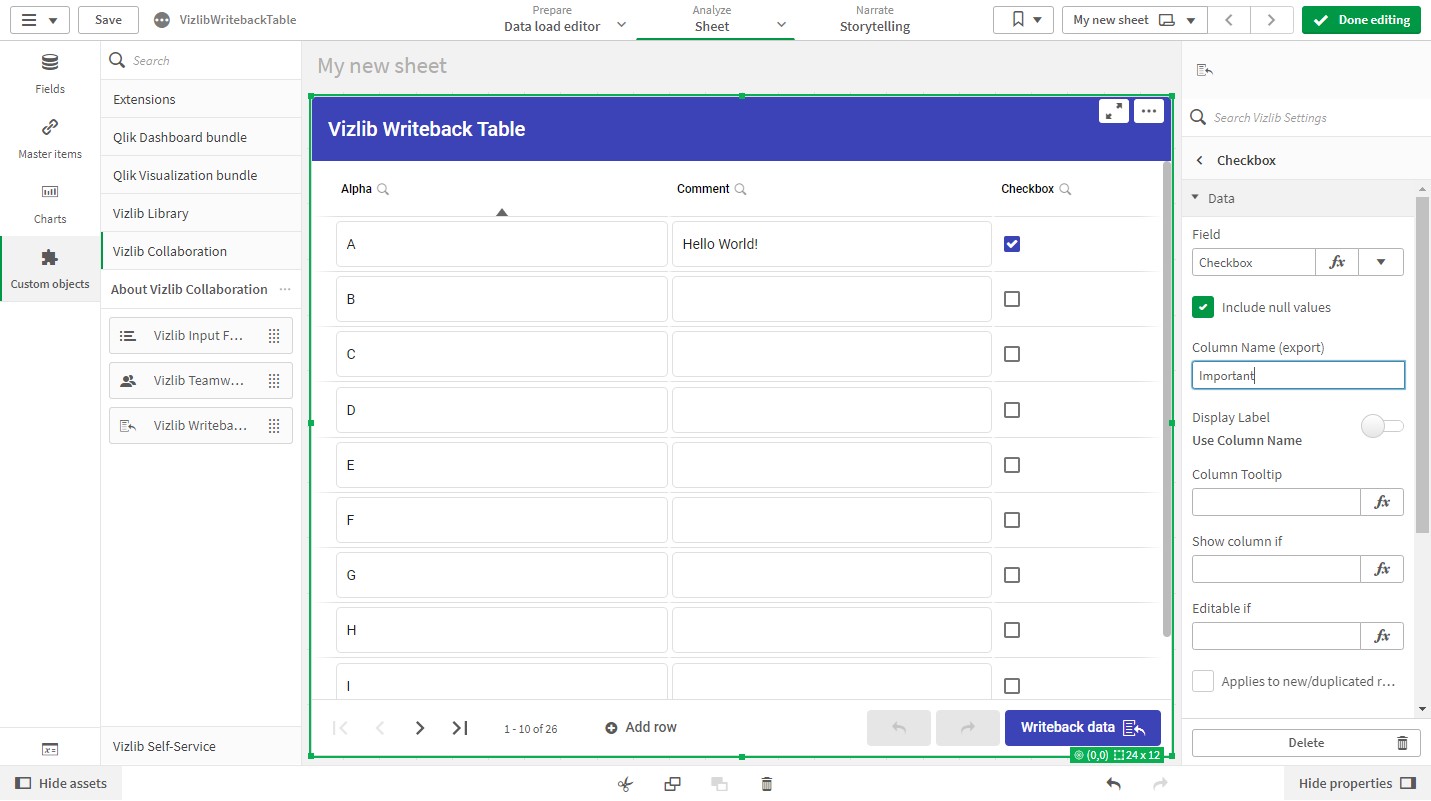
Figure 63: Important Column Name (export)
13. Modify the Audit Columns
While we changing the structure of the QVD we can also simplify the audit column names. We plan to only have one Vizlib Writeback Table in this application so we can remove the guid part that is appended to the end of the audit column labels to make them distinct and not cause synthetic keys in the data model.
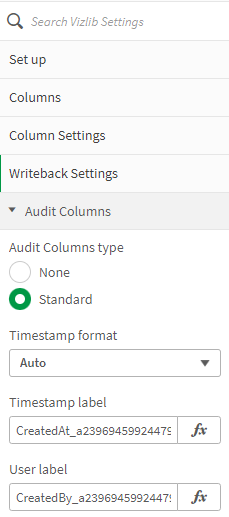
Figure 64: Audit column labels with guid
Remove the guid and the underscore for both the Timestamp and User label.
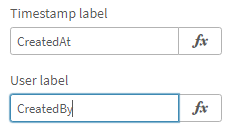
Figure 65: Audit column labels without guid
14. Write Back Data with the Overwrite Operation to Modify the QVD Structure
Change the Operation type to Overwrite in the Writeback Settings section of the property panel.
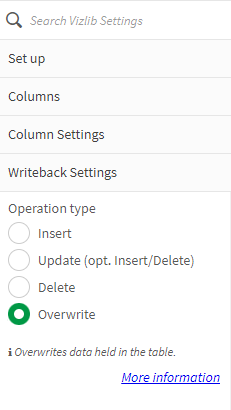
Figure 66: Operation type Overwrite
If we were to do a write-back all the Alpha values will be added to the QVD with empty comments. To keep the AlphaComments.qvd small we should filter on only values in Alpha that has a comment or is marked as important.
Note: If the qvd uses audit columns this operation will set all the edited values timestamp to the same value and your user. This is probably not acceptable in production, where you want to make changes to the qvd in the Data load editor instead. This example is for prototyping where a change like this will not cause any issues.
Click the magnifying glass icon button next to the Alpha table header to open the Selection Listbox for the Alpha field.
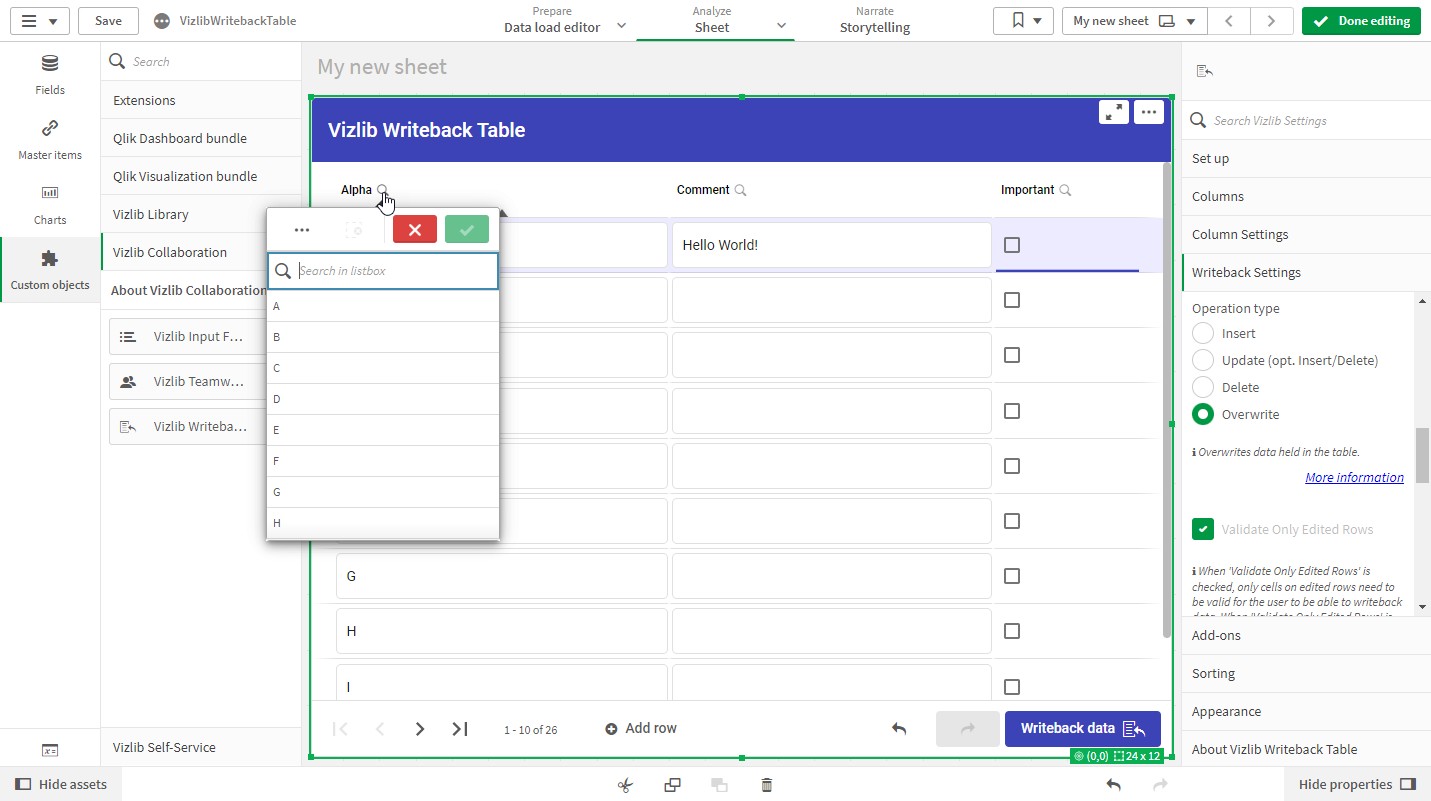
Figure 67: Selection Listbox Alpha
Select value A and click the green checkmark to confirm your selection.
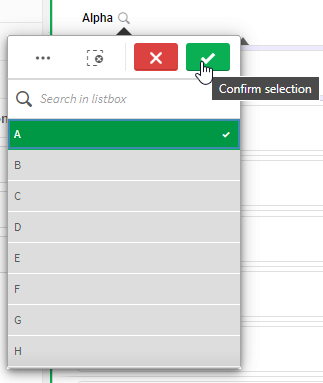
Figure 68: Confirm selection
This will reduce the rows in the Vizlib Writeback Table to only show the row where Alpha is equal to A. When using the Overwrite operation it will overwrite the data in the QVD with the rows and values that are currently in the table. It will also only write back the column definition of the Vizlib Writeback Table, so it works great if you want to rename or remove columns.
Click the Writeback data to update the AlphaComments.qvd with the new structure and keep the comment for Alpha value A.
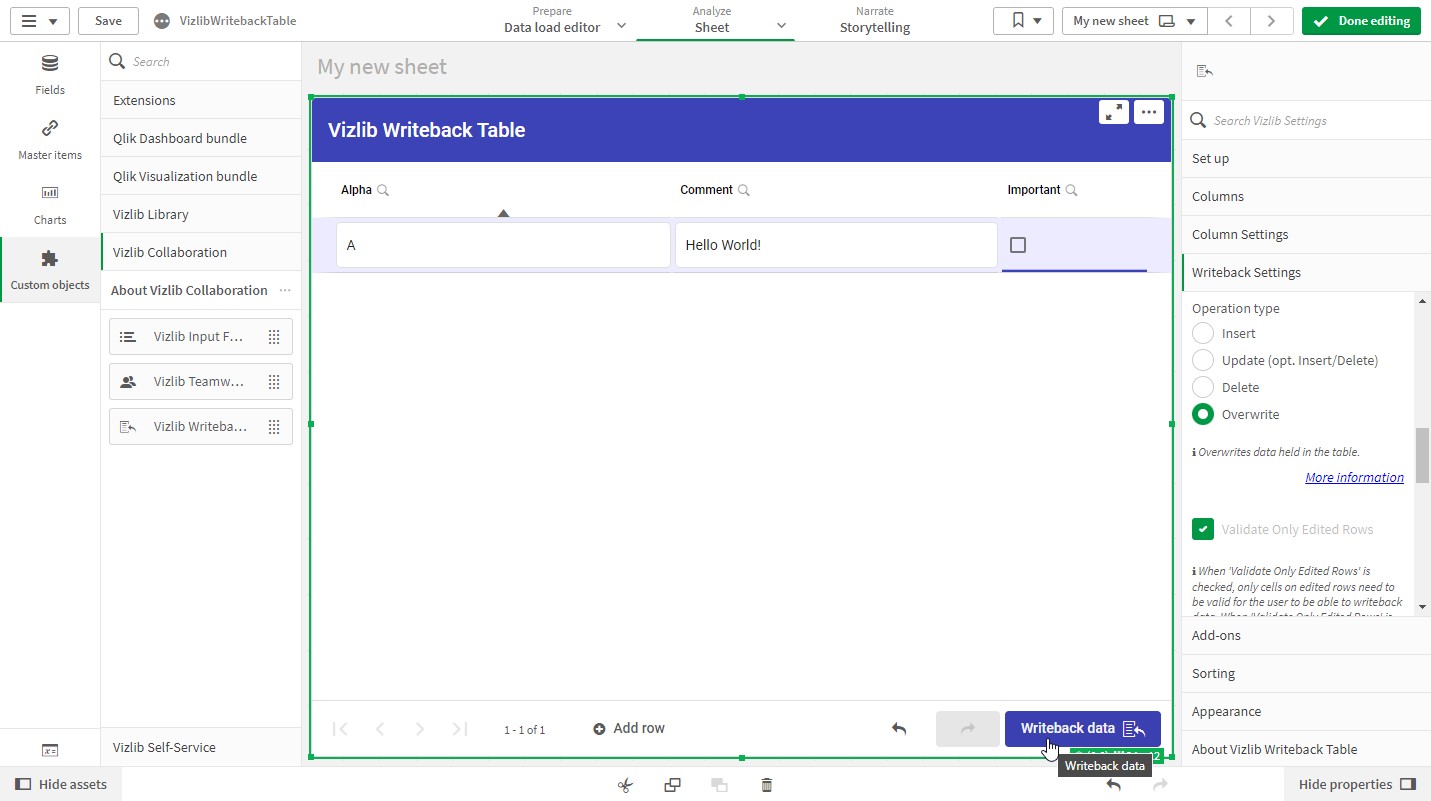
Figure 69: Row where Alpha equal to A
Inspect the AlphaComments.qvd to verify that the changes are applied and the data is kept.
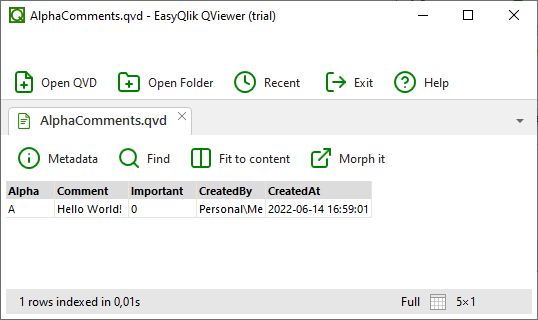
Figure 70: AlphaComments.qvd with changed structure and data
15. Change it Back to Update Operation
Now that the QVD and data model are updated with our changes we should change the operation type back to Update. Navigate to the Writeback Settings section in the property panel and scroll down to Operation type. Click the Update (opt. Insert/Delete) option.
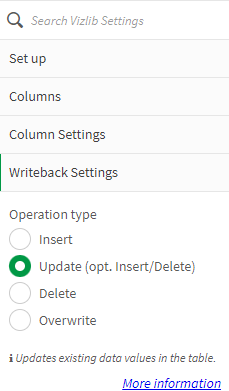
Figure 71: Operation type Update
Let's verify that everything is working as we expect. Add some new comments and mark a row as important. Click the Writeback data button.
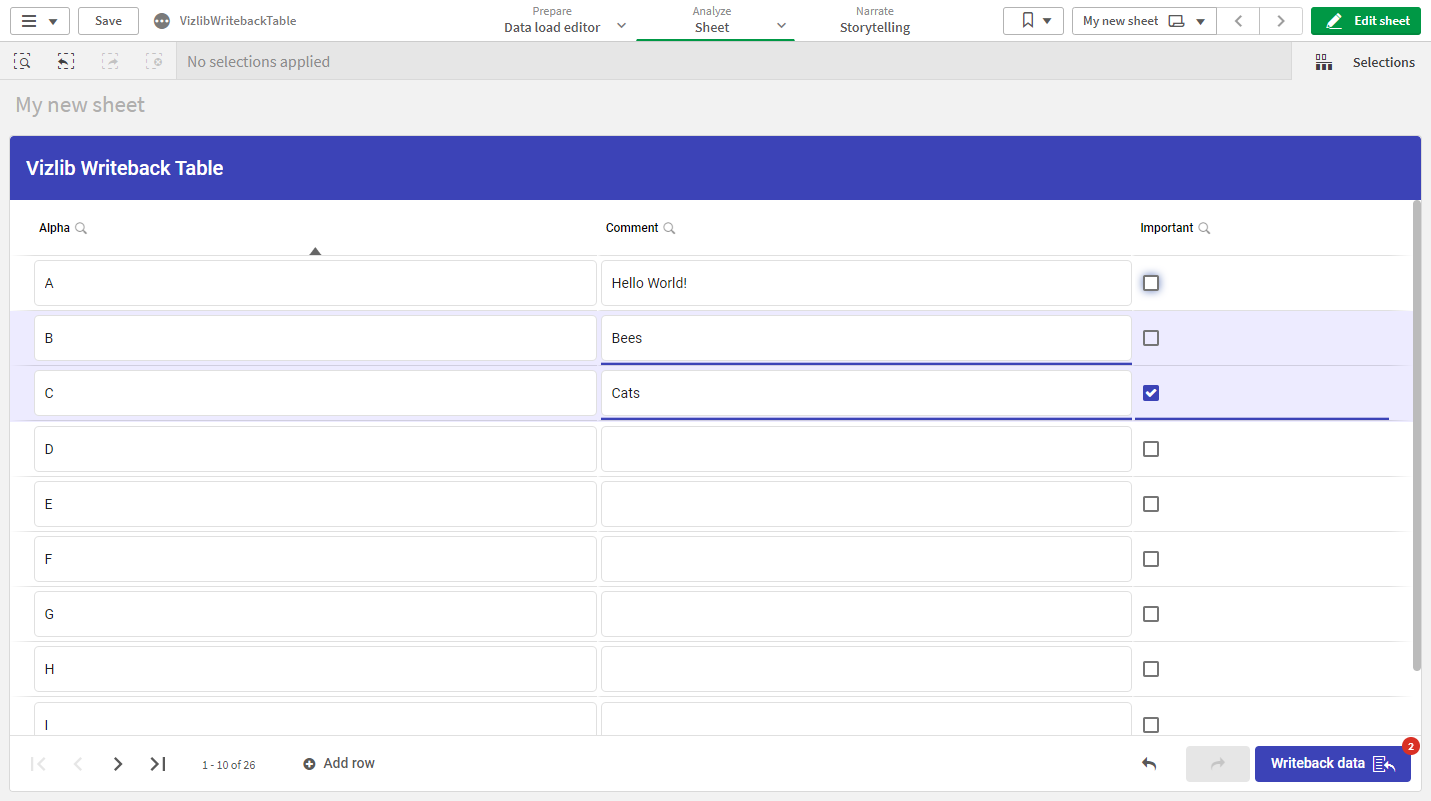
Figure 72: New comments and Important rows marked
Verify that the changes are persisted.
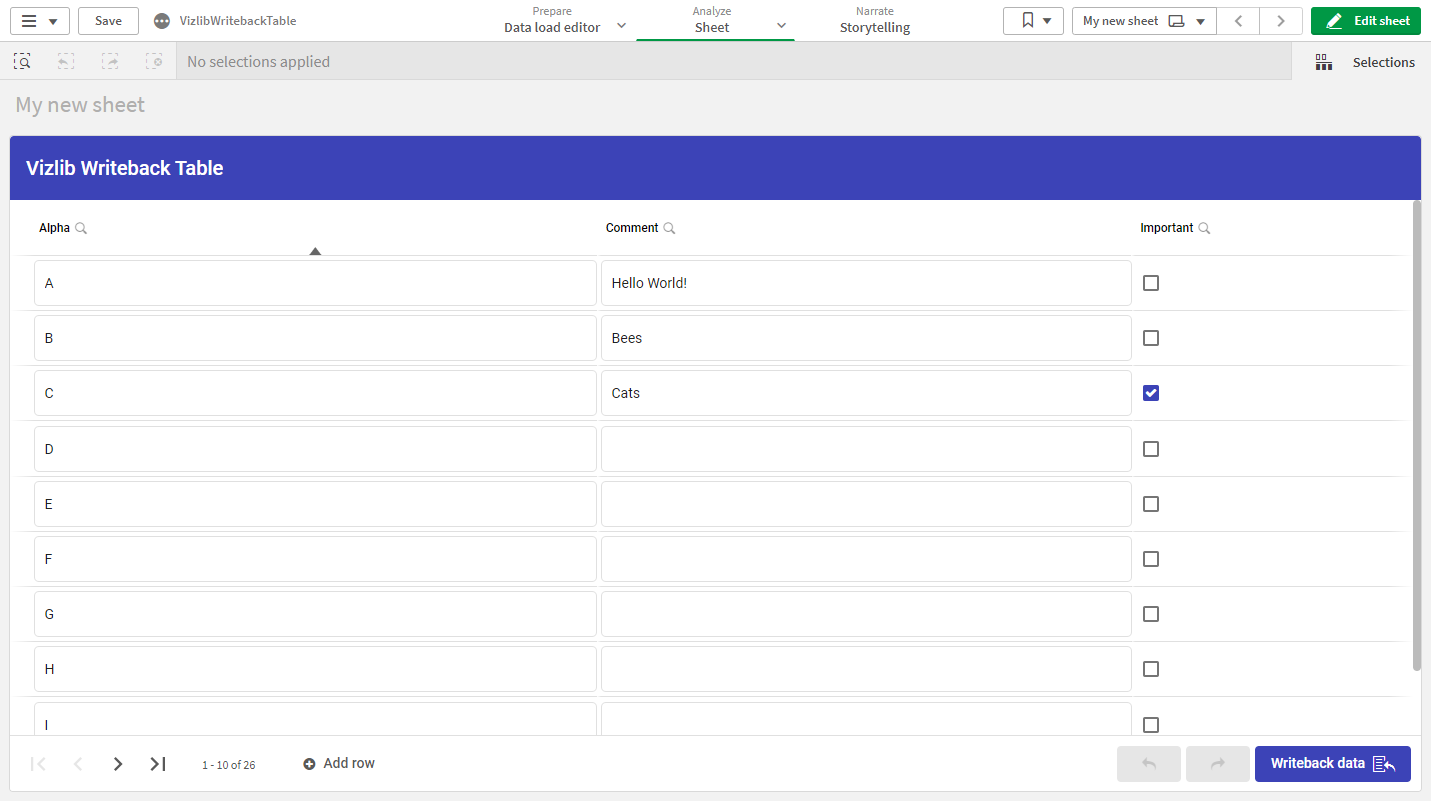
Figure 73: Persisted values
One last check is to verify the QVD. Inspect it and make sure it looks something like Figure 74.
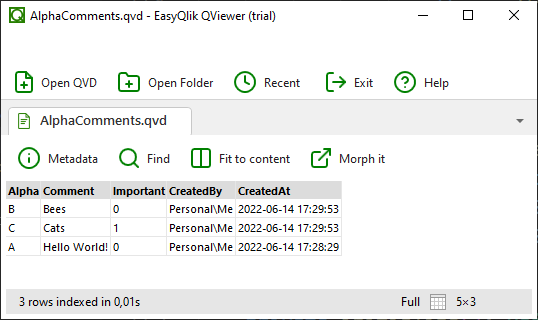
Figure 74: AlphaComments.qvd with latest changes
Congratulations you have now configured your first Vizlib Writeback Table! To learn more of what Vizlib Writeback Table is capable of we recommend reading the documentation and watching this introduction video on Gettings Started with Vizlib Writeback Table and Input Form.