Writeback Set Up
Vizlib Writeback Table has been designed to keep the setup process as straightforward as possible, help you easily configure your writeback settings, leaving you to concentrate on working with your data. With Setup you can define columns, choose your data connection, choose the output for your results and even export the create script.
This topic contains the following sections:
Important: Before you start, you need to create a table.
Selecting a Destination
When setup opens, the Select Destination dialog displays, where you can work with properties related to your data output (Figure 1). There are four properties you can select:
-
Output Type - sets the format for your exported results. Select one of the dropdown options.
-
QVD-CSV-TXT - a file containing data.
Note: Create App permissions are needed for QVD/CSV/TXT export.
-
REST - a REST operation response used with APIs.
-
Database Connection - currently SQL, Snowflake, BigQuery, and Oracle.
Note: Vizlib Server is required to use the Database Connection output type and is part of the Vizlib Collaboration Enterprise subscription. For more information about moving to Enterprise please contact vizlib-sales@insightsoftware.com to learn.
Using API or File Output
Note: If you're working out whether to use an API or a file, it's worth considering how your data will be used.
File output is great for managing smaller data sets that need to be accessed and interpreted quickly (a list of attendees for a conference).
API output is suited to data sets that are updated frequently by multiple users, and the data is potentially shared with other systems (a list of attendees looking to book appointments with conference exhibitors, or pre-registering for conference events).
-
Operation sets the Writeback operation to write data to the Output Type. Select one of the drop-down options:
-
Insert - New values inserted with every writeback.
-
Overwrite - Existing values overwritten with every writeback.
-
Update - New values inserted with every writeback, existing data unchanged.
-
-
Data Connection sets the source for your writeback data. Select one of the dropdown options, or use the search function to find a connection.
Note: Data connections are configured in the Qlik Sense associative indexing engine, find out more about data connections in Qlik Sense here.
-
Enter a File Name for your output, and select a File Type, or click Choose to search for a file extension.
-
Click Next to move to the Define Table Columns dialog.
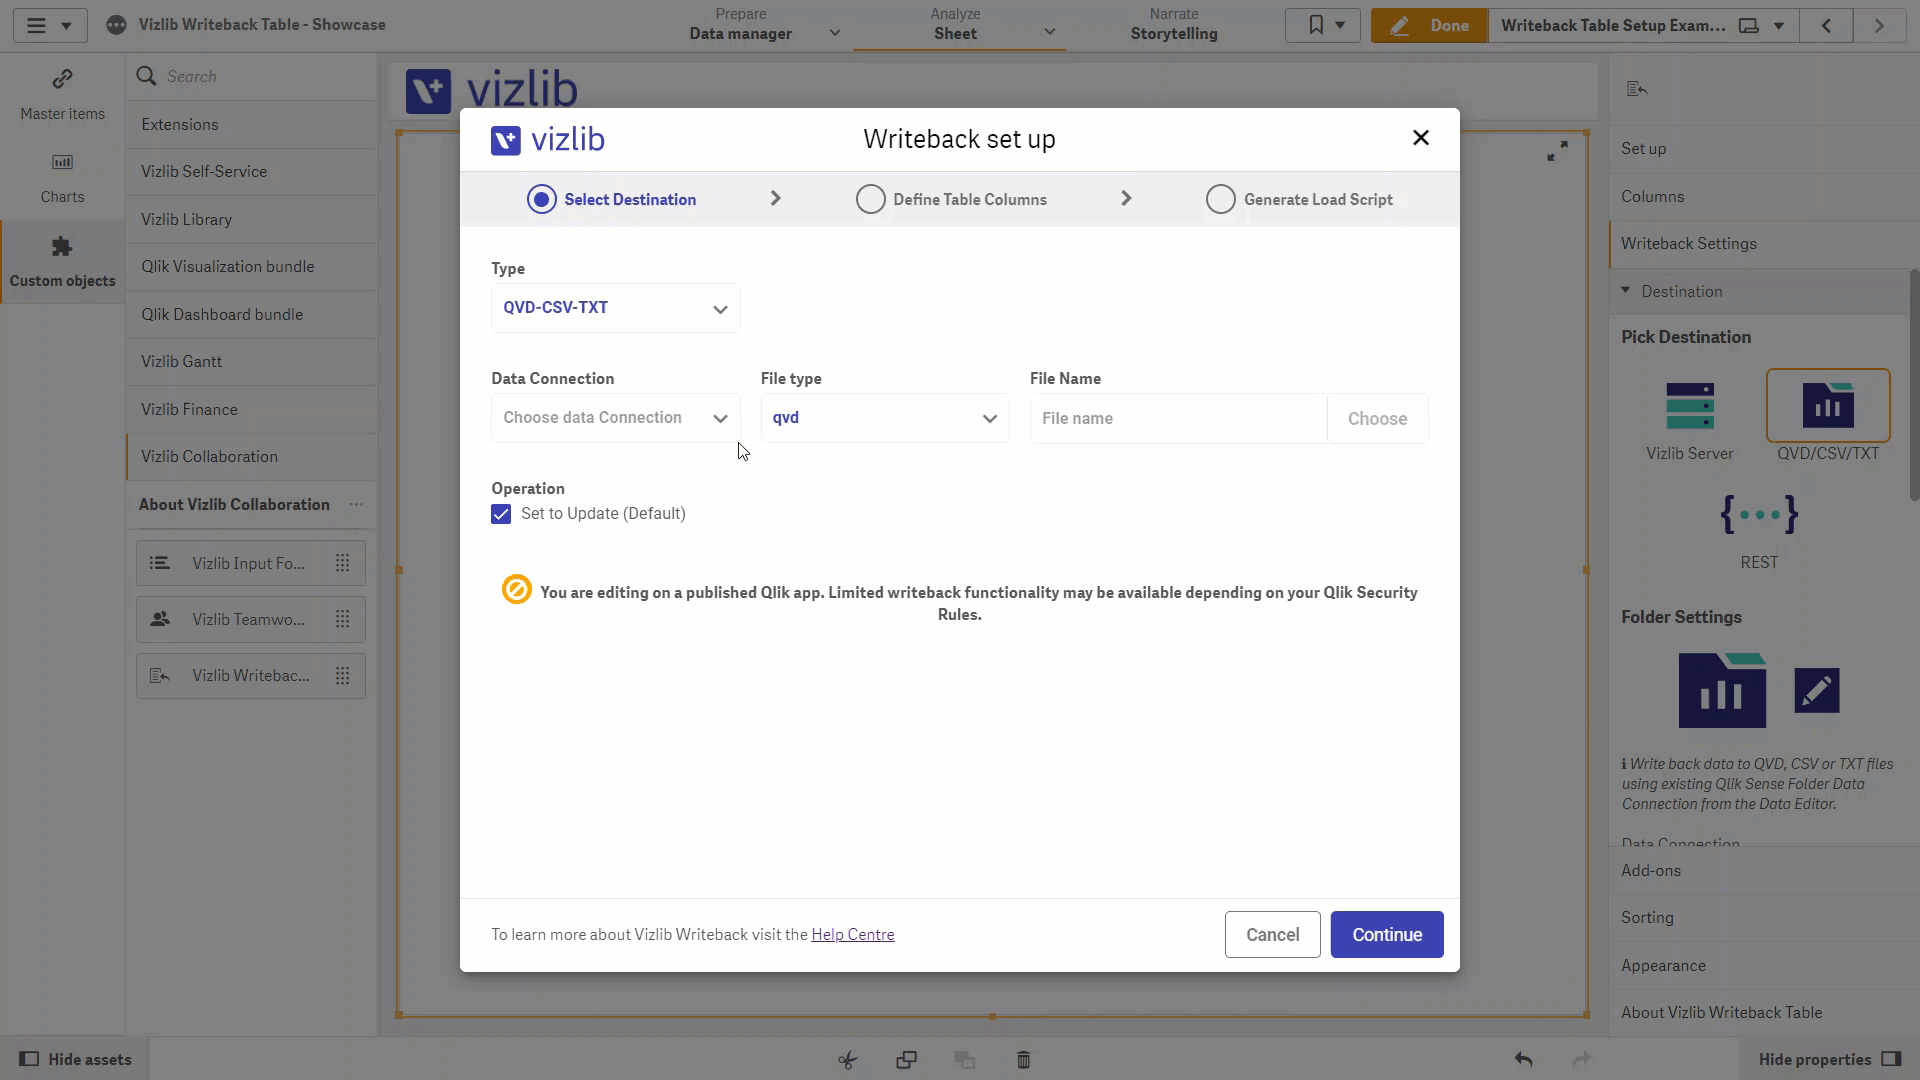
Figure 1: Writeback Wizard - Select Destination
Defining Table Columns
The Define Table Columns dialog (Figure 2) helps you work with the columns in your writeback table, adding them, editing properties, and creating new columns.
The Define Table Columns dialog has a set of panels on the left, which contain values from the data connection you've chosen, and a panel on the right that holds the columns you're adding to your writeback table. The three types of data columns are:
-
Dimensions - are used to organize data into groups, e.g. a list of product types, or countries. They are defined in the data model loaded by the application hosting the writeback table and can be added using Setup or Manual Configuration. You can add select a dimension already linked to a column in the data model, or you can choose to link to one of the Fields in the lower half of the drop-down.
-
Measure - are used for calculating data, e.g. the total sales for a product type sold, or the number of units sold per country. Like dimensions they are also defined in the data model using Qlik Sense aggregations, and can be added using Setup or Manual Configuration. You can select a measure that has an aggregation defined for a particular field, or select a field and add your own aggregation.
-
Column - can be added to display new data which hasn't been held in the data model, e.g. a comments section for each row. When the setup screen opens you'll find any existing values in the Fields section at bottom left. You can add a column using Setup or Manual Configuration, and select from a list of data types or utility types.
To start adding fields:
-
Click the check box next to the data field you'd like to add, you should see the check box turn blue. You can use the search function to filter the list of fields.
-
Use the
 arrow to move the field into the right-hand panel. To remove a column, select the field and click on the
  arrow.
 -
Once the field is added, you can edit several of the field properties.
-
Change the column Type by clicking to open the drop-down.
-
Add an Aggregation by clicking to open the drop-down.
-
-
If you need to add a completely new column, click on the Create Column to open the Type drop-down.
-
If you need to change the column order, drag and drop the column you want to move.
-
Once you've set all your column properties, click Next to go to Generate Load Script.
In the Writeback table setup wizard - options for Type and Aggregation are visible, but the column ‘Editable if’ is not visible by default.
Instead, an ‘Advance Mode’ toggle is displayed. Slide the toggle to the right to view the Editable options.
Care should be taken when applying too many rules to individual rows or columns. Please read more about applying the Editable if feature.
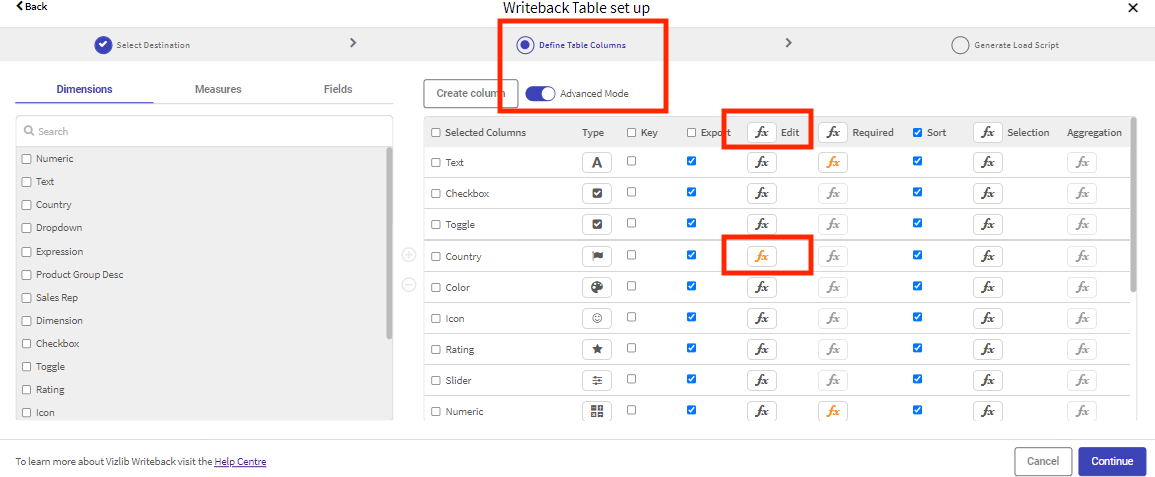
Figure 2: Define Table Columns
Generating the Load Script
Generate Load Script helps you work with the command which loads your column data to the output file (Figure 3). The dialog displays the table name, the load script and has two buttons - Inject to load script and Copy to clipboard.
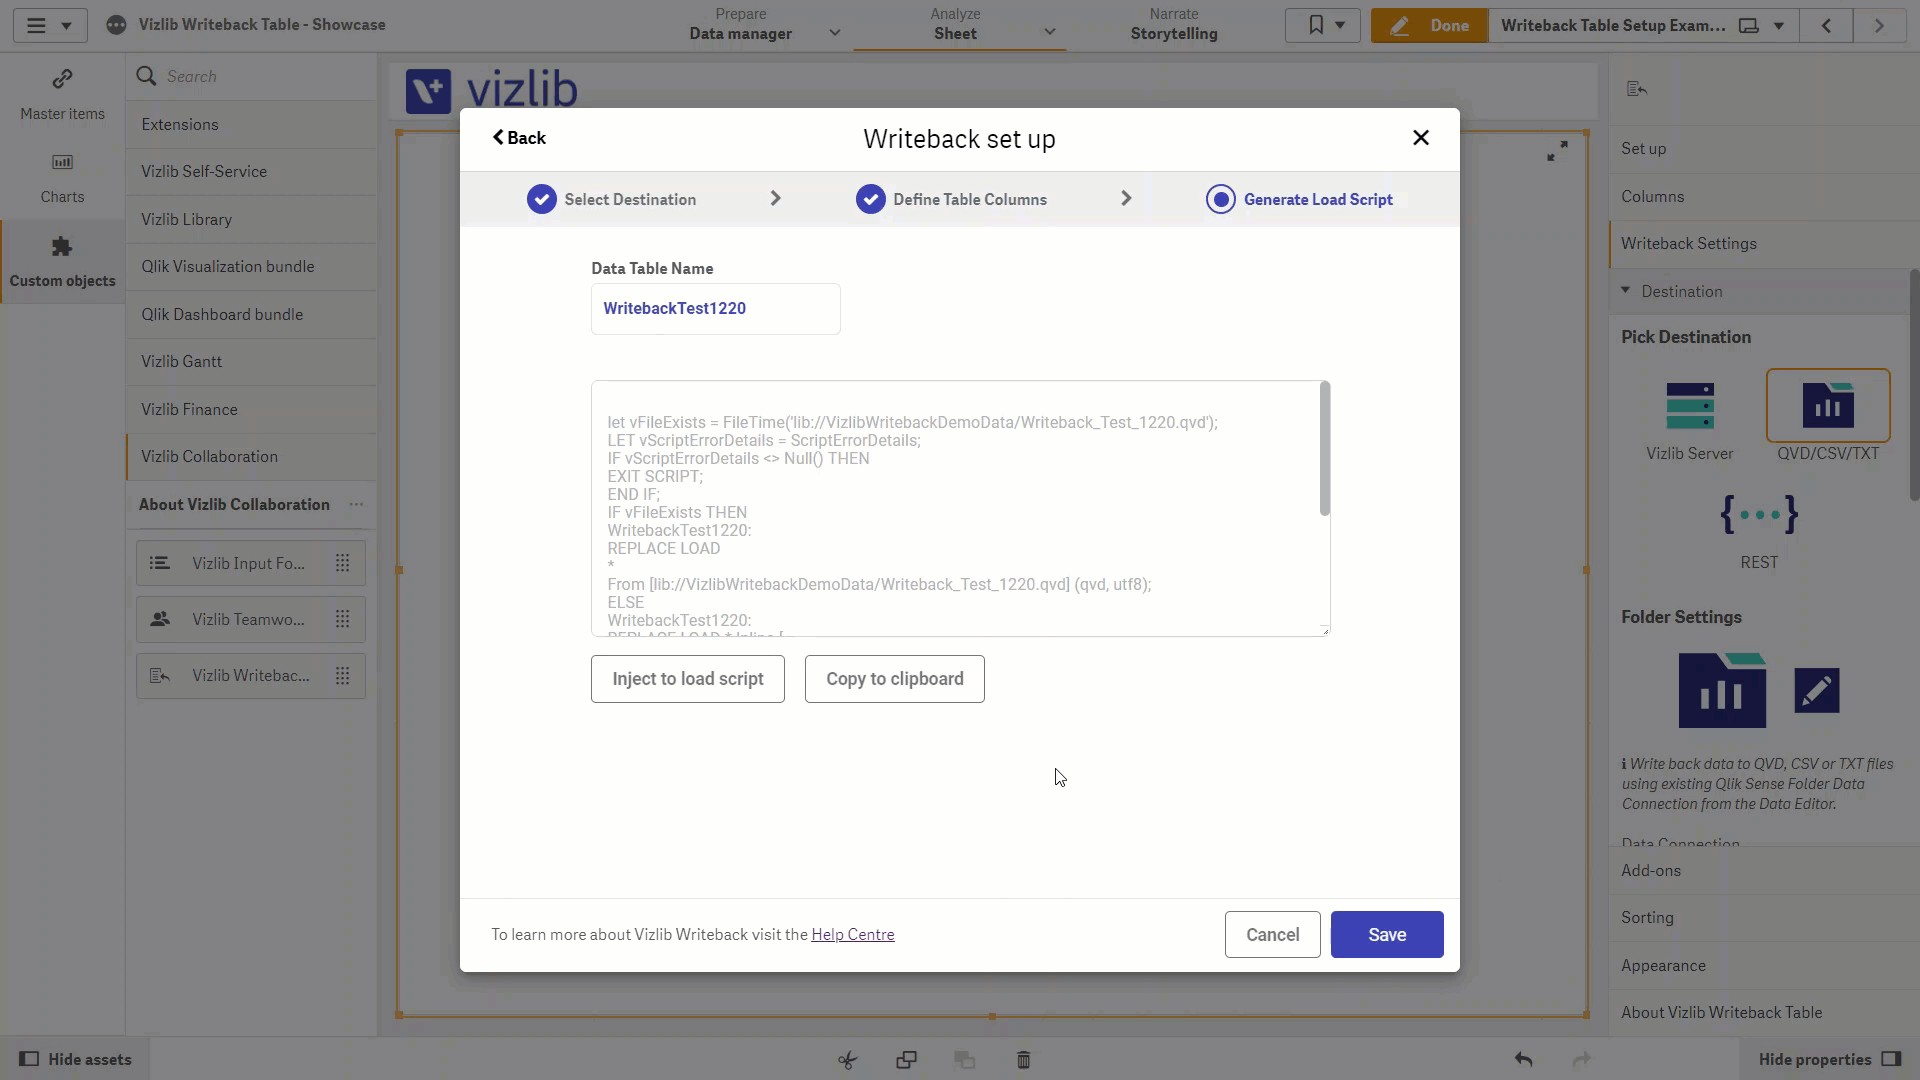
Figure 3: Generate Load Script
-
If you don't need to edit anything, click on Inject to load script. When the process completes, the pop-up (shown below) should appear.

-
If you need to edit the script, click Copy to clipboard to open the data load editor in a new window (Figure 4), where you can make any changes.
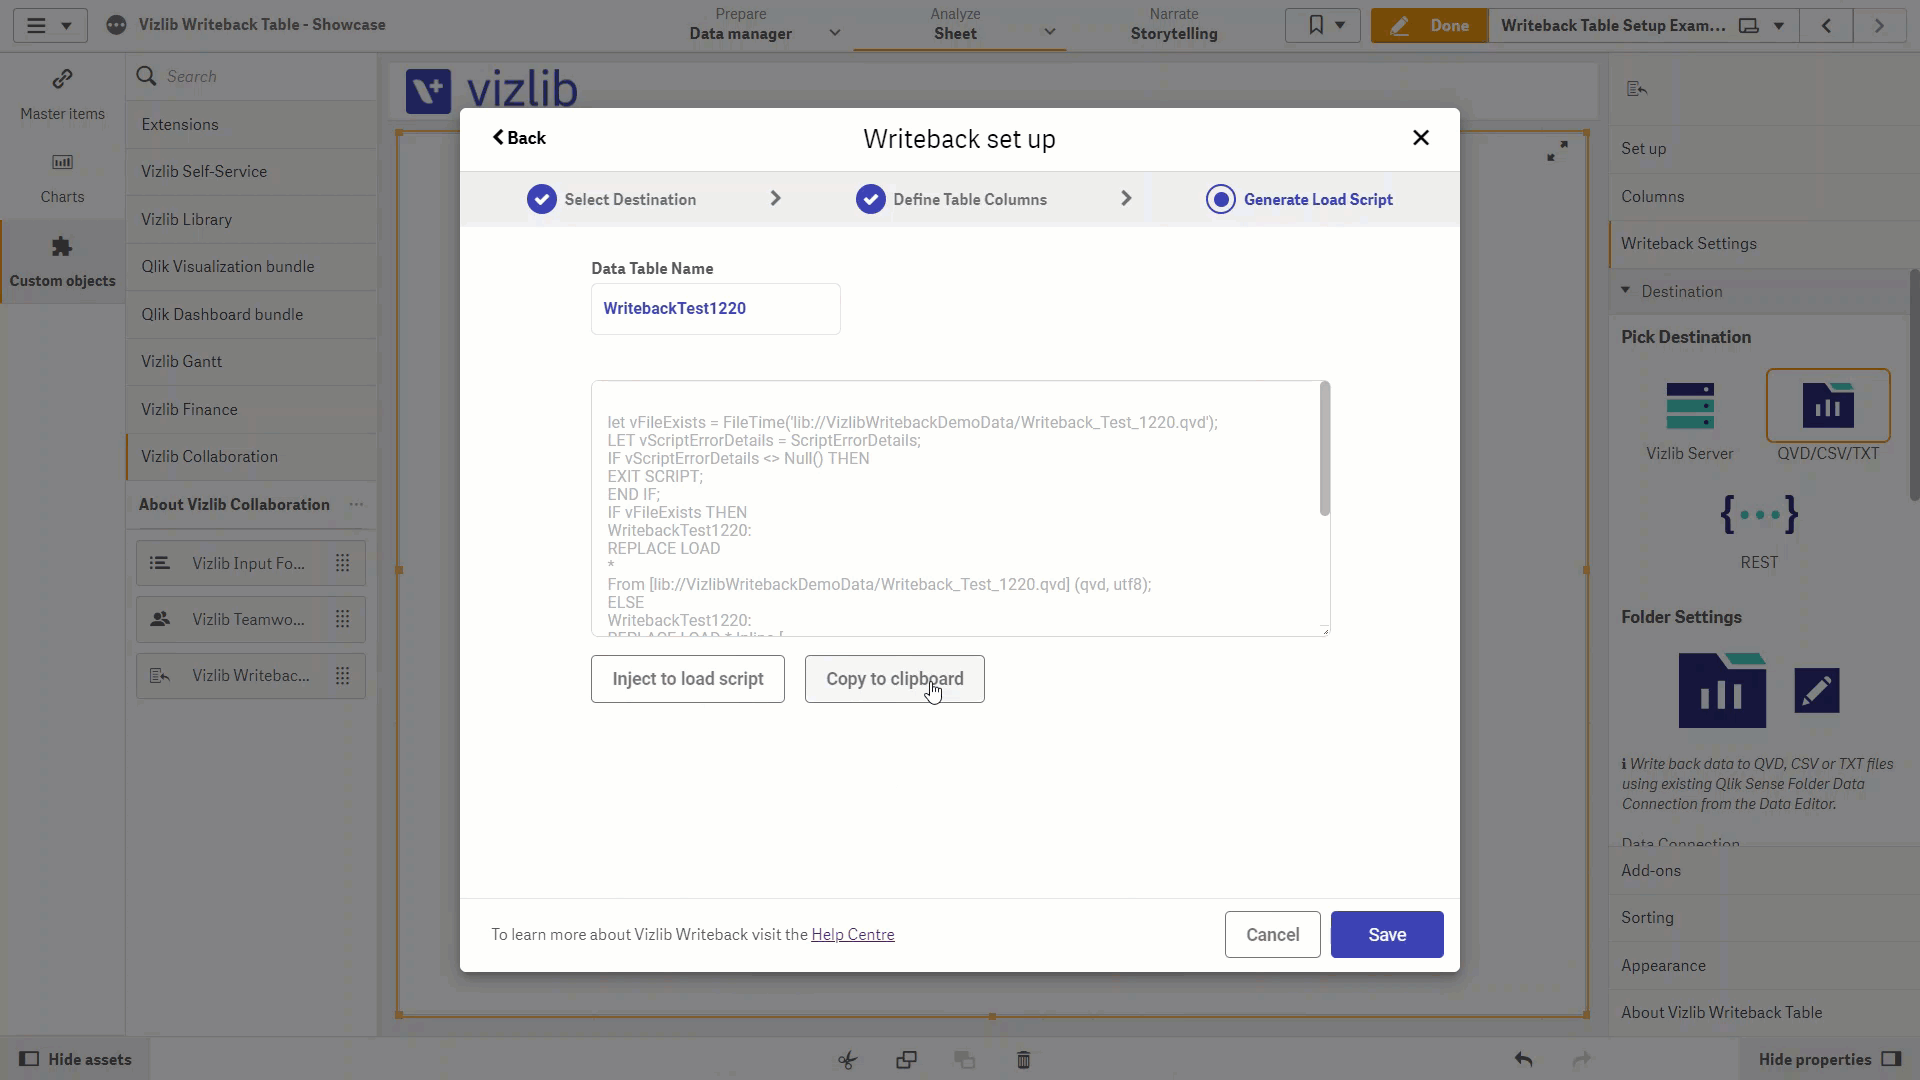
Figure 4: Data Load Editor
Note: If you want to customize the security rules for your non-root admin users, you will find more details here.
Completing the Setup Wizard
Once you've completed setting your Writeback table properties, click on Save in Generate Load Script to complete the wizard and display the table (Figure 5).
You can see the fields have all been added. If you do need to change any data properties you can either click on Open Setup in the property panel or select the field name in the Columns section and edit the properties there.
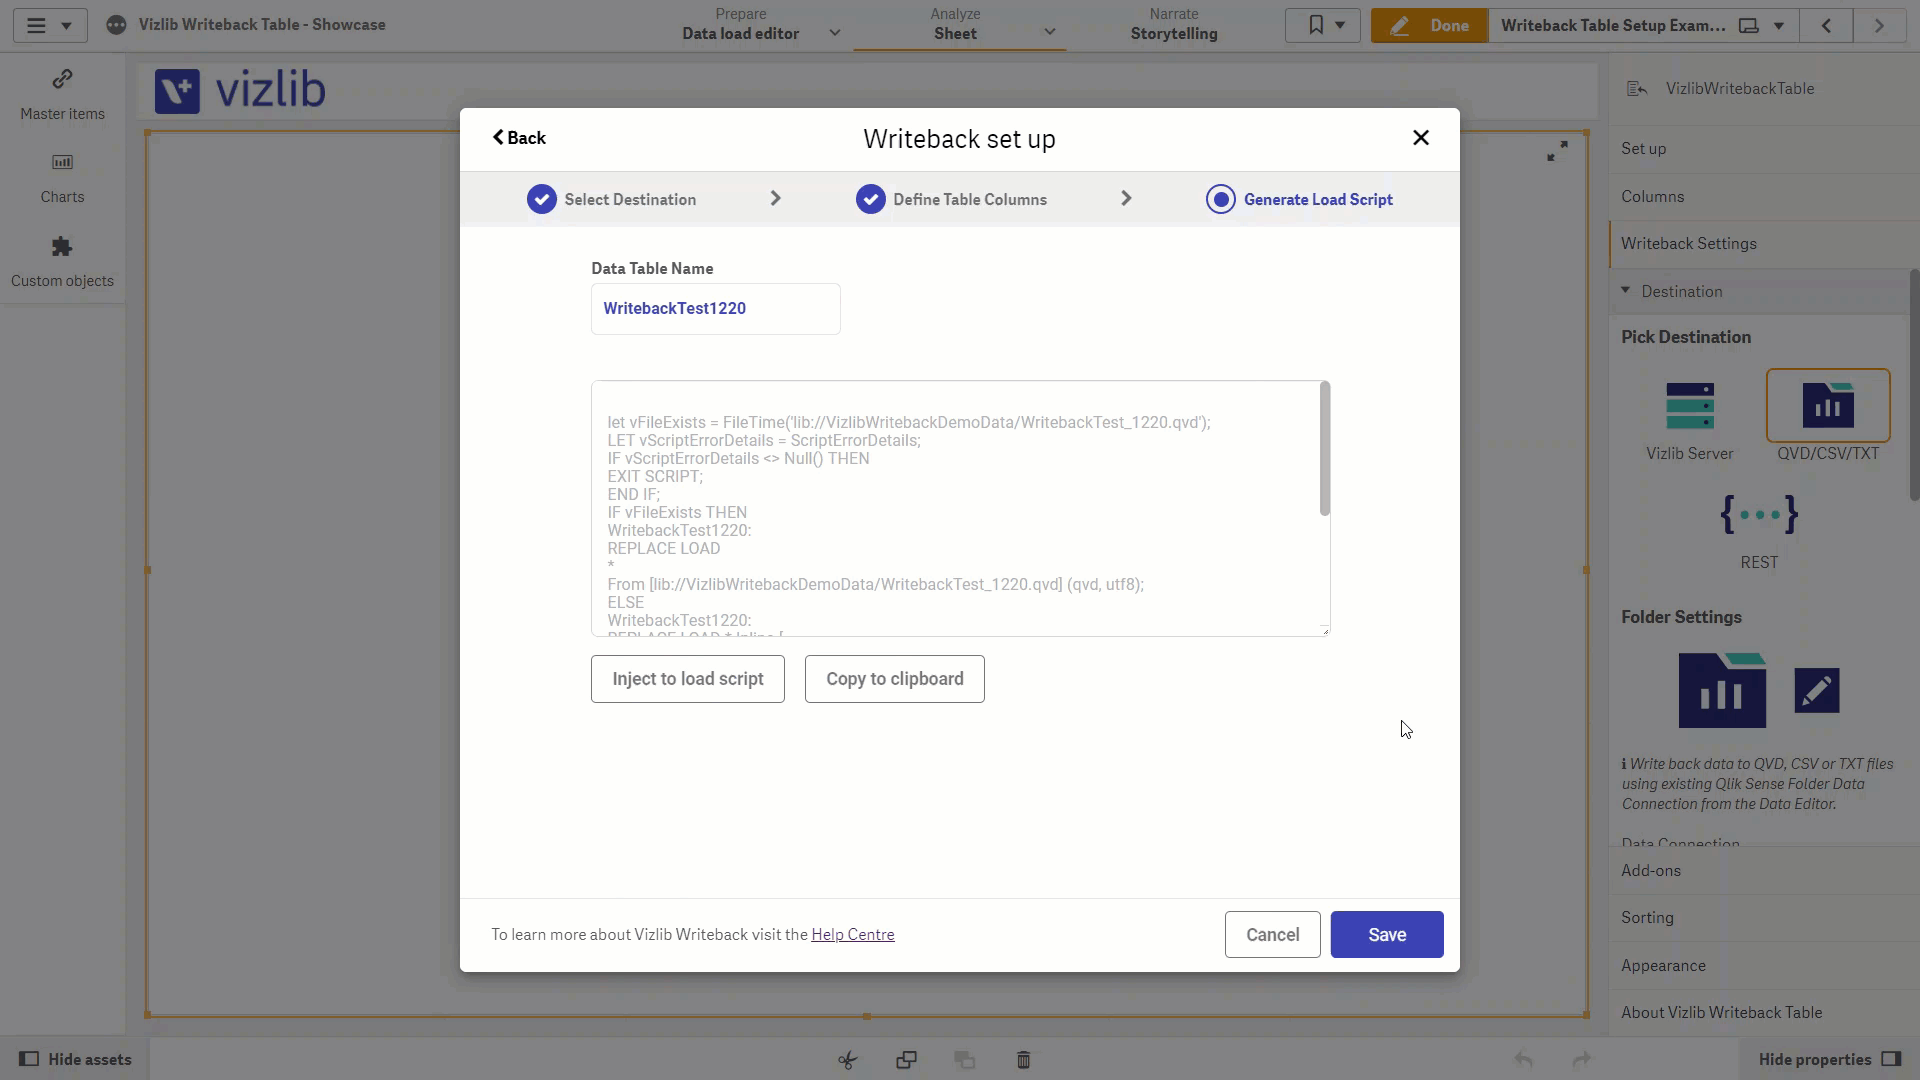
Figure 5: Writeback Wizard Complete