Writeback Table Settings - Data Conflicts Resolution
When you use Vizlib Writeback Table concurrently within multiple scopes, for example with multiple users, there is a chance of entering different values for the same cell. When, for example, you and another user are editing the same cell by entering different values, the software detects a data conflict whenever either of you performs the writeback operation. With the data conflicts resolution feature, you can decide how Writeback Table behaves when such a conflict occurs. The feature applies only to Writeback Table with the Key Columns feature enabled, so that the software properly detects any conflicting changes.
Resolve Data Conflicts
To decide how Writeback Table behaves in the case of a data conflict, go to the Properties Panel > Writeback Settings > Data Conflicts and select one of the following options:
-
Pick & Resolve—whenever you or other users update the data model with a different change for the same cell, the software displays the Data Conflicts window that enables you or other users to decide which changes to keep.
Note: If you and another user are editing the same cell, the software displays the Data Conflicts window for you if the other user performs the writeback operation first. If you perform the writeback operation first, the Data Conflicts window displays for the other user.
-
Always keep user changes—You can select this option if you want the software to always apply your changes without any prior changes check.
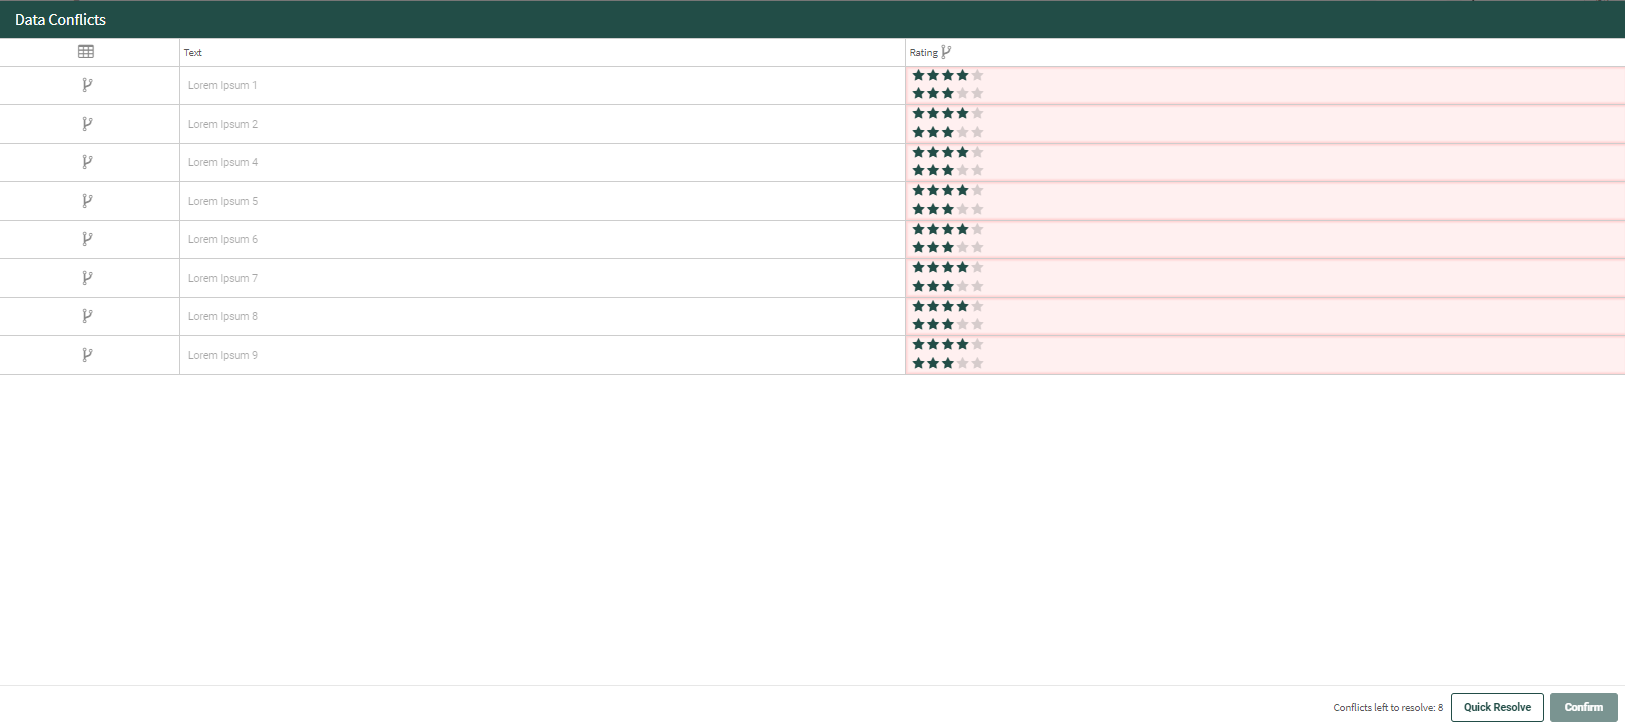
The Data Conflicts window shows how the data in Writeback Table differs between instances. The top value in a cell is the change that you have made. The bottom value shows a change made externally.
Figure 1: Data Conflicts window

As an example, assume that you’re the user editing Writeback Table and the Data Conflicts window is what you can see on your device screen. The image shows that you have edited the rating for all the cells in the Rating column by changing the original value to four stars. Simultaneously, another user entered a three-star rating for these cells and clicked the Writeback data button. As a result, the software displays the Data Conflicts window for you.
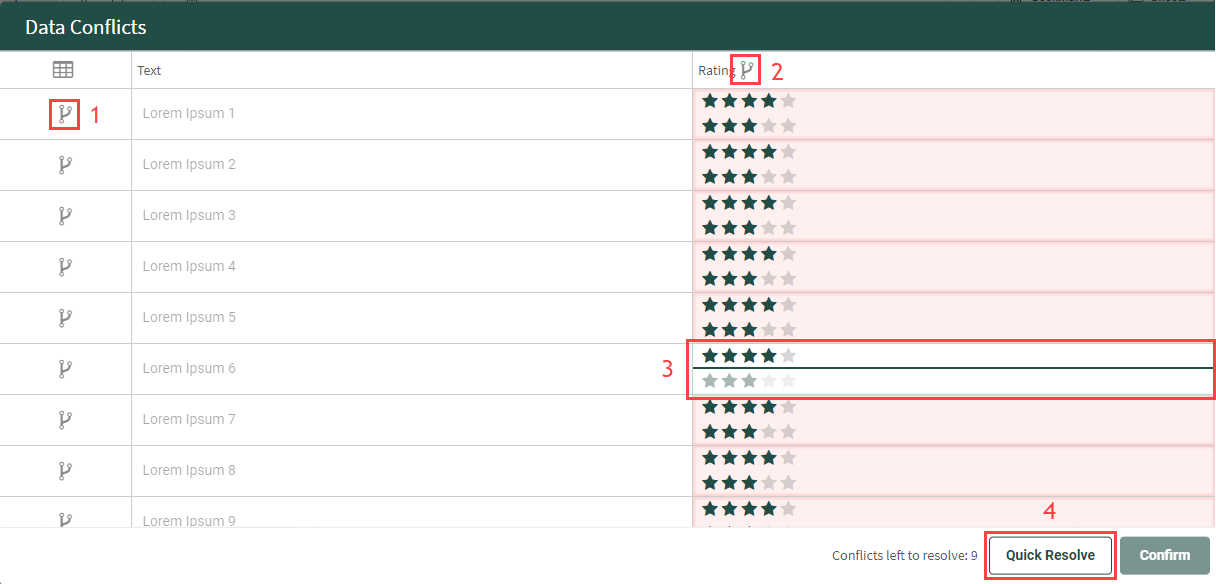
You can resolve a data conflict in the following ways as shown on Data Conflict resolution buttons image:
- By clicking the
 icon for a specific row to resolve all conflicts for the selected row [1].
 - By clicking the
 icon for the column to resolve the conflicts for the entire column [2].
 - By clicking the value you want to keep directly in the cell [3].
- By clicking the Quick Resolve button to resolve all conflicts [4].
Figure 2: Data Conflicts resolution buttons

When you click on the ![]() icon or Quick Resolve button, you can see the following conflict resolution options:
icon or Quick Resolve button, you can see the following conflict resolution options:
-
Keep my changes—the software keeps the latest changes you have made.
-
Take incoming changes—the software keeps the latest changes made in another instance of the Writeback Table (for example in another browser tab or by other users).
After you choose the resolution, you can apply the changes by clicking the Confirm button.
Adjust Data Conflicts Window
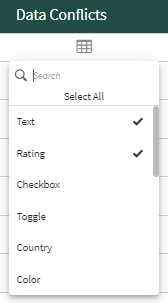
You can decide which columns of the Writeback Table you want to see in the Data Conflicts window. To do this, click the  icon and from the list, select the columns you want to display.
Figure 3: Options to adjust Data Conflicts window
