Properties - Writeback Settings - Destination
Vizlib Writeback Table has a Writeback Settings menu, making changes to your writeback configuration quick and easy to manage.
This topic contains the following sections:
Writeback Settings
Writeback Settings are found in the right hand panel of the Writeback Table Editor (Figure 1), below the Columns menu. In this article we're going to focus on the properties for the Destination section. If you need further information on Audit Columns, Table Settings and Reload, you can find a link to the article here. You can also find more information on Writeback Operations in the article here.
Pick Destination
The first set of configuration settings in the Destination section relates to Pick Destination (Figure 1), where you choose if you'd like your writeback output to be written to a database table (Vizlib Server) data file (QVD/CSV/TXT), or a REST API response (REST).

Figure 1: Pick Destination
Clicking on one of these icons will display a related list of settings.
Folder Settings
Note: Before you start, make sure you have the correct Data Connection, File Type and File Name.
-
Click the QVD/CSV/TXT icon (Figure 2).
-
Scroll down to the Folder Settings options.
-
Select the Data Connection.
-
Click the
 button to select a connection from the drop-down.
 -
Click the
 button to enter the connection name as an expression.
-
-
Select the File type by clicking on the extension name you want.
-
Choose the File name.
-
Click the
button to select a file from the drop-down. -
Click the
button to enter the filename as an expression.
-
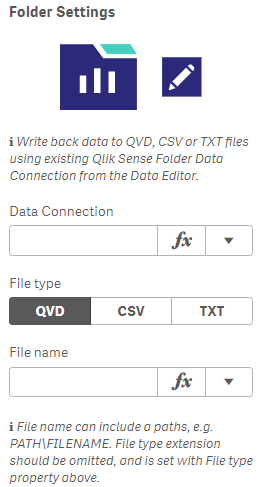
Figure 2: Folder Settings
If you're working with an output file, you can also configure the writeback Operation type (Figure 3). The operations are:
-
Insert - New values inserted with every writeback.
-
Update - New values inserted with every writeback, existing data unchanged.
-
Delete - Existing values deleted with every writeback.
-
Overwrite - Existing values overwritten with every writeback.
You can find out more about operations in our article here.
Select the operation type you need to use. If you choose an Insert operation, you'll also need to define the insert state.
You can also choose to enable Validate Only Edited Rows for an Update operation.
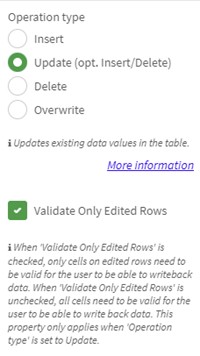
Figure 3: Operation Type
If you enable Validate after touch (Figure 4), which means validation errors are only displayed after a user selection or interaction (e.g. an item in the row is changed, or the Writeback button is clicked), choose whether to Insert All Rows or Edited and New Rows, and select Disable New File Confirmation to stop notifications. Enabling Exclude measures and calculations helps prevent duplicates in an Update operation. You can find out more about preventing duplicates here.
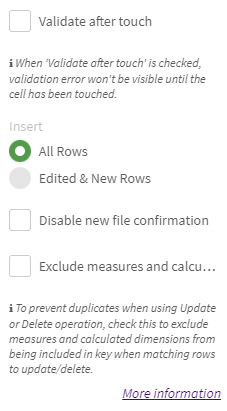
Figure 4: Validate after touch
REST Settings
Note: Before you start, make sure you have the correct endpoint URL, Method, Payload and Authentication settings, and Params (Parameter) and Header details.
-
Click the REST icon (Figure 5) and go to the REST Settings options.
-
Select the endpoint URL for your output by clicking the
 button to enter the URL.
 -
Select the Method by clicking on POST, GET, PUT or PATCH.
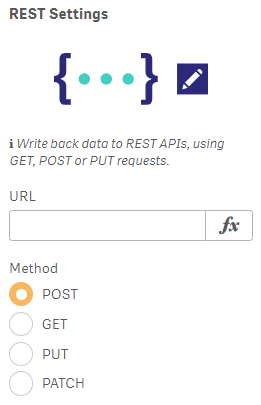
Figure 5: REST Settings
-
Choose the Payload (Figure 6) by clicking on JSON, Form or as Params.
-
Enable Validate after touch, which means validation errors are only displayed after a user selection or interaction (e.g. an item in the row is changed, or the Writeback button is clicked).
-
Choose to send the payload as an Array or a Record/Request.
-
Choose the Pagination options. Selecting Custom will let you specify the number of records in each request.
-
Choose an Authentication method from the drop-down (None, Basic, Token).
Note: If you choose GET, you don't need to select a payload or specify how it is sent. The data will be sent as query parameters in the request. If you send multiple rows of data within a writeback operation, for GET, a separate request will be sent for each modified row.
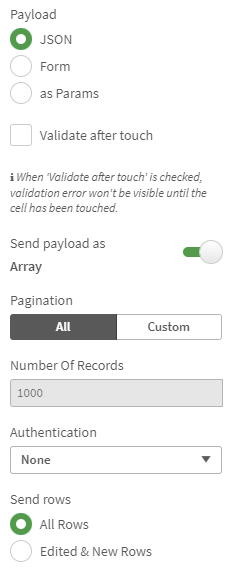
Figure 6: Payload and Authentication
-
Click on Add Param (Figure 7) to add any additional parameters, entering values or using the expression editor.
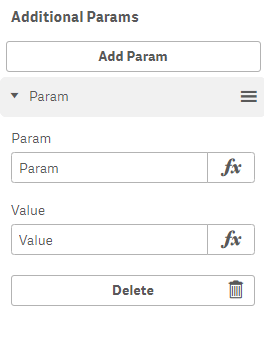
Figure 7: Add Parameters
-
Click on Add Header (Figure 8) to add a header, entering values or using the expression editor.
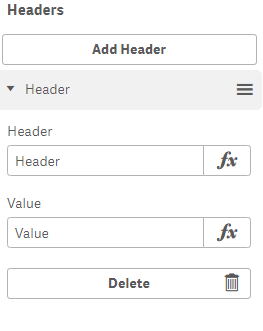
Figure 8: Add Header
Server Settings
Note: Before you start, make sure you have the correct Destination name and Destination Path (Database type and Table name). You can currently use Server Settings to connect to SQL, BigQuery and Oracle Integrations.
-
Select a Writeback Destination from the drop-down (Figure 9) to confirm where data should be saved.
-
Destination paths can be broken down into parts with a structure Destination|Database Type|Table Name
Example SQL path - writeback|SQL|newtable
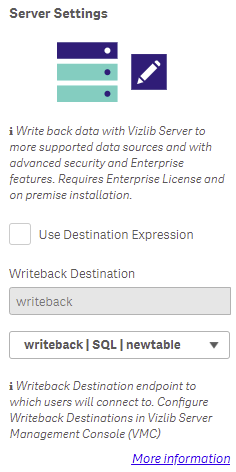
Figure 9: Server Settings
You can also select the Use Destination Expression check box and use a Qlik Sense expression to connect to your destination (Figure 10).
Note: If you've configured a whitelist for filenames in the VMC, you'll need to use a filename which meets the whitelist requirements, or you'll return an error. You can find out more about setting up whitelists here.
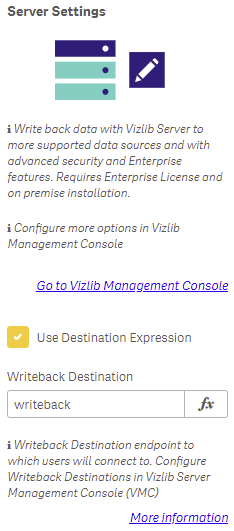
Figure 10: Use Destination Expression
Note: The Override Server URL settings do not need to be enabled if the extension URL is defined correctly in the VMC under on the Server Settings page of System Settings. You should be able to install and configure Vizlib Writeback table using those settings.
-
Enable Validate after touch (Figure 11), which means validation errors are only displayed after a user selection or interaction (e.g. an item in the row is changed, or the Writeback button is clicked).
-
Enable the Override Server URL setting if you need to specify where Vizlib Server is installed.
-
Enter the server URL and Port.
-
Check Use server hostname if your server is hosted locally.
-
Enable Exclude measures and calculations to help prevent duplicates in an Update operation. You can find out more about preventing duplicates here.
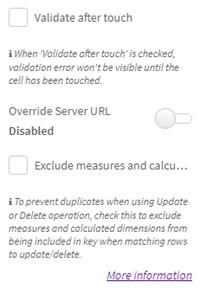
Figure 11: Server Override