Setup Wizard
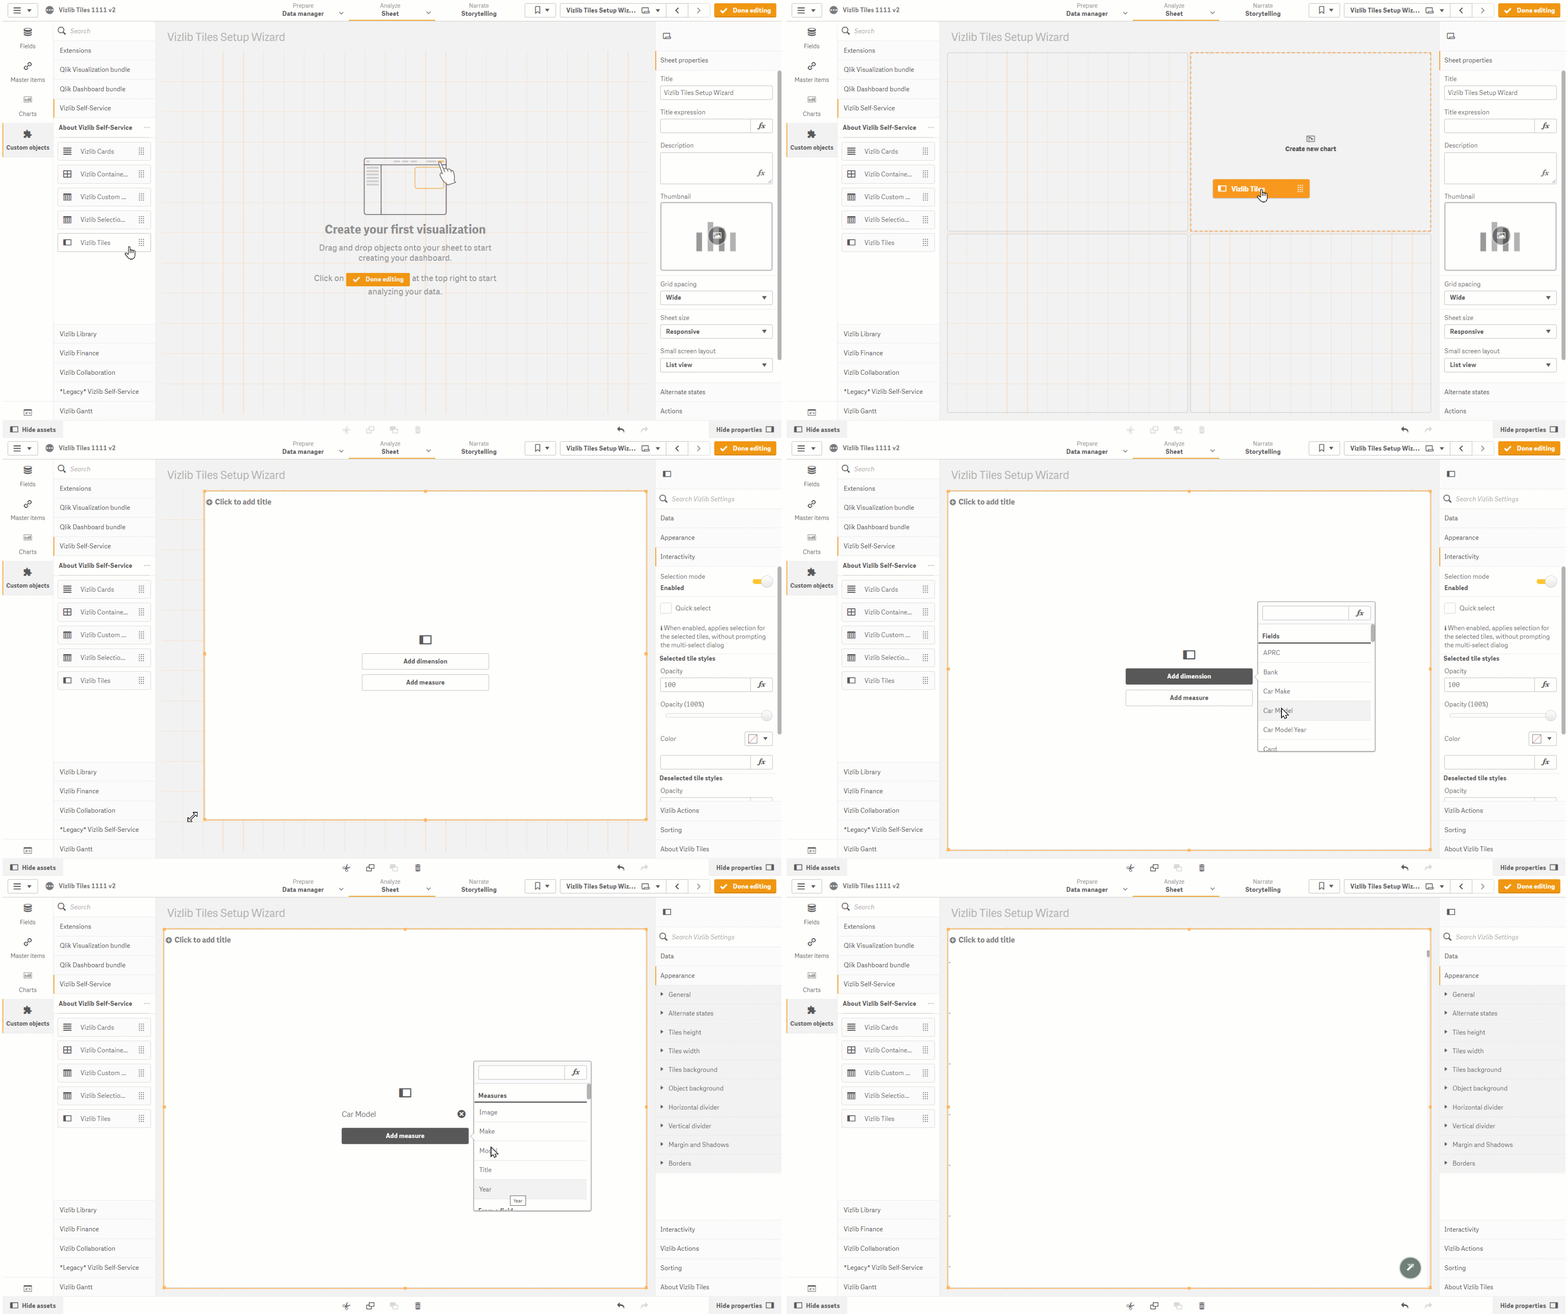
Vizlib Tiles has a Setup Wizard to help you create a visualization quickly and easily (Figure 1). It's activated when you add a Vizlib Tiles object from the Custom Objects menu to a sheet.

Figure 1: Setup Example
If you want to use the Setup Wizard, follow these instructions:
-
Click on Custom Objects in the far-left panel, to open the custom objects menu.
-
Select Vizlib Self-Service.
-
Click and hold the cursor on Vizlib Tiles.
-
Drag and drop the cursor into the sheet.
-
Drag the table edge (highlighted in orange) to change the table size.
-
Click Add Title to enter a title for your visualization.
-
Click Add Dimension and select the dimension you want from the list.
-
Click Add Measure and select the measure you want from the list.
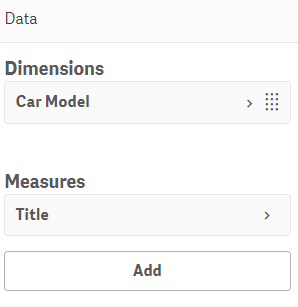
If you need to add more measures, you can use the Add button in the Data section in the property panel (Figure 2). The first measure listed in the property panel will make up the bottom layer, with the last measure listed will make up the top layer.

Figure 2: Data
If you'd like to know more about working with Dimensions and Measures in Vizlib Tiles, please see our article here.